Skylake新平台尝鲜-ASRock Z170 Extreme 6搭配Intel Core i7-6700K实测

前言:
相信许多玩家等到Skylake平台报到已经等很久了,在NDA解禁前也有许多心脏较强的玩家已经将效能表现与相关资讯做了不少披露,玩家们对Skylake也有相当程度的期待与了解,这次介绍使用了ASRock Z170 Extreme 6、Intel Core i7-6700K(4C8T、基础时脉4GHz、TurboBoost 时脉 4.2GHz、TDP 95W)与Panram DDR4-2400 8GB(4GB*2),这次ASRock Z170 Extreme 6用料相当不错与扎实,CPU供电部分采用12相供电并搭配了超大电流的60A白金电感与大面积的散热模组,外接传输介面采用了目前相当夯且传输速率相当高的USB3.1 Type-A与Type-C,音效部分同样采用天籁美声技术并进步到三代,在音效品质上提供更佳的输出品质,记忆体部分支援DDR4,并可超频至DDR4 3500以上,另外还导入了目前也是相当夯的M.2介面,不过这次是Ultra M.2提供了高达32Gb/s的频宽,Ultra M.2提供PCIe Gen3 x4与SATA Gen 3讯号,并可以搭配ASRock的U.2 Kit即可支援U.2 SSD与Intel 750系列产品;另外ASRock Z170 Extreme 6采用华擎超合金用料,提供相当不错的稳定度与耐用度,说了这么多还是赶紧来看看这次解禁的新产品拉
 包装与配件
包装与配件▼彩盒这次较为简约,强调采用超合金用料,并印有产品型号
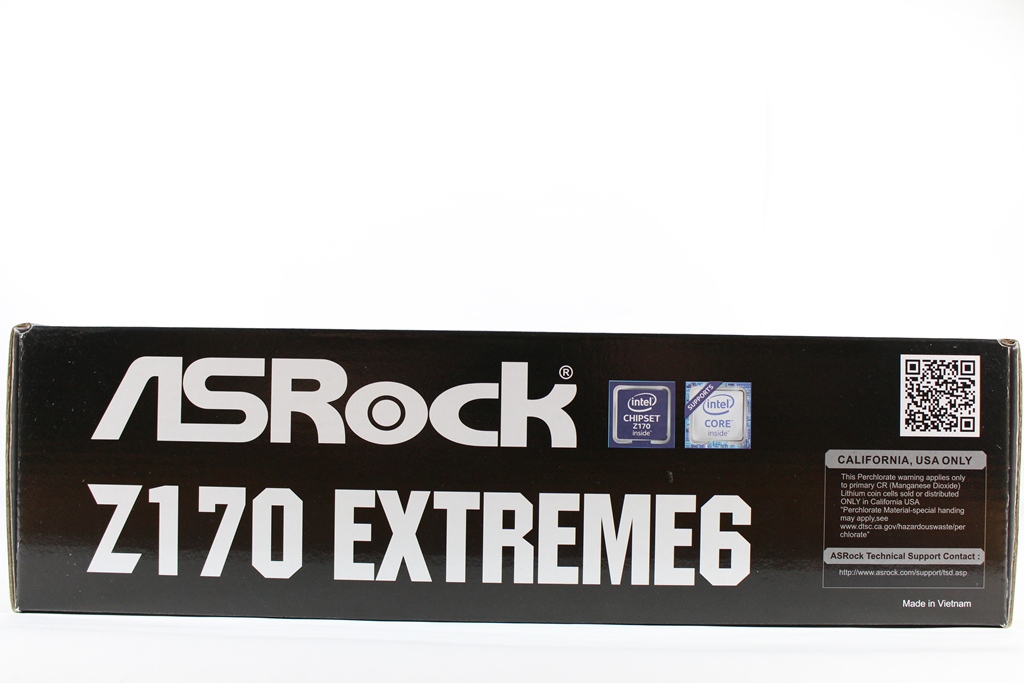
▼HDMI认证Logo、dts认证Logo、支援Windows 10、支援AMD CrossFire与NVIDIA SLI、采用Intel Z170晶片组与支援Intel Core系列处理器
▼采用华擎超合金用料

▼产品型号:Z170 Extreme 6
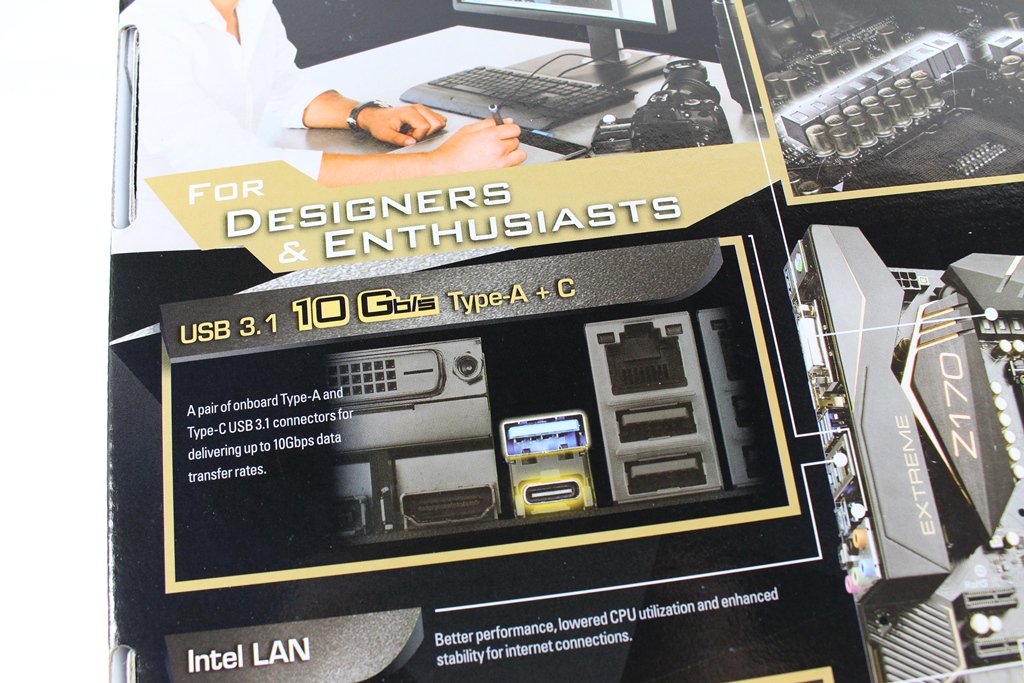
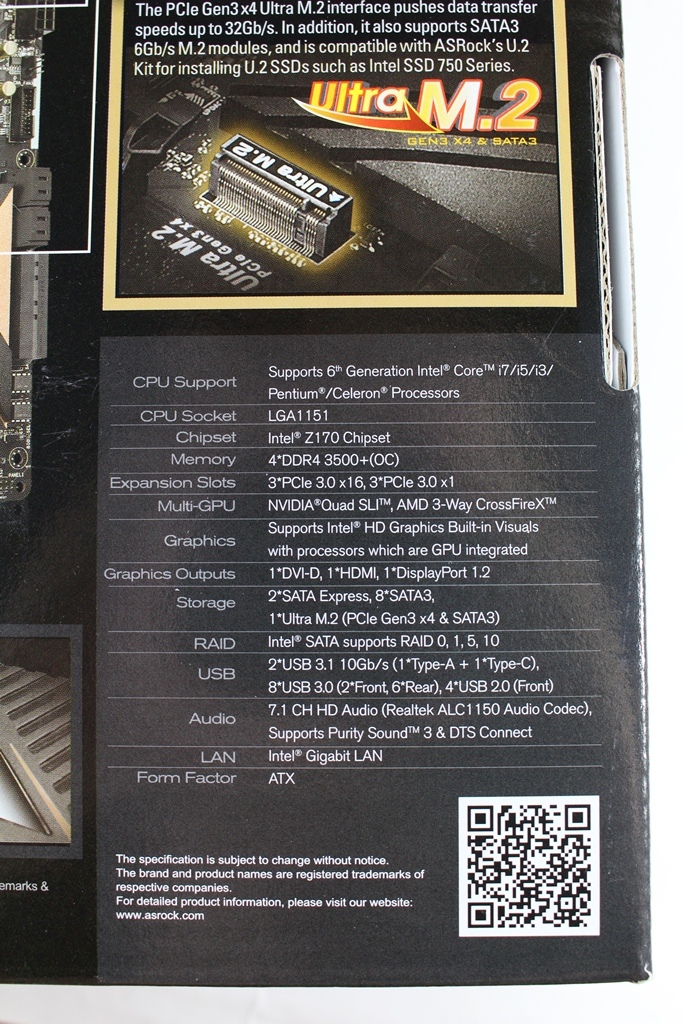
▼包装背面标示产品特色与规格
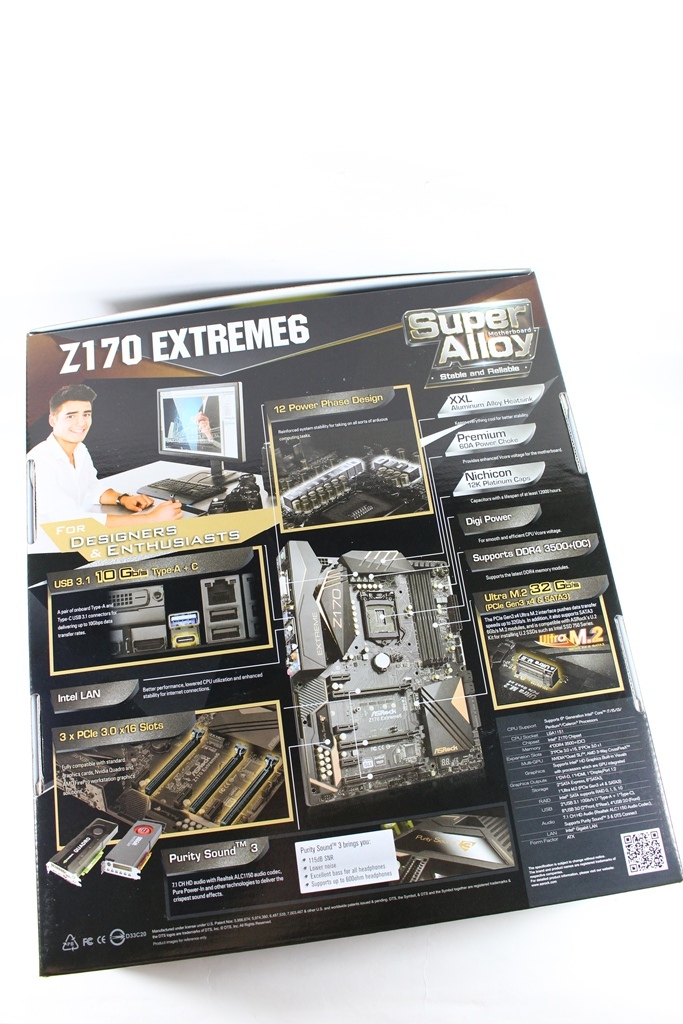
▼USB3.1 10Gb/s Type-A + Type-C
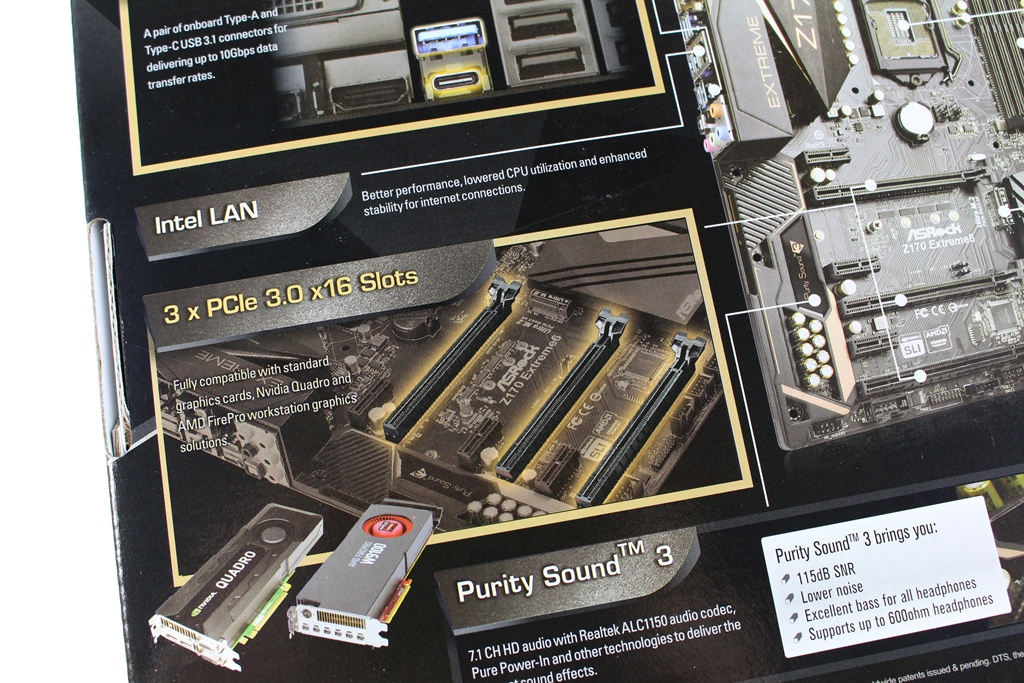
▼采用Intel网路卡,并支援AMD CrossFire与NVIDIA SLI(3组PCIe 3.0 x16)
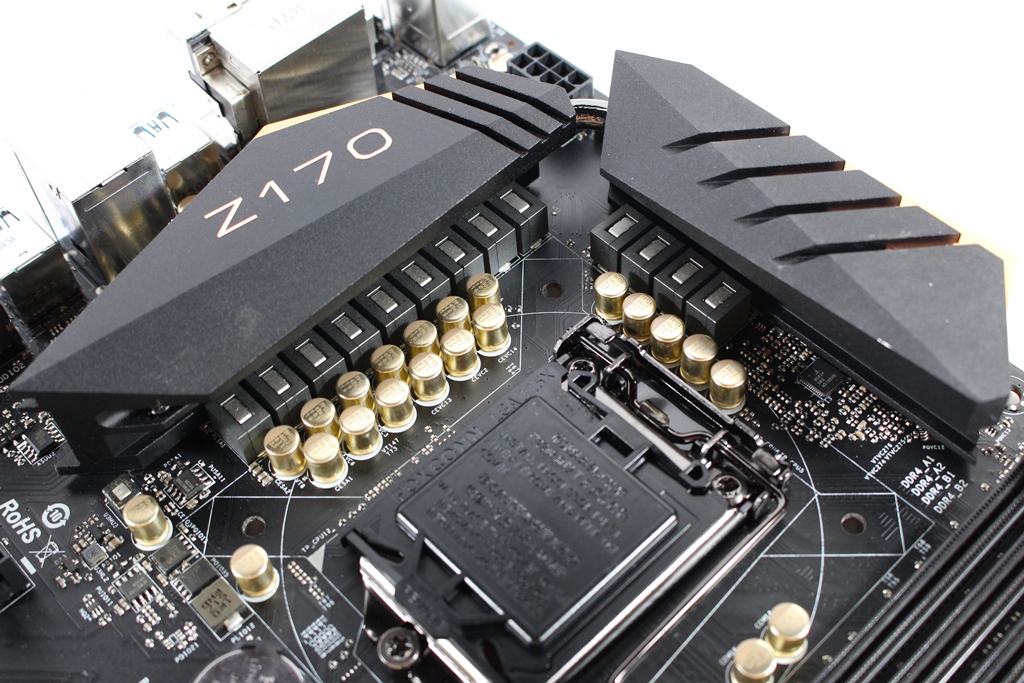
▼CPU供电部分采用12相供电

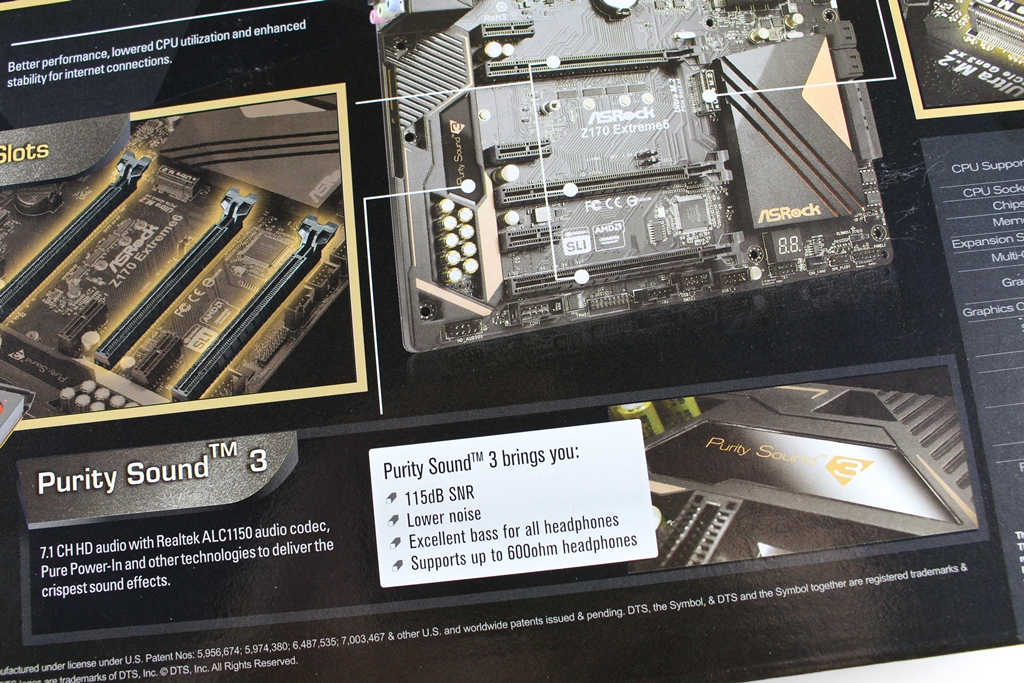
▼音效采用天籁美声三代
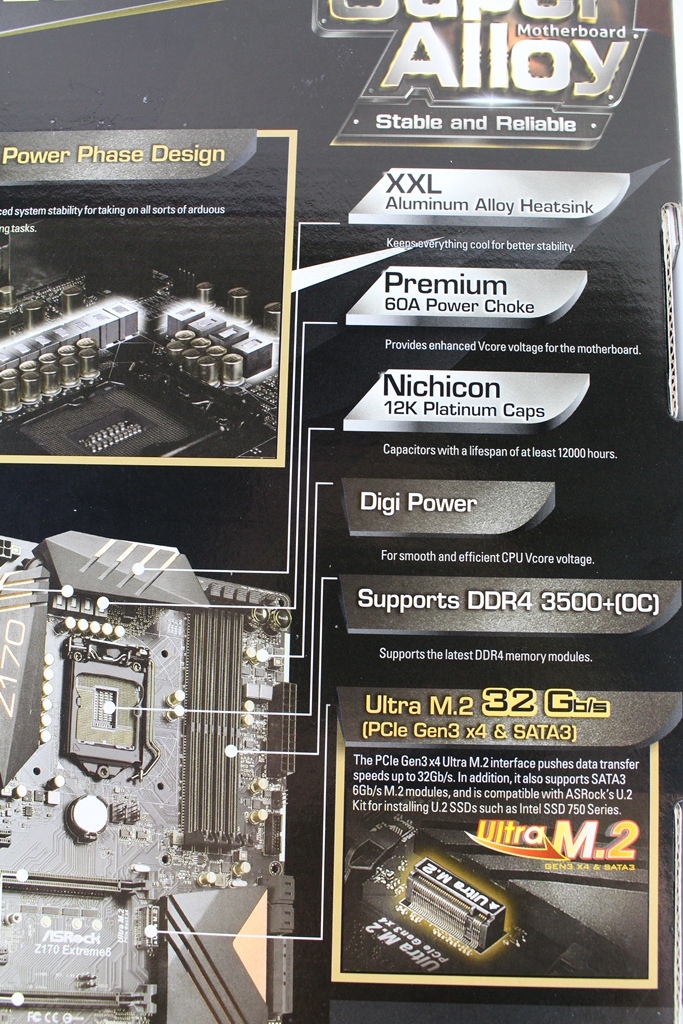
▼采用大面积散热片、60A白金电感、12K顶级白金电容,并支援记忆体超频至DDR4 3500,这次还导入Ultra M.2超高速32Gb/s传输介面
▼Z170 Extreme 6产品规格
▼包装两侧为产品型号与强调超合金用料

▼包装上方还有提把,方便使用者携带
▼配件:主机板说明书、ASRock贴纸、驱动光碟、SATA 6Gb/s传输线*4、SLI桥接器、I/O挡板与M.2固定螺丝

 用料与规格介绍
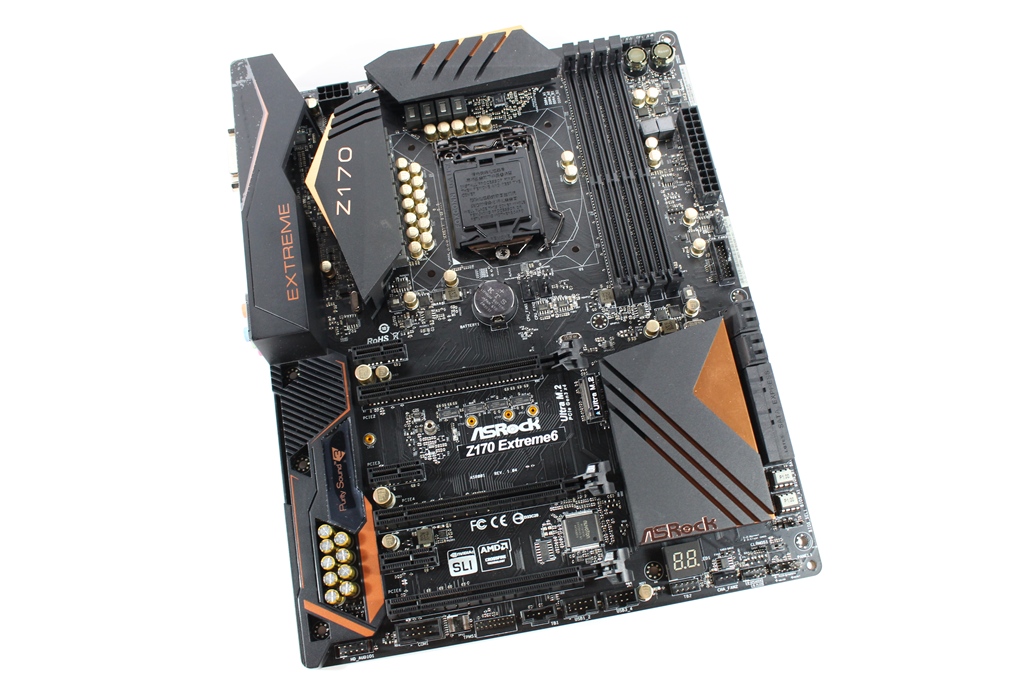
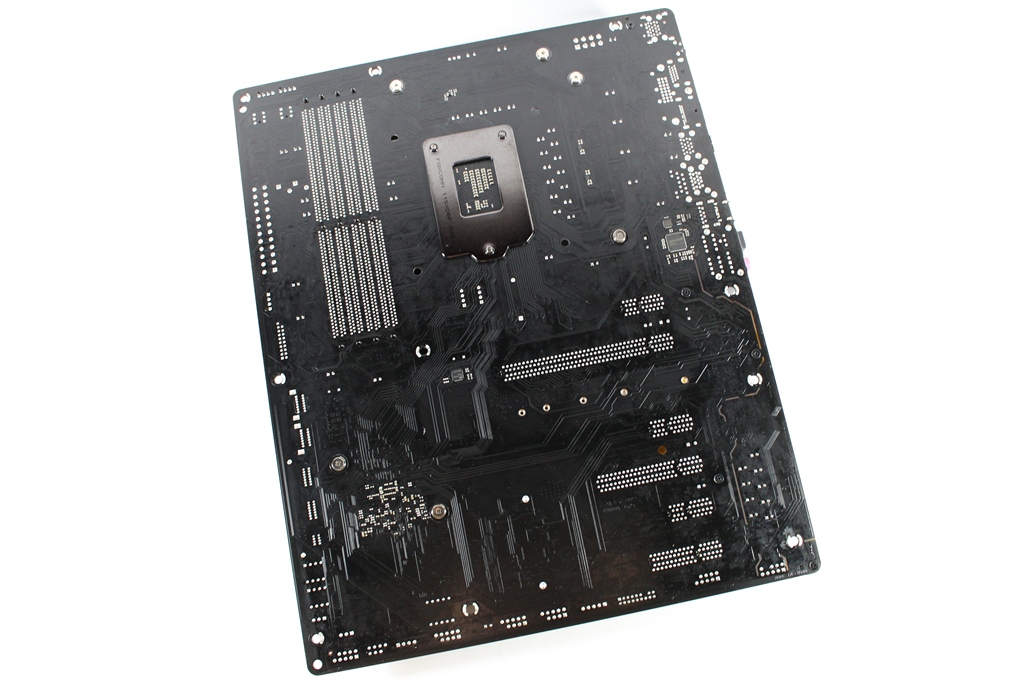
▼主机板正反面一览,采用黑色PCB与橘色做搭配,相当具有杀气感!!
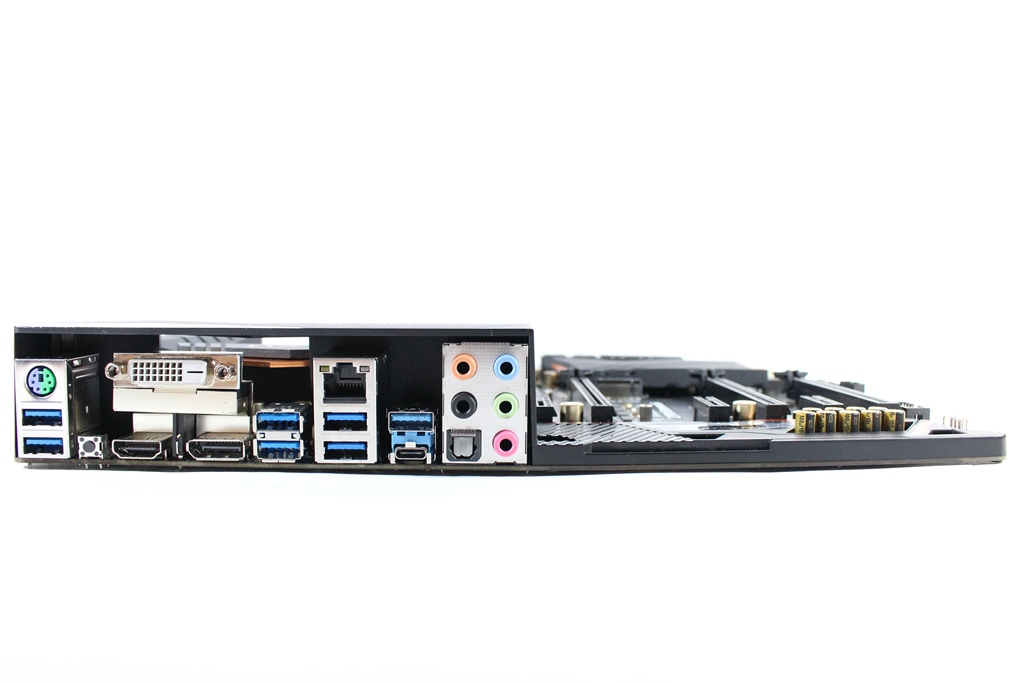
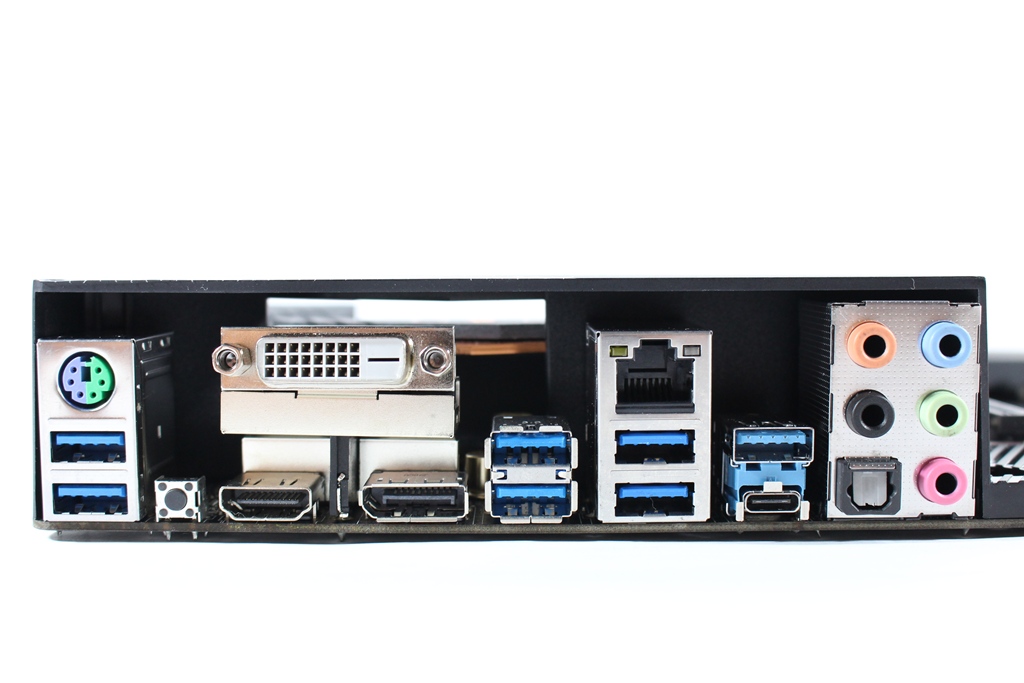
▼I/O部分:PS/2、USB 3.0 *6、Clear CMOS、DVI、HDMI、DP、RJ-45、7.1声道音讯输出、USB3.1 Type-A、USB3.1 Type-C
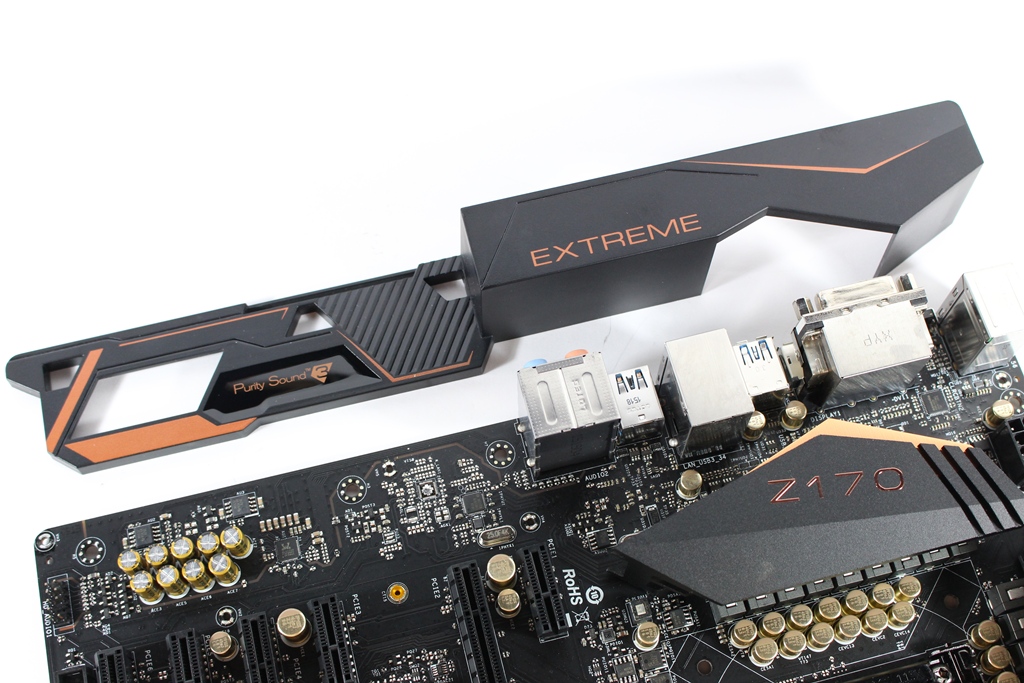
▼I/O上方有一块橘黑配色的饰板,增加了不少质感

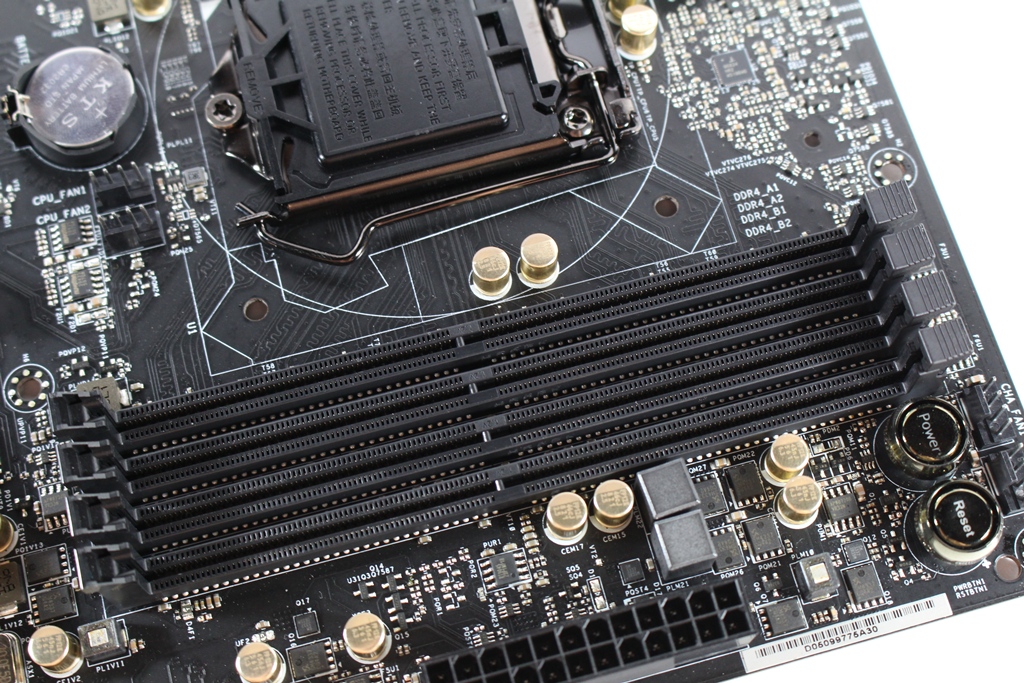
▼CPU脚座,支援LGA1151处理器

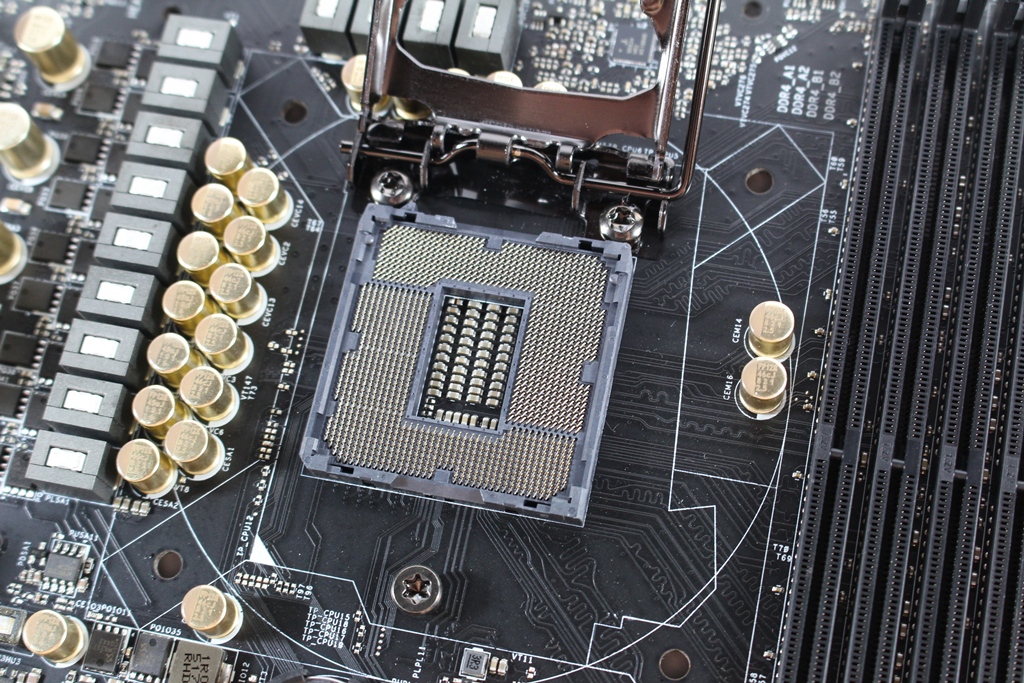
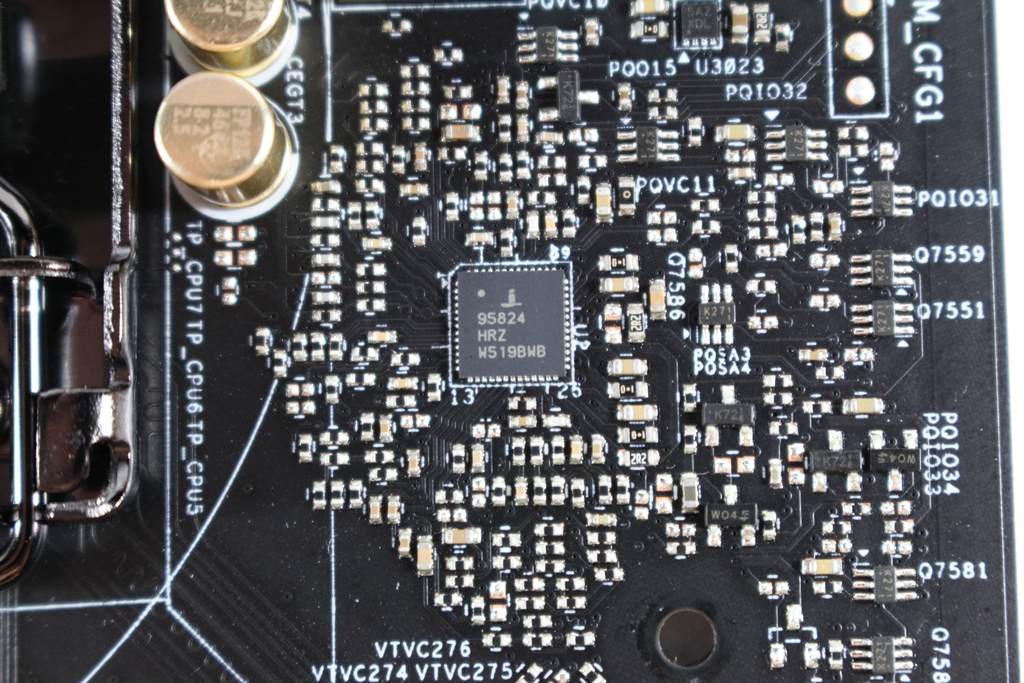
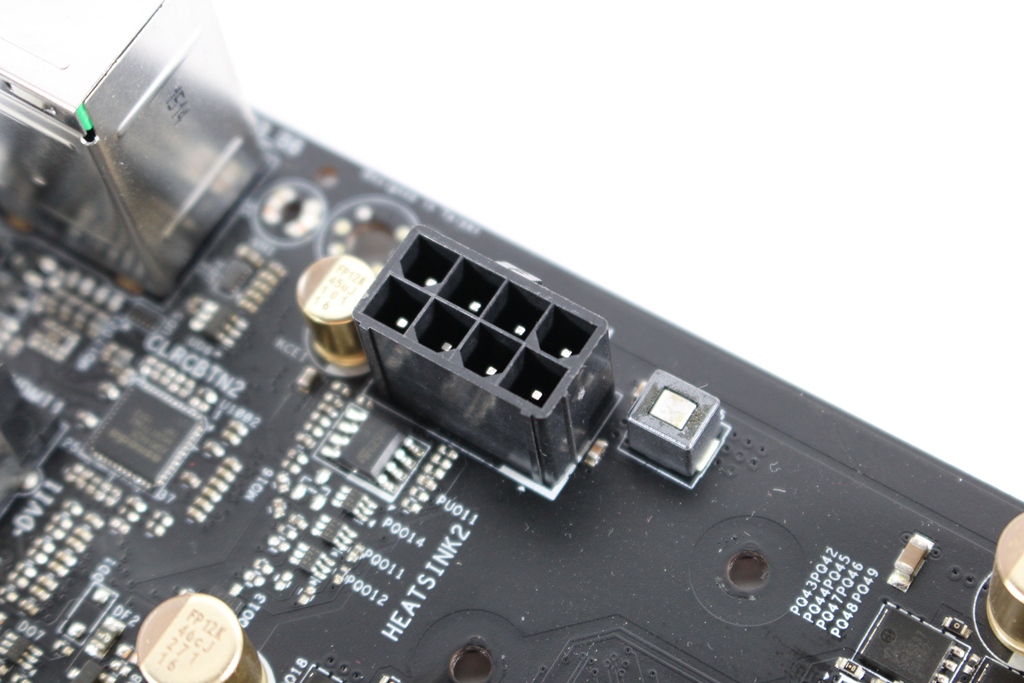
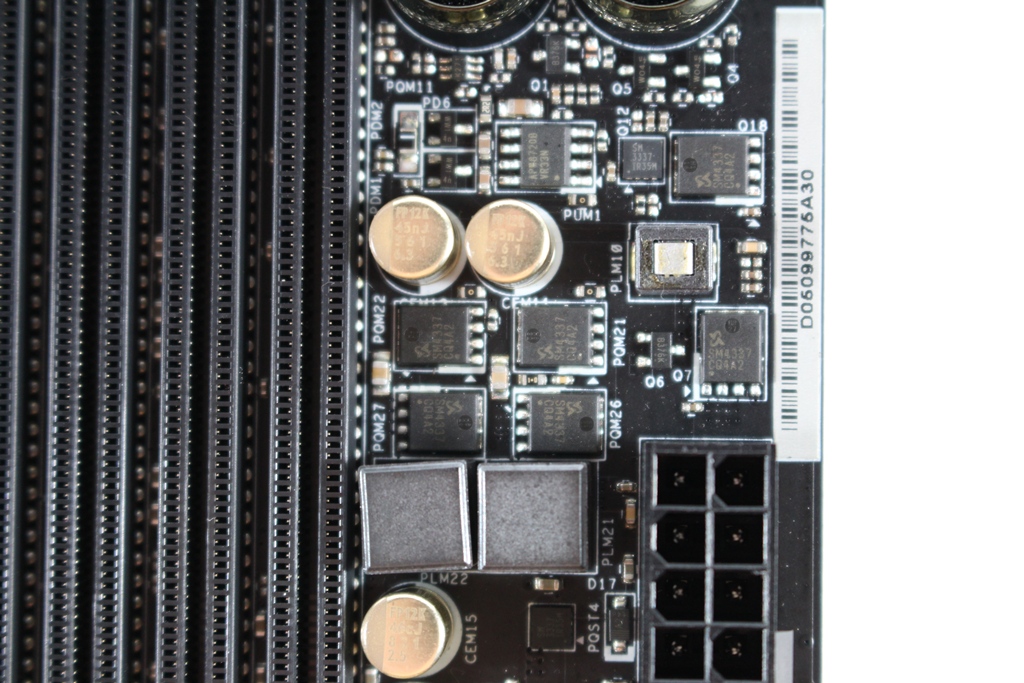
▼CPU供电部分采用12相供电,搭配Intersil ISL95824 PWM控制器,MOFET部分有独立散热片做散热,结构为上一下一结构,CPU VCore供电为8 Pin


▼记忆体扩充槽为4条
▼记忆体电源用料

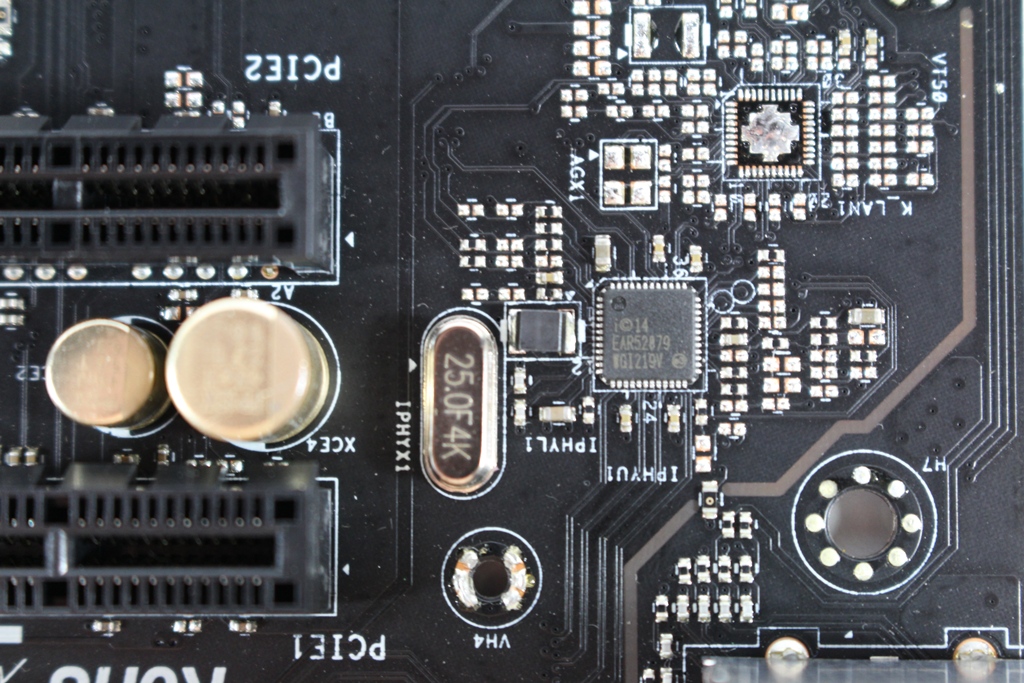
▼网路晶片:Intel WGI219V
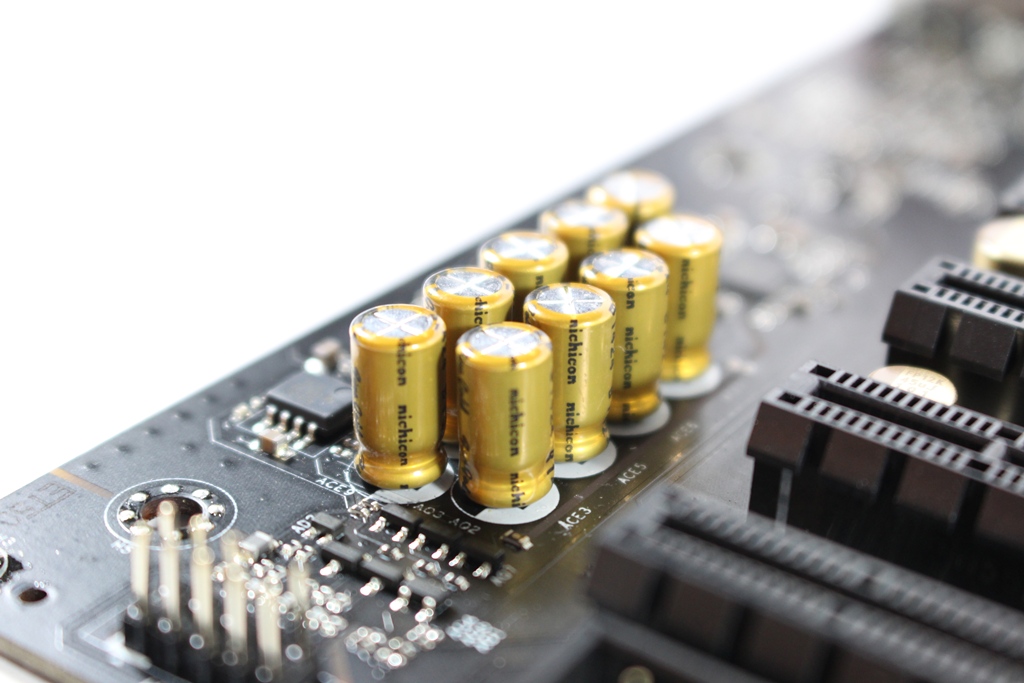
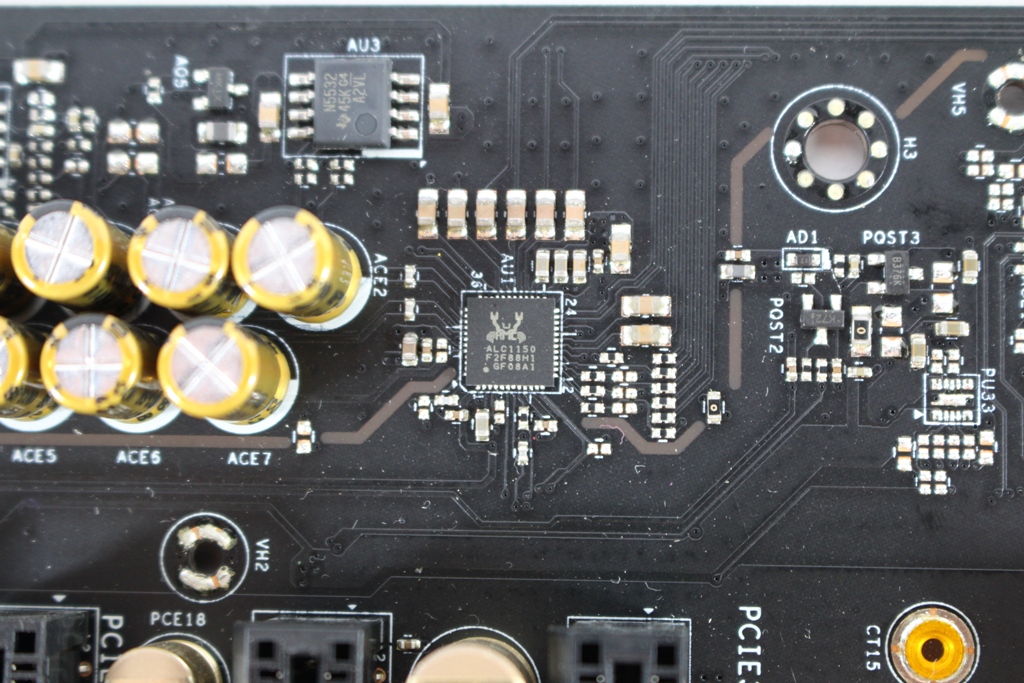
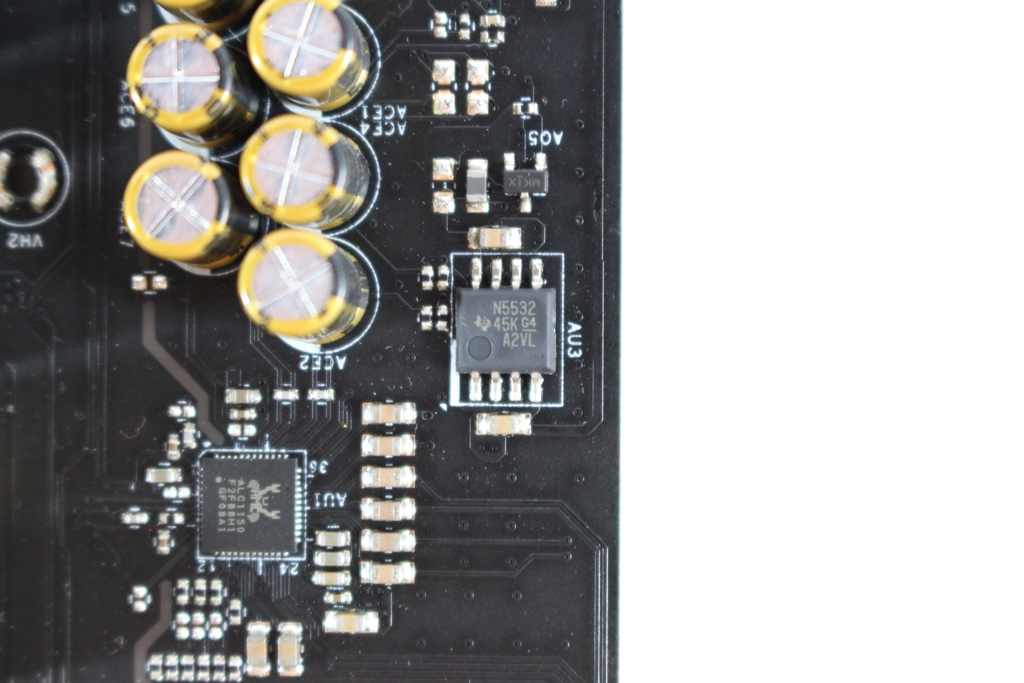
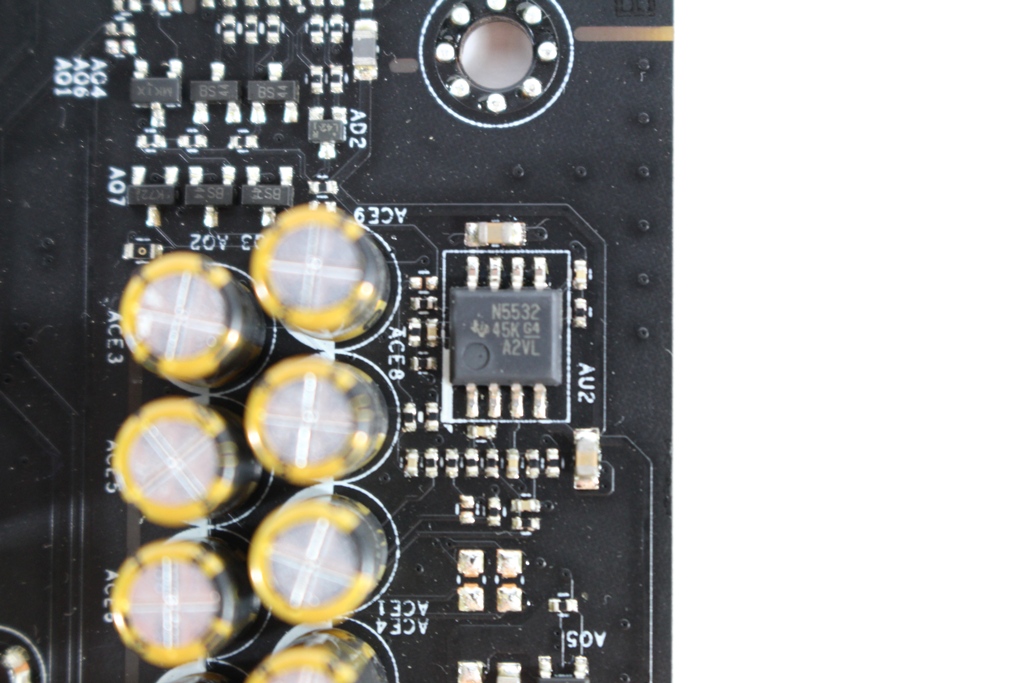
▼音效采用天籁美声三代并搭配Nichicon电容,音效晶片采用ALC1150,输出端搭配两颗发烧级TI N5532 OPA放大器

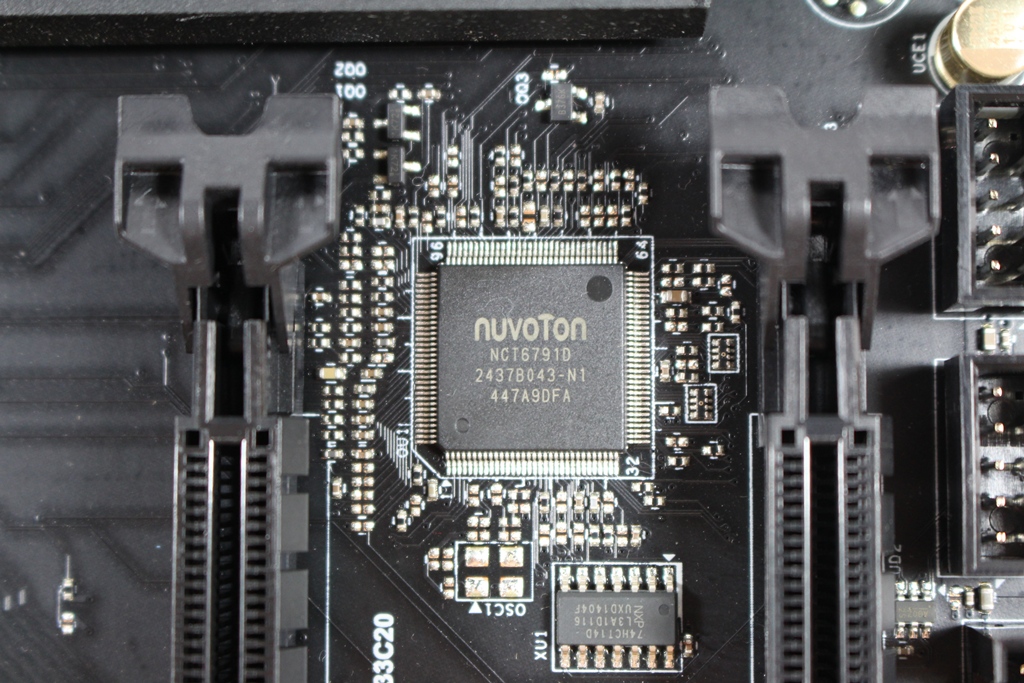
▼nuvoTon NCT6791D Super IO晶片
▼ASMedia ASM1442K HDMI Level Shift晶片

▼ASMedia ASM1142 PCIe转USB3.1晶片

▼EtronTech EJ179V USB3.1 Type-C Switch加整合控制功能

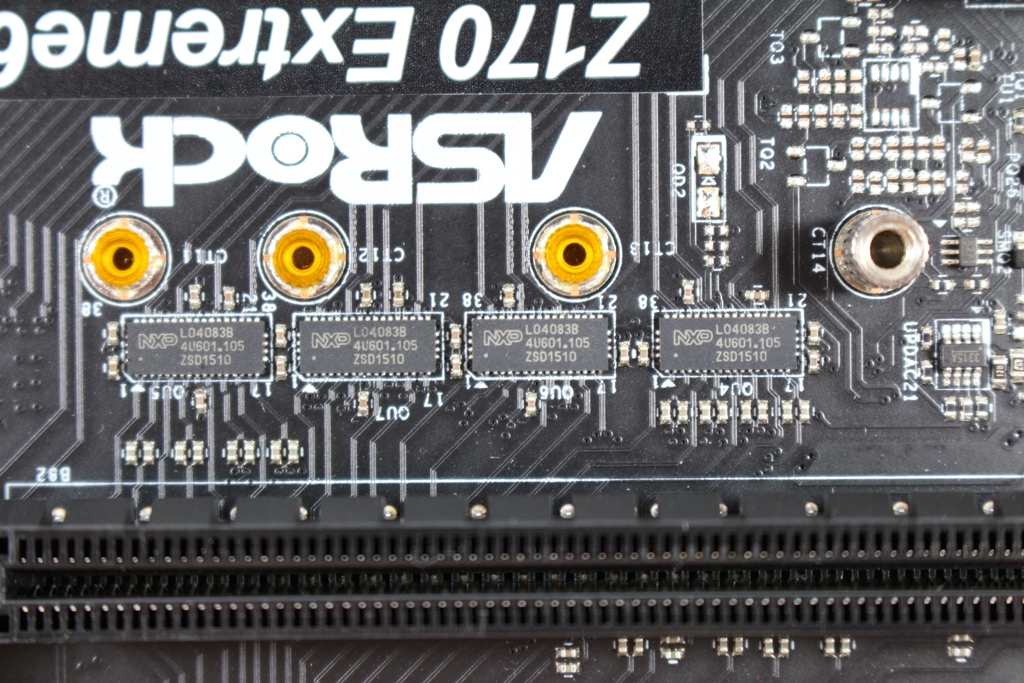
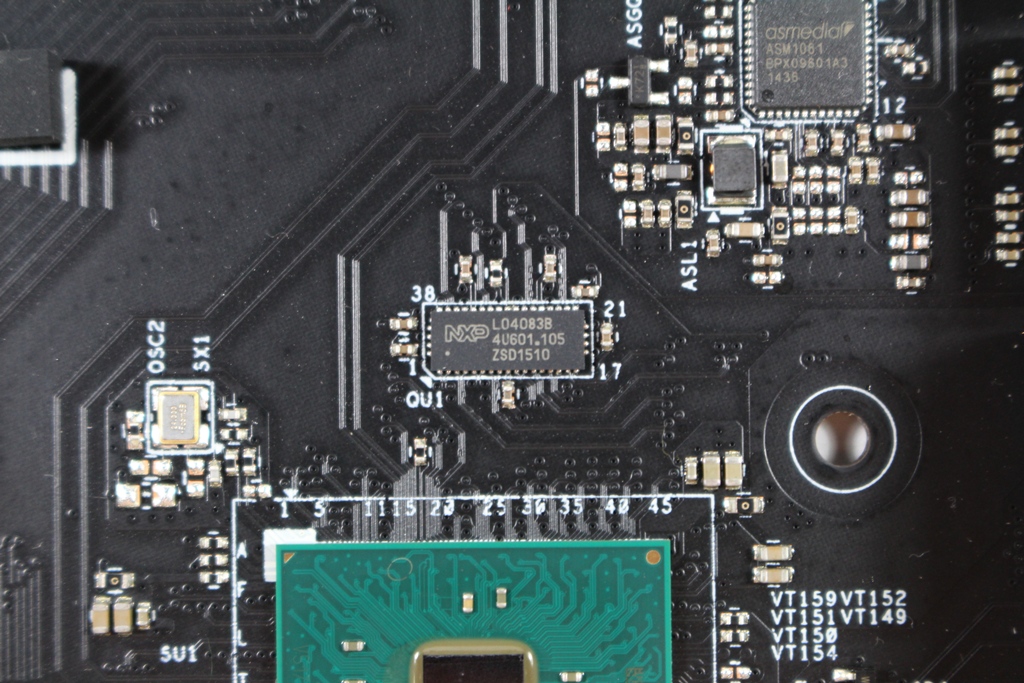
▼NXP L04083B PCIe 3.0切换器
▼ASMedia ASM1061 SATA 6Gb/s晶片
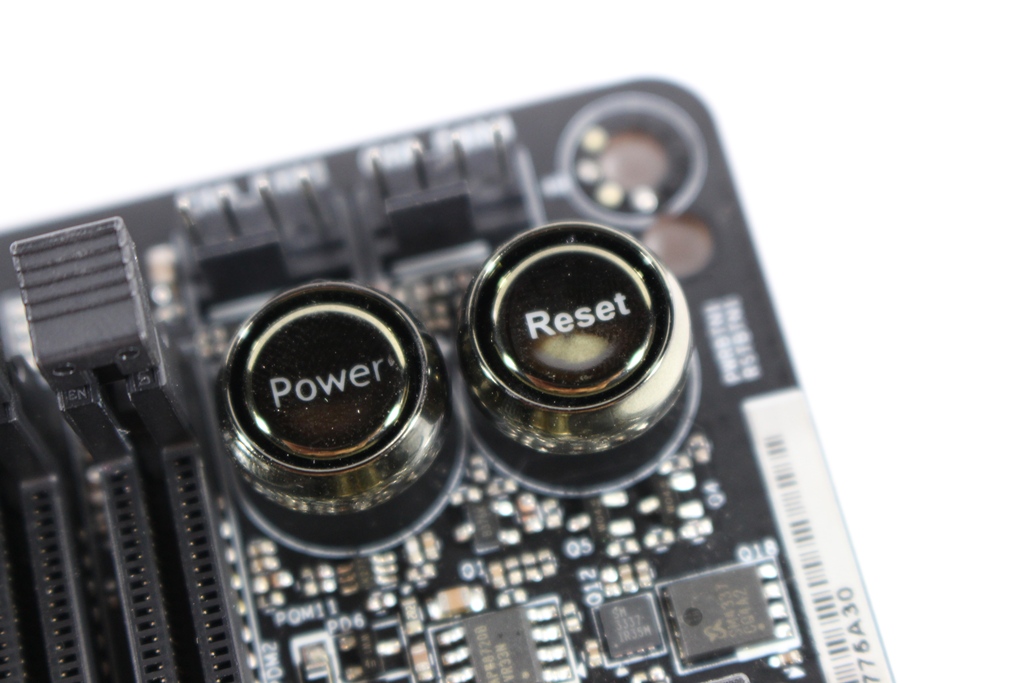
▼Power与Reset按钮
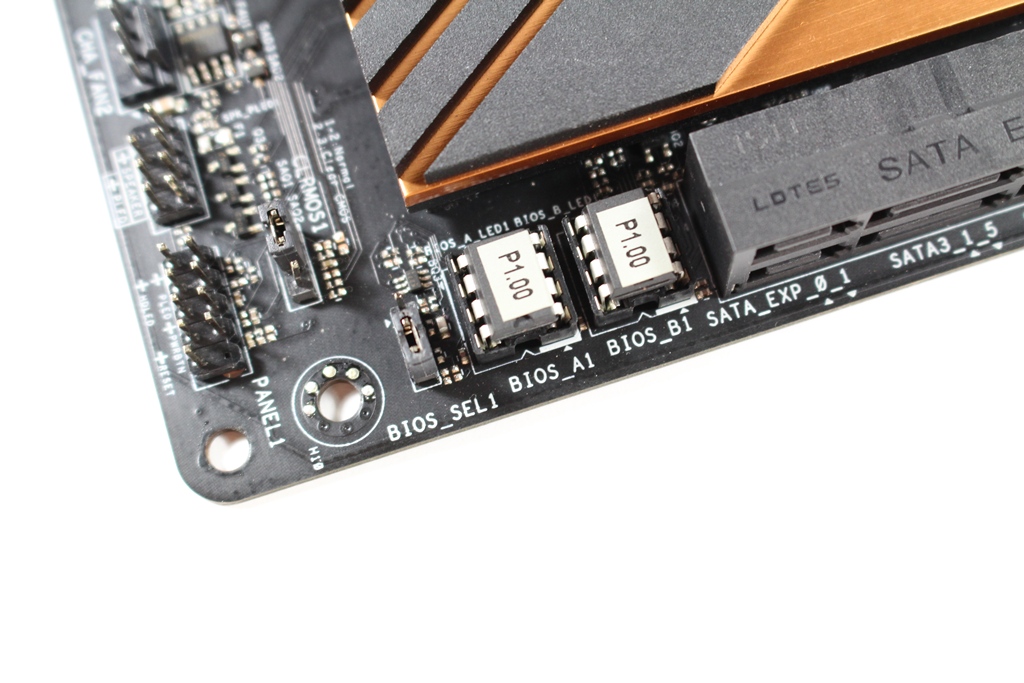
▼双BIOS设计,并有开关可切换BIOS ROM
▼前置Audio插Pin
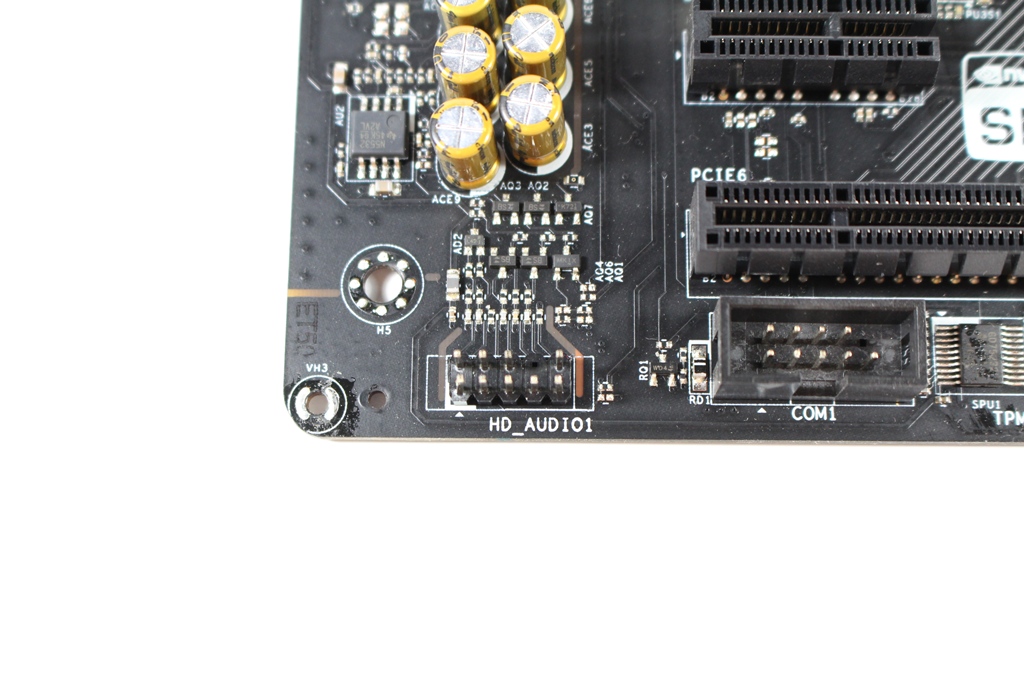
▼COM Port插Pin
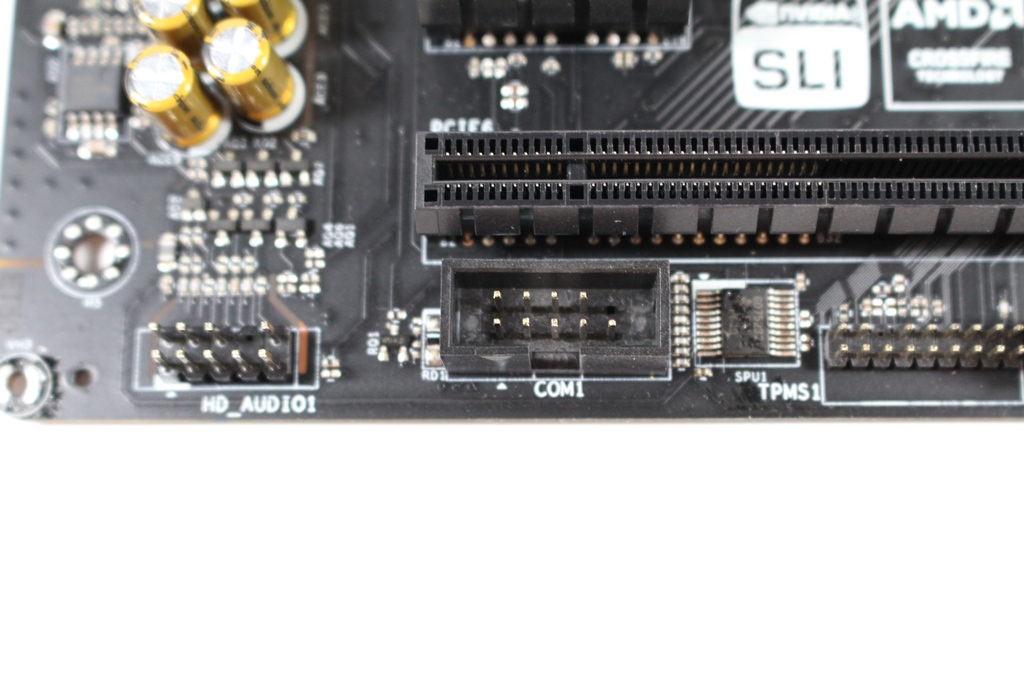
▼TPM模组插Pin
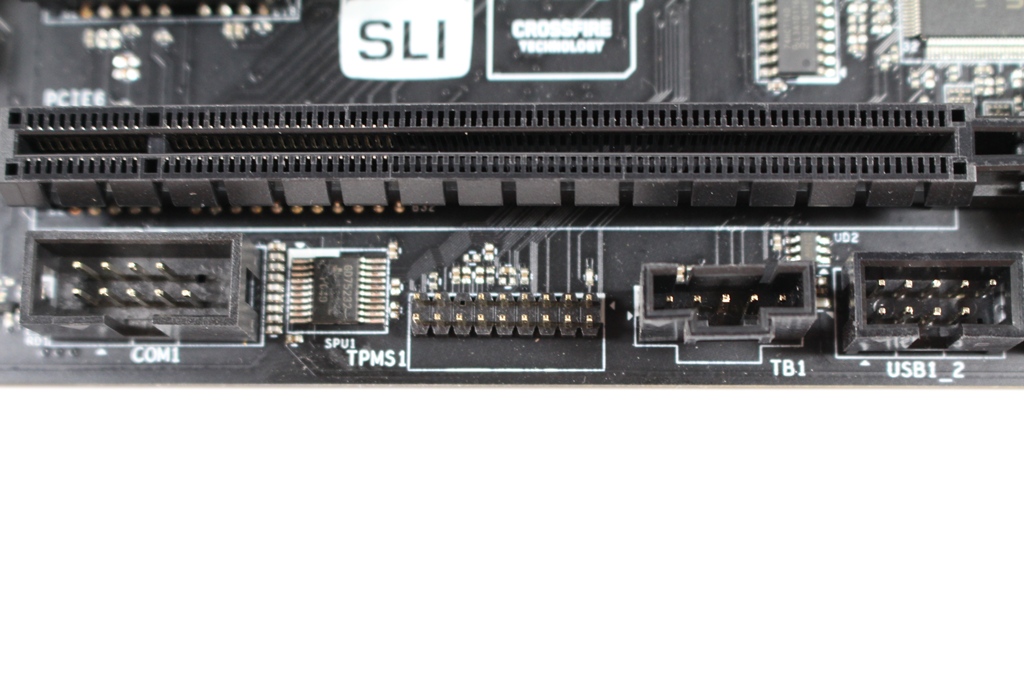
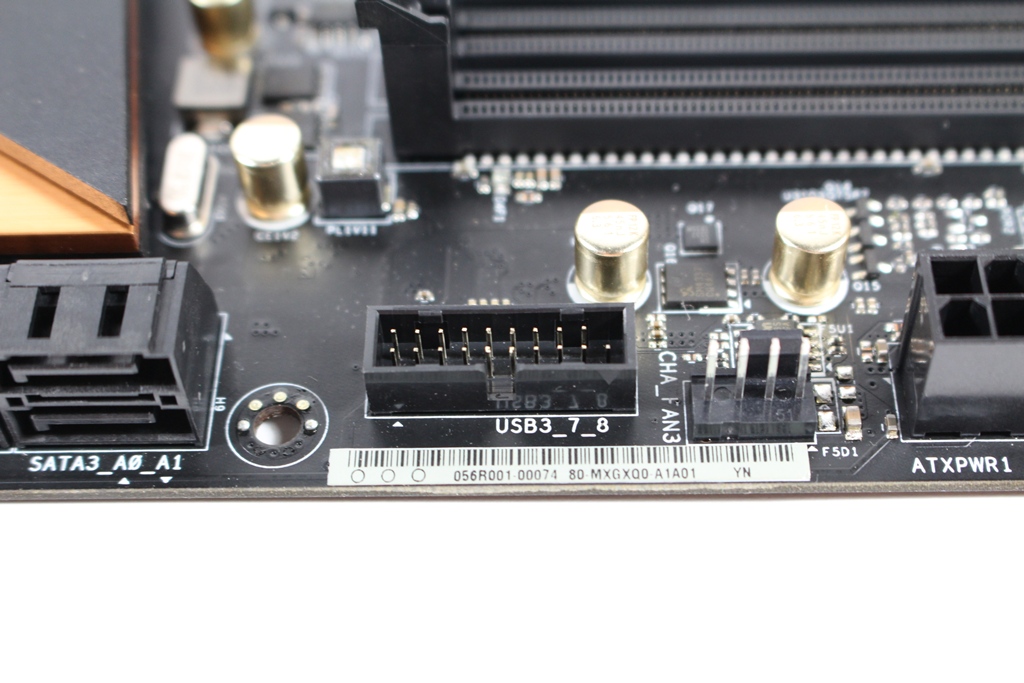
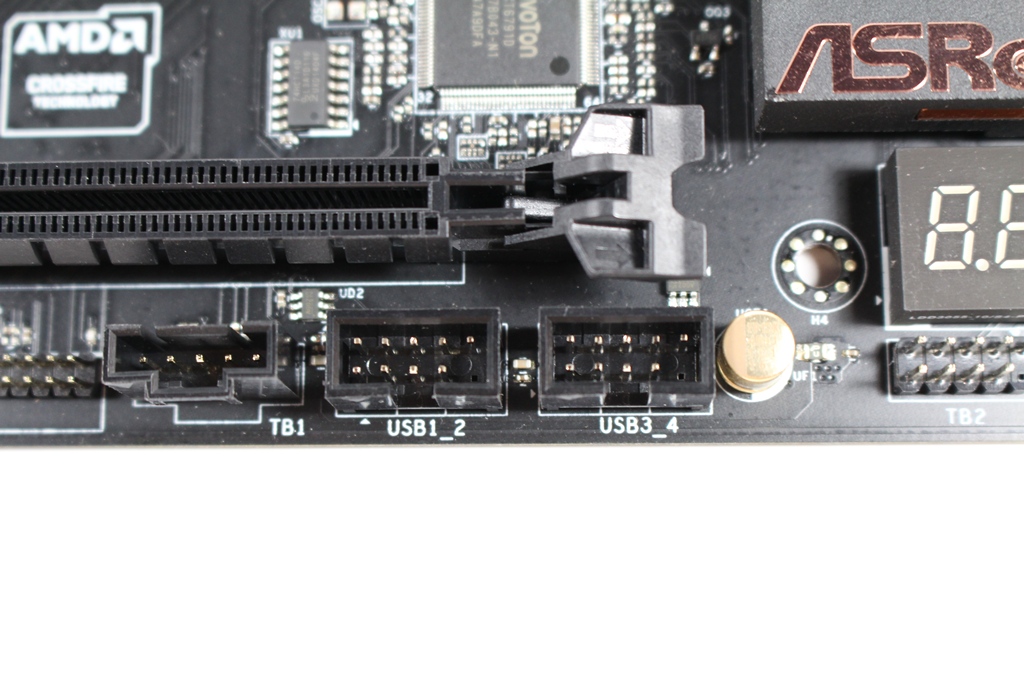
▼前置USB 3.0插Pin
▼前置USB 2.0插Pin
▼前置面板插Pin
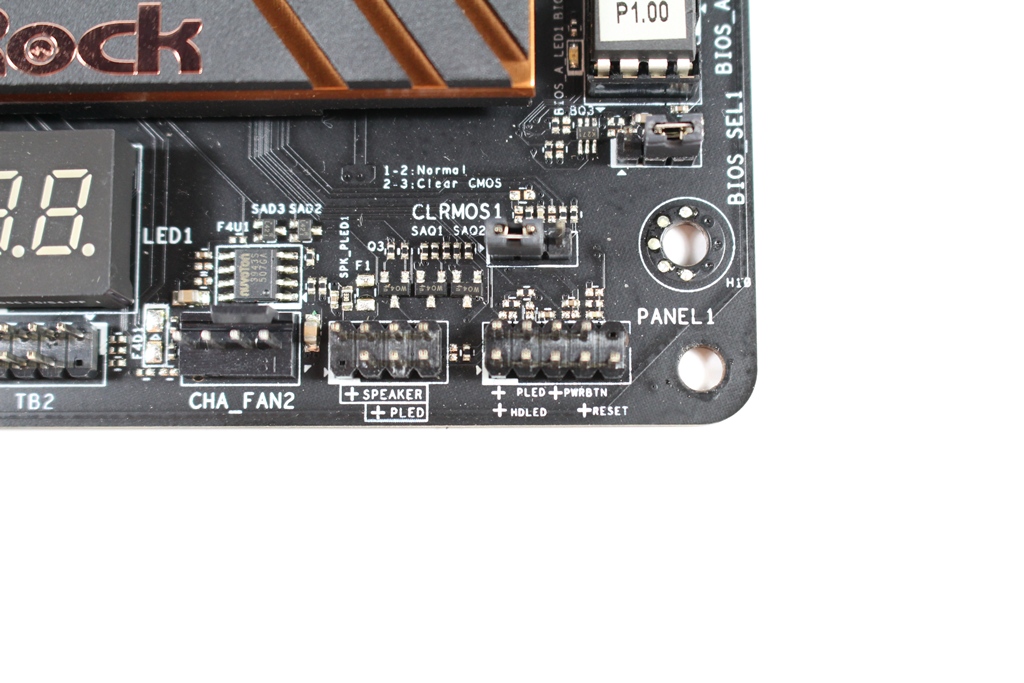
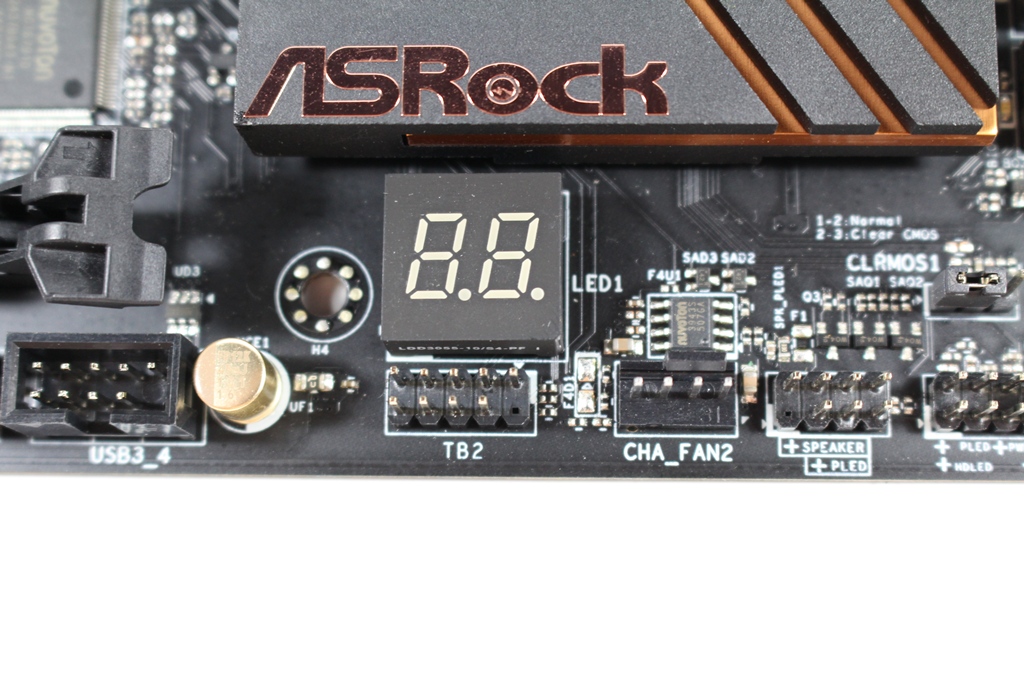
▼Debug指示灯号
▼SATA部分为SATA 6Gb/s*4与SATA Express*2(可变成SATA 6Gb/s*4使用)

▼PCIe扩充槽一览

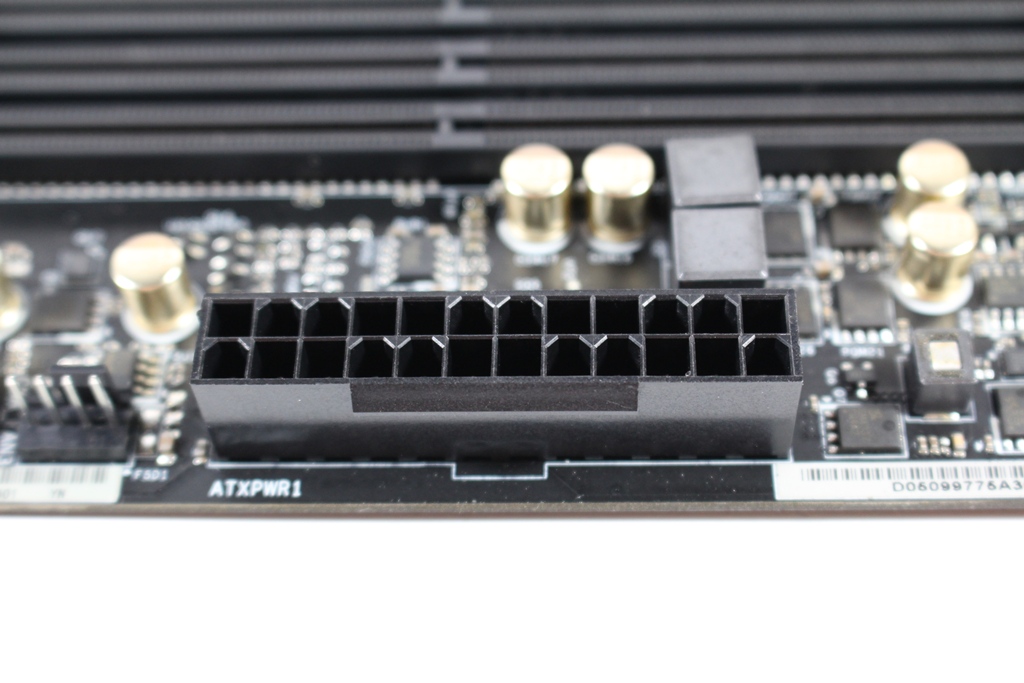
▼主机板为20+4 Pin电源供电
▼Z170 PCH散热片

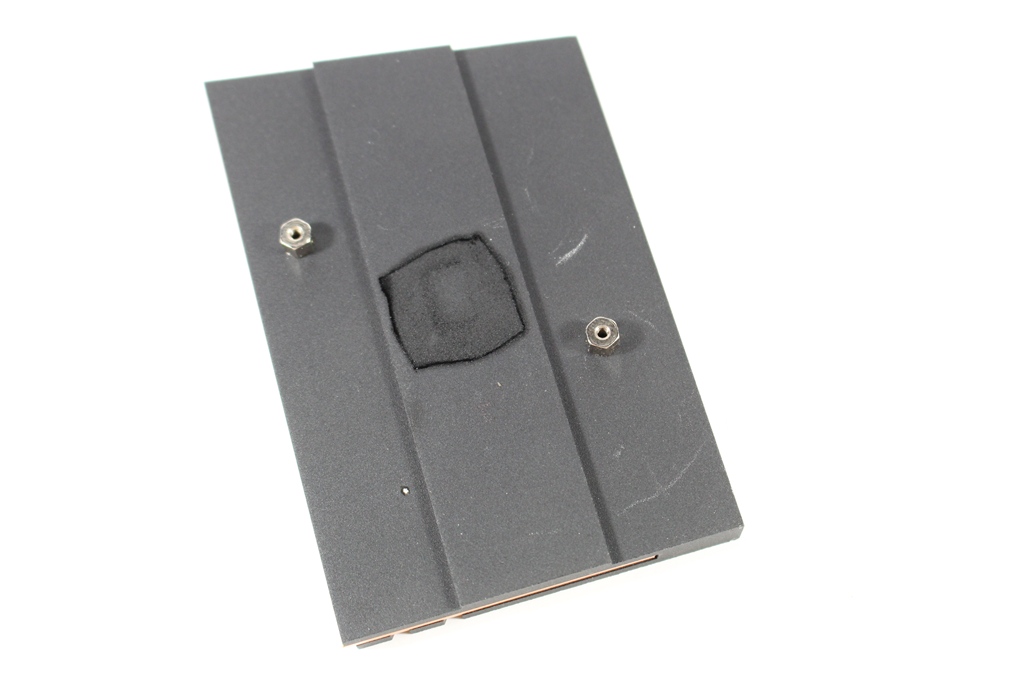
▼Z170 PCH
 BIOS设定简单介绍
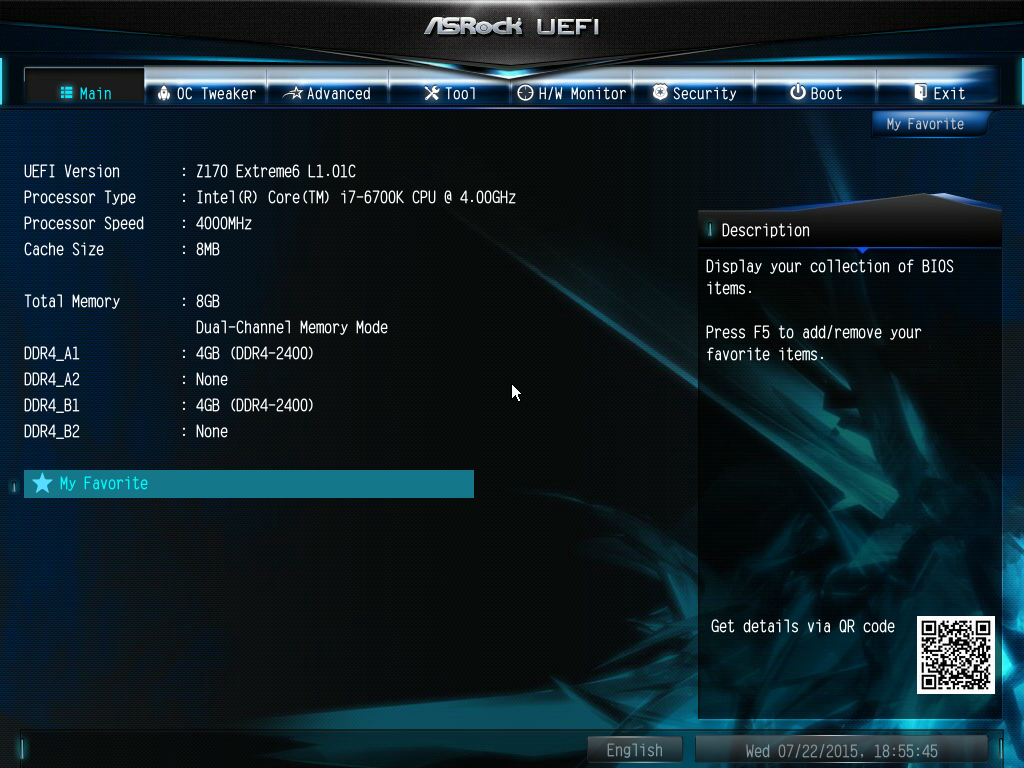
▼第一面为基本系统状态显示,CPU型号、工作时脉,记忆体工作时脉与容量
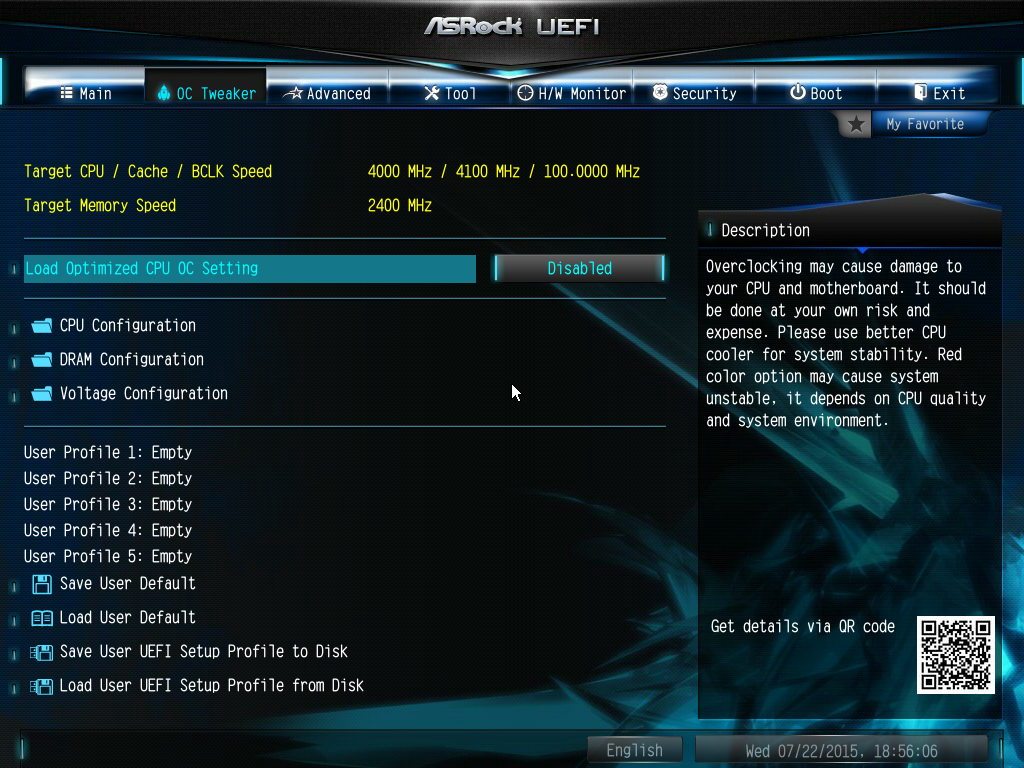
▼超频调校页面可设定所有超频选项功能,并有官方所调整的超频设定值可以使用
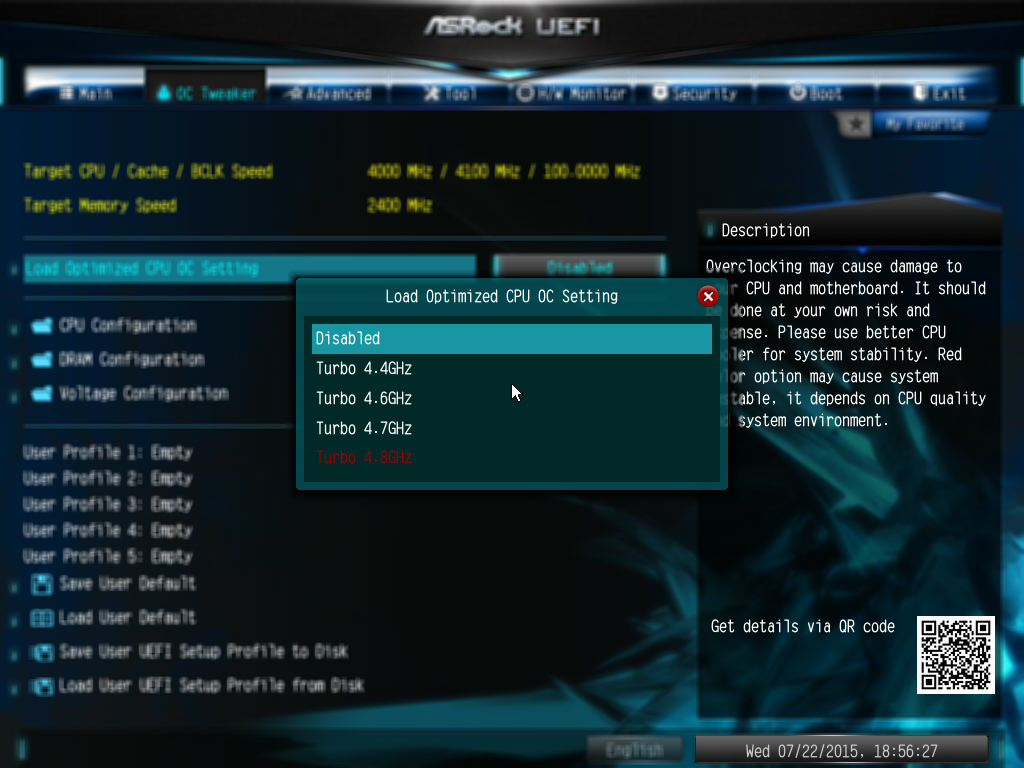
▼官方所调整的超频设定值有4.4GHz、4.6GHz、4.7GHz、4.8GHz可选择
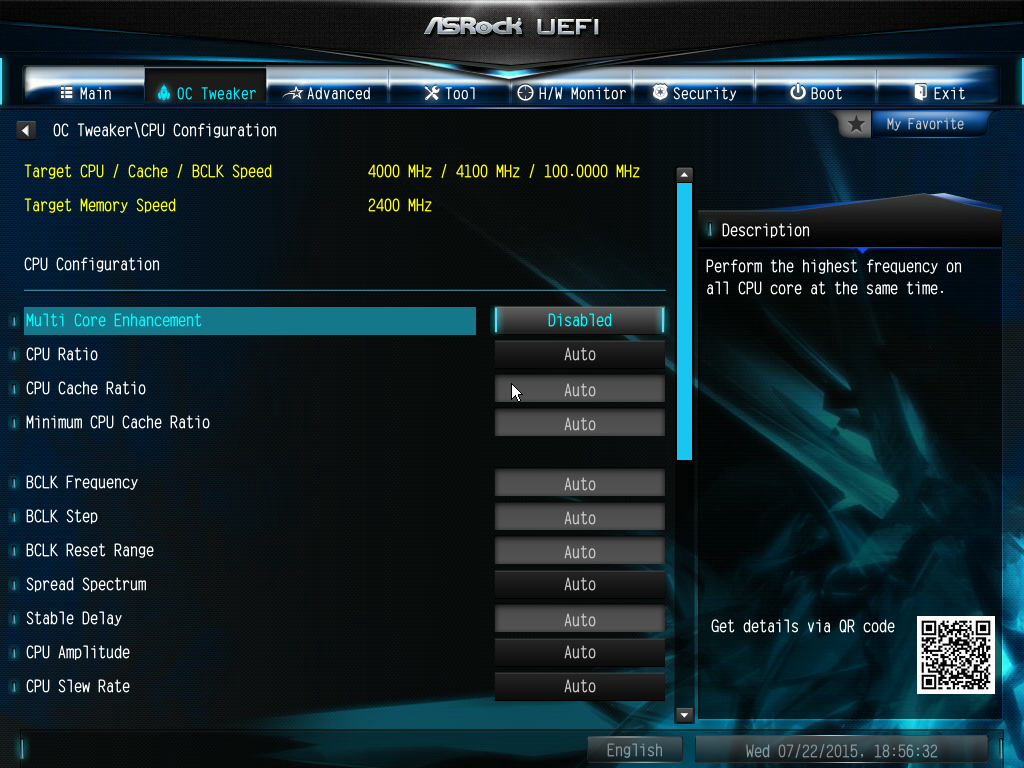
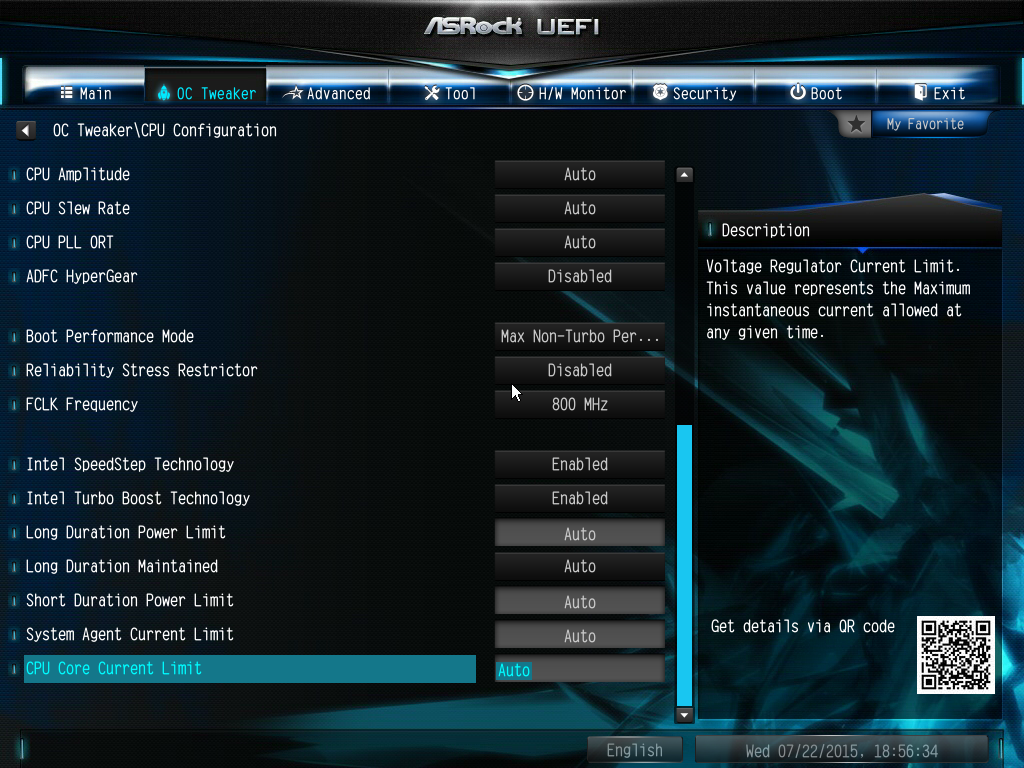
▼CPU超频选项一览
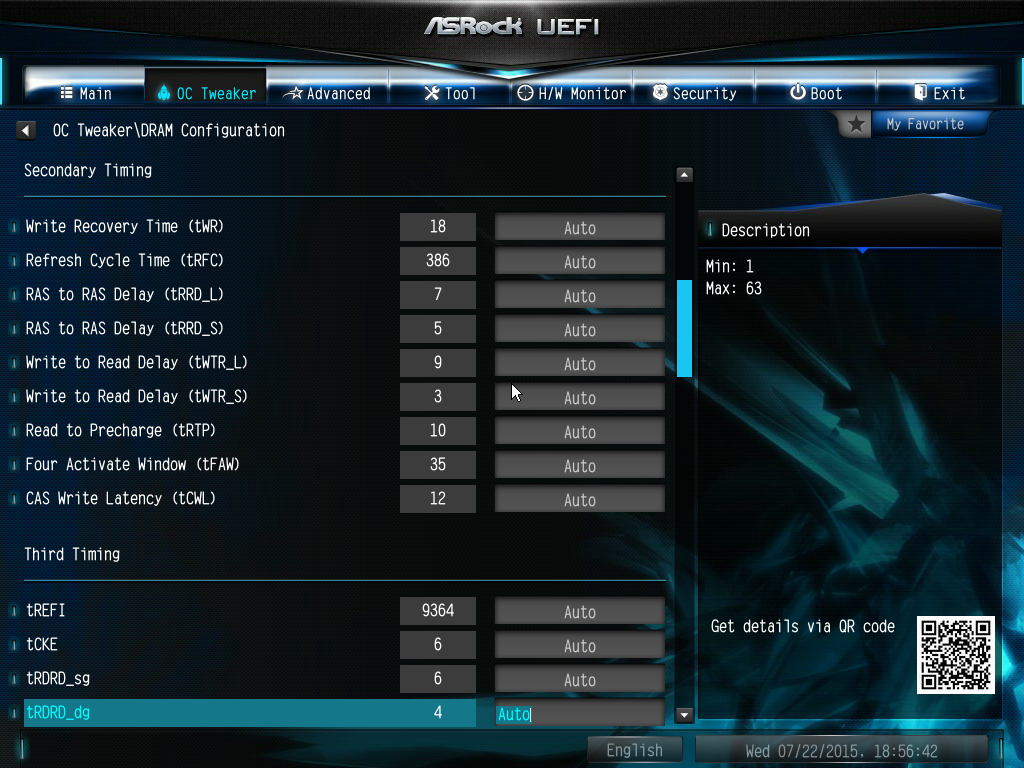
▼记忆体超频选项一览

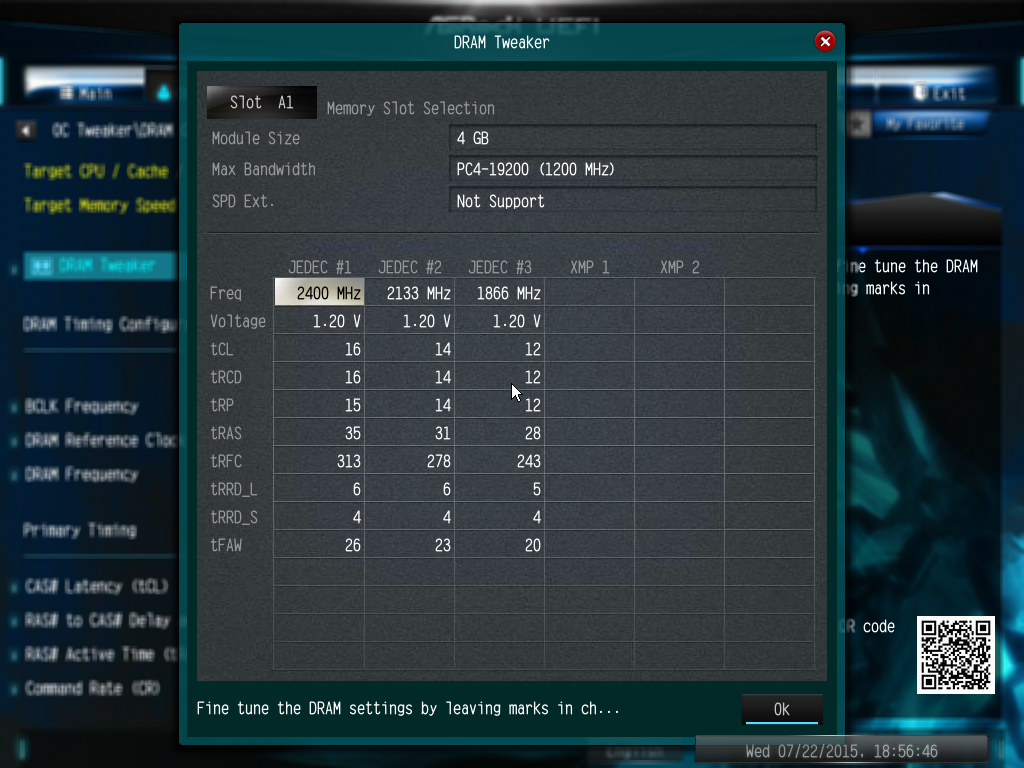
▼可以直接查看记忆体内SPD资讯
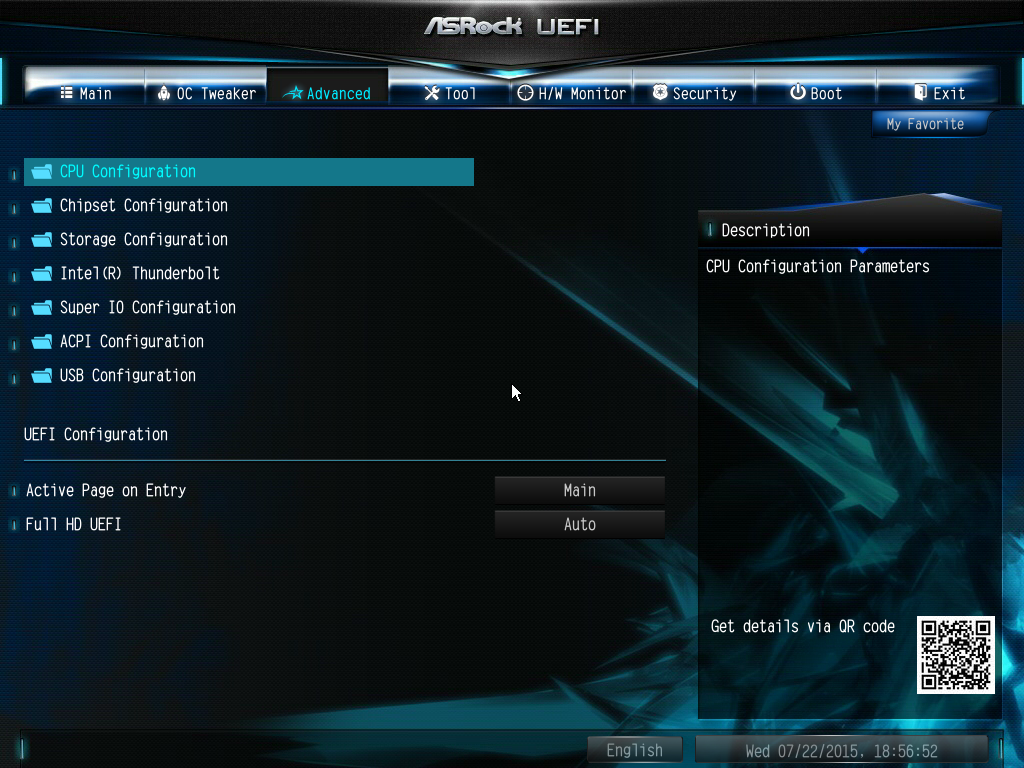
▼进阶页面可设定个装置详细设定选项
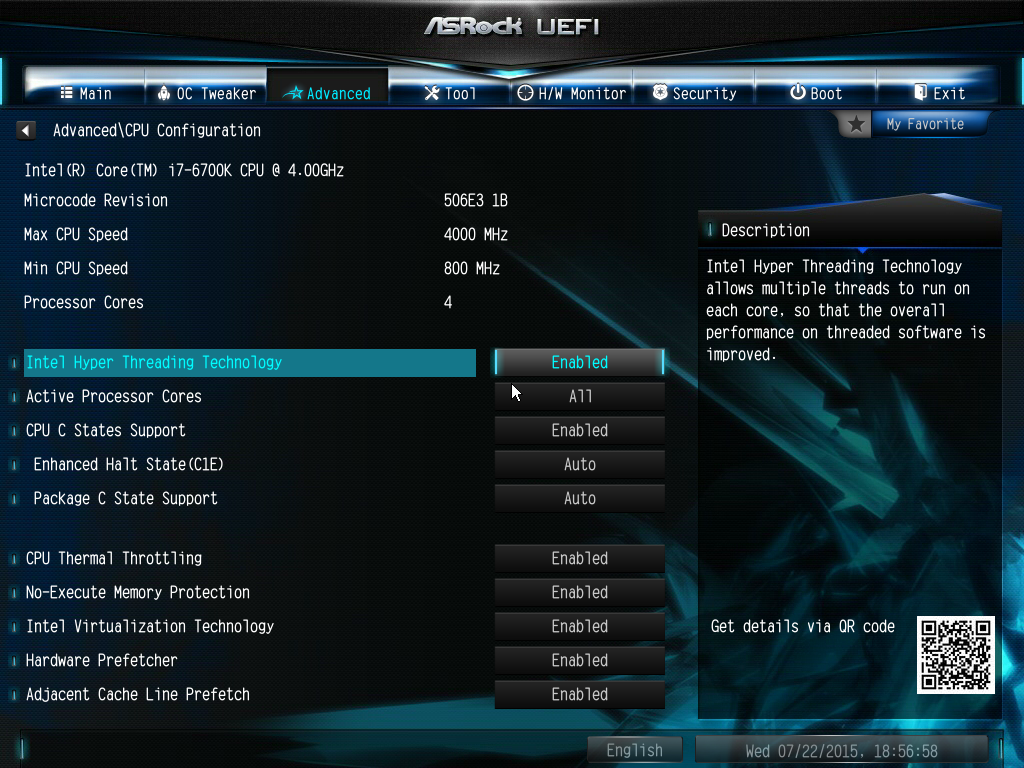
▼CPU进阶设定选项一览
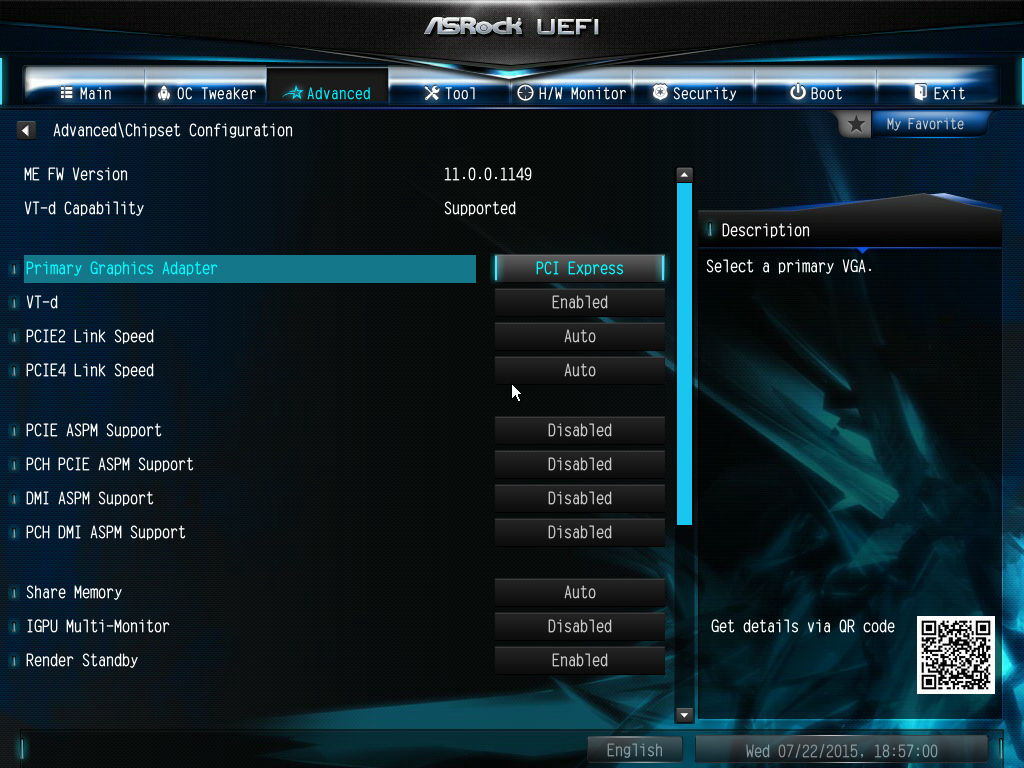
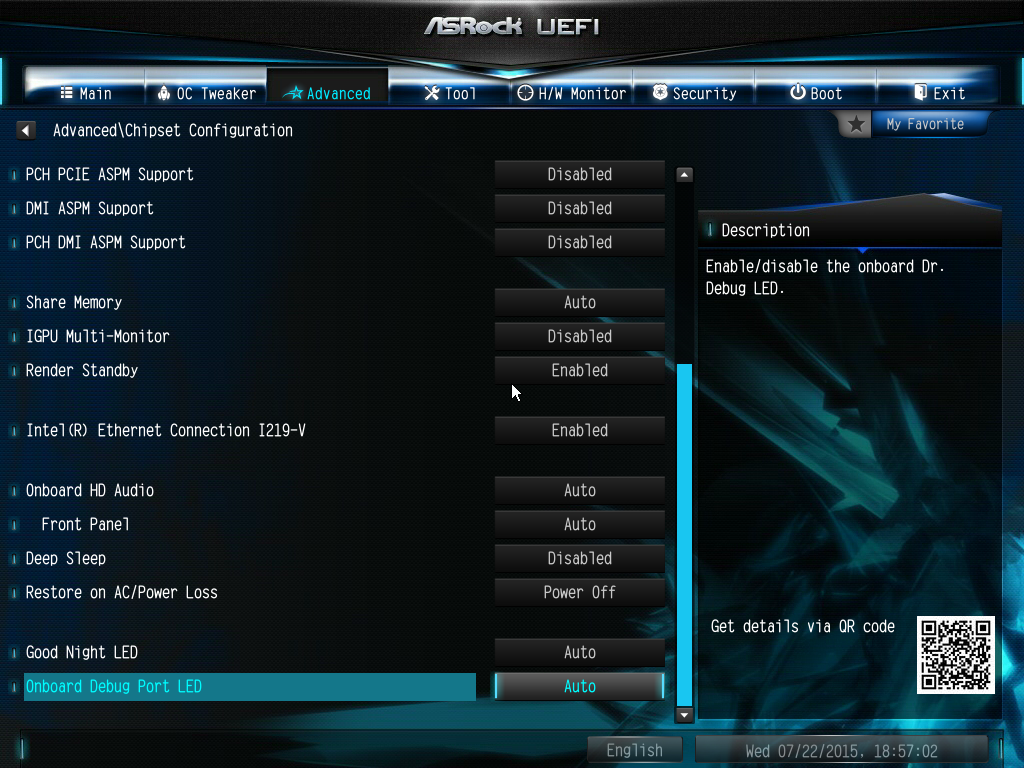
▼晶片组进阶设定选项一览
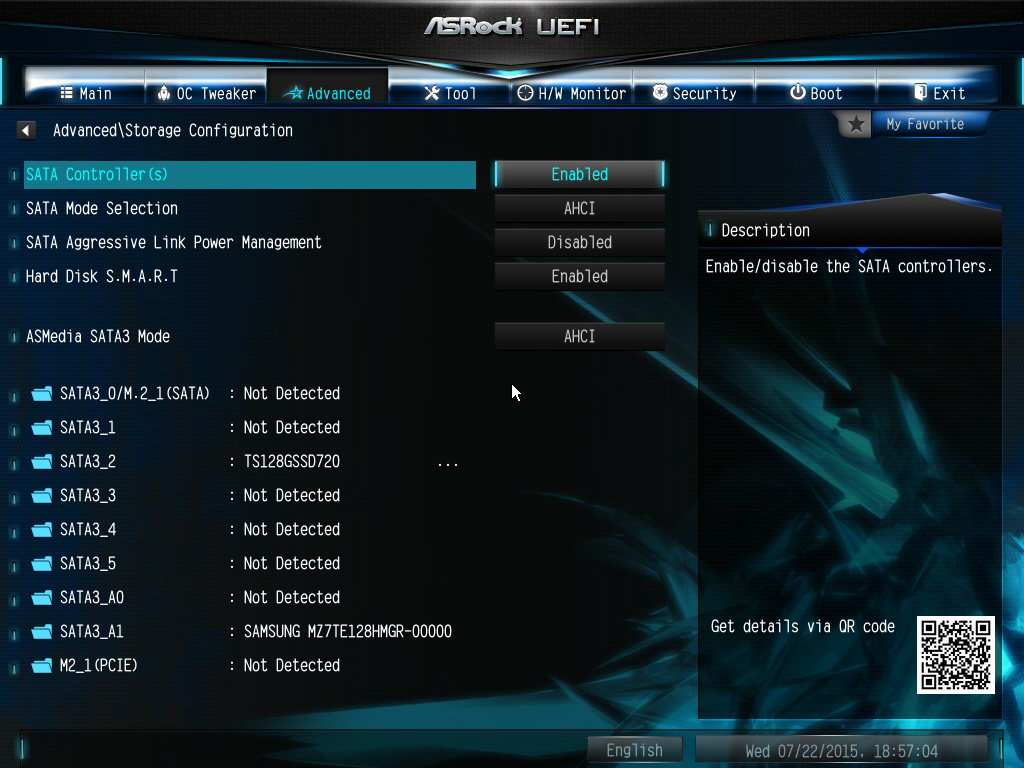
▼SATA进阶设定选项一览
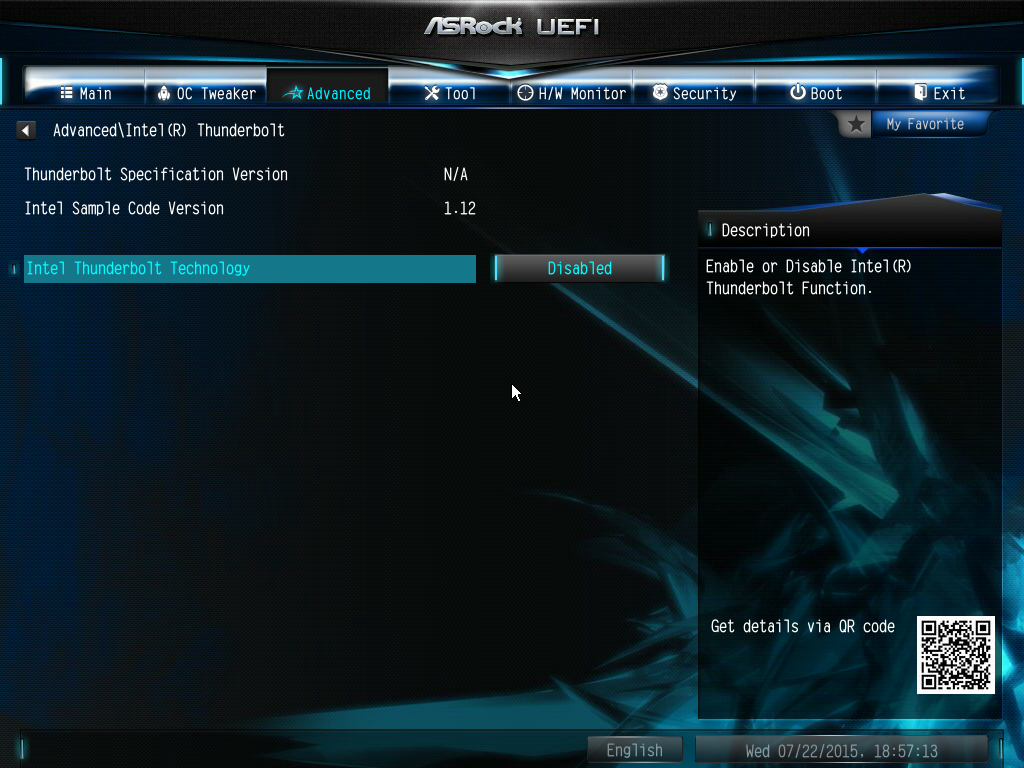
▼Thunderbolt设定选项一览
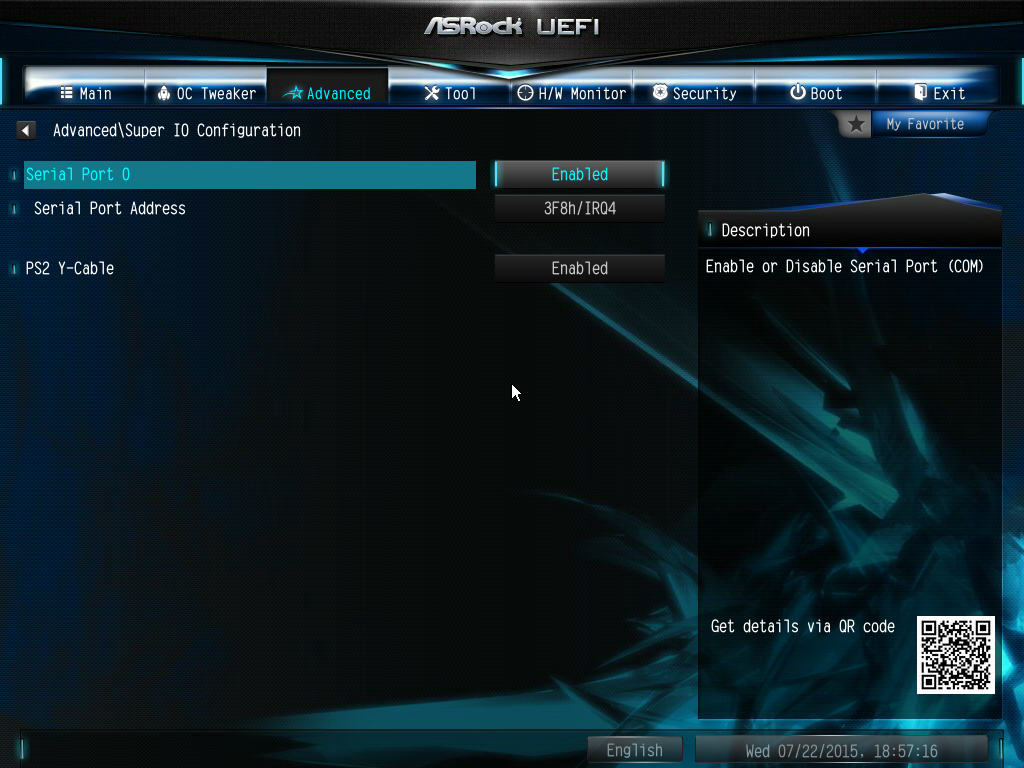
▼Super IO进阶设定选项一览
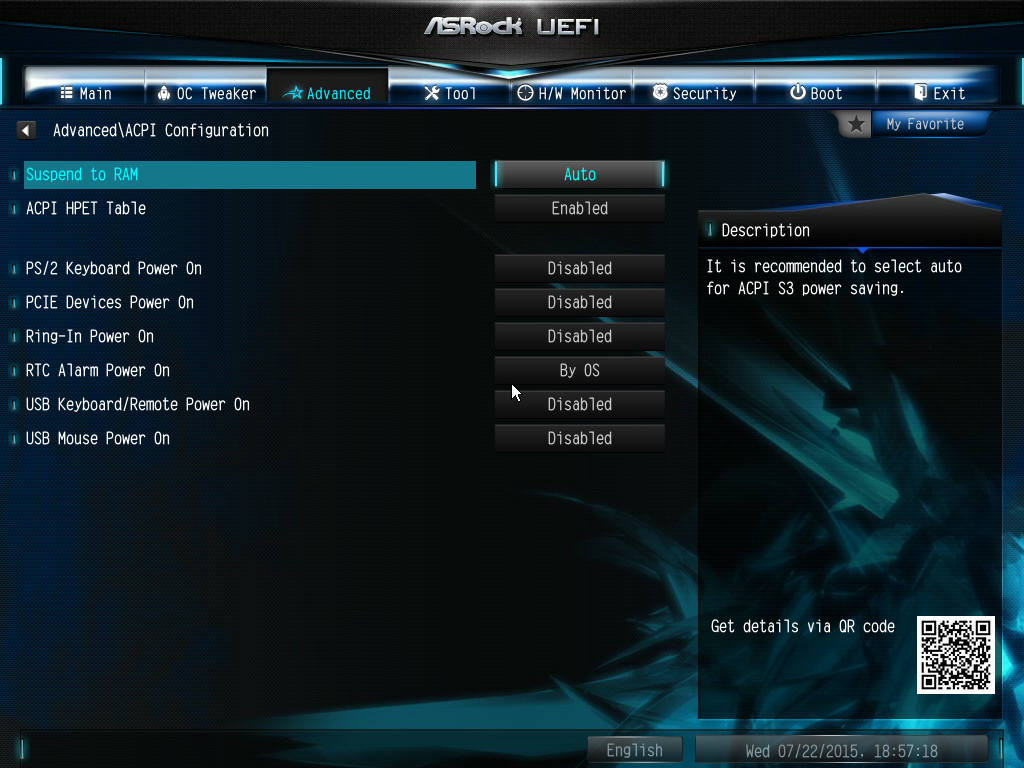
▼ACPI进阶设定选项一览
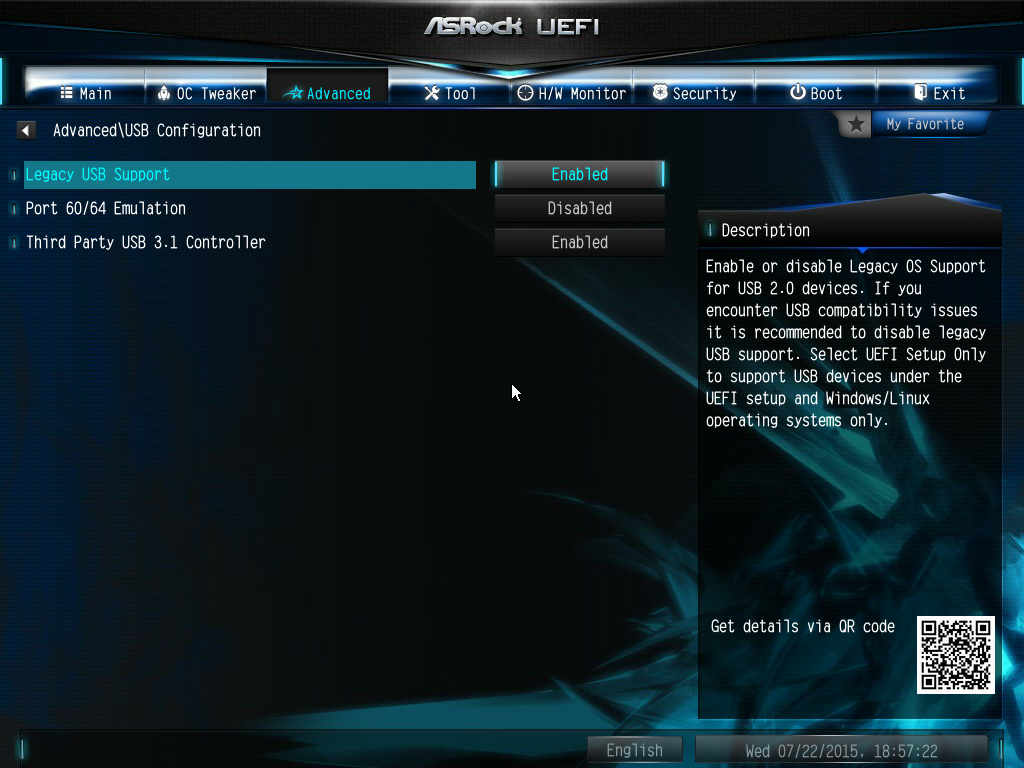
▼USB进阶设定选项一览
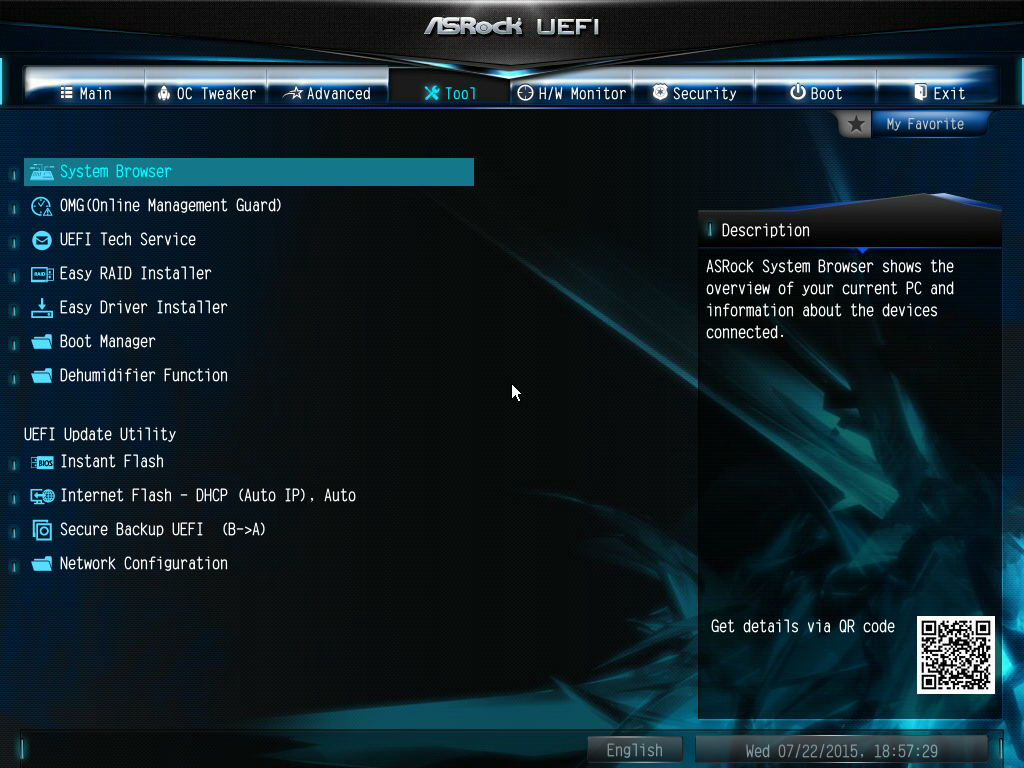
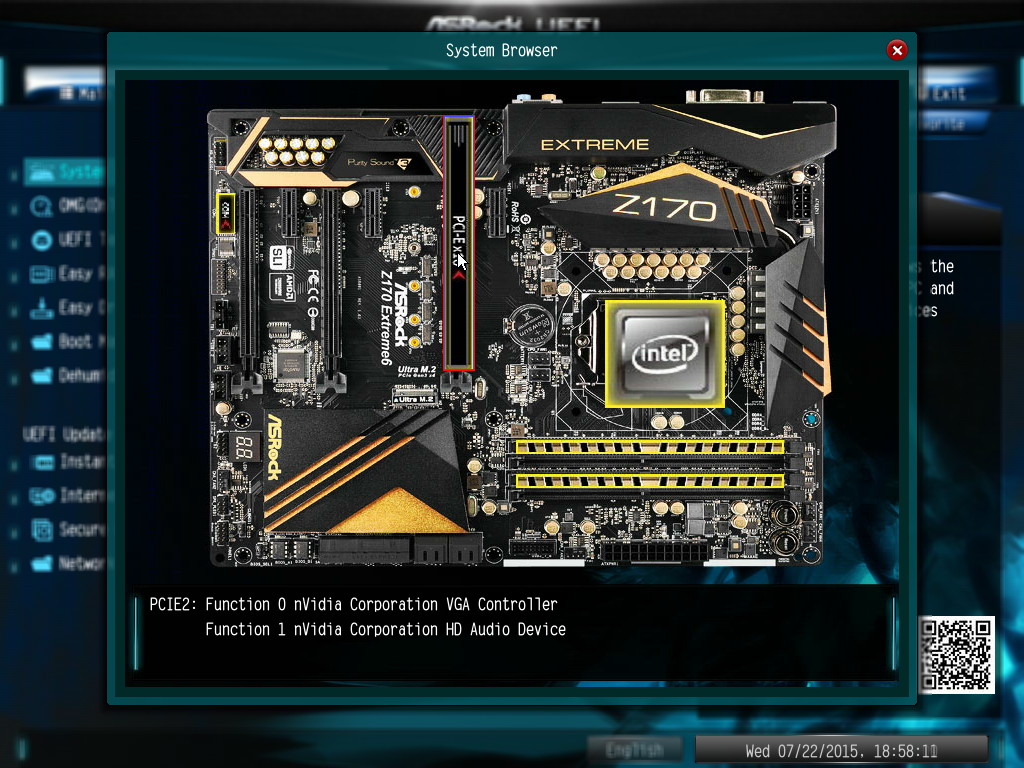
▼工具页面可查看系统总览、OMG设定、RAID设定与UEFI设定
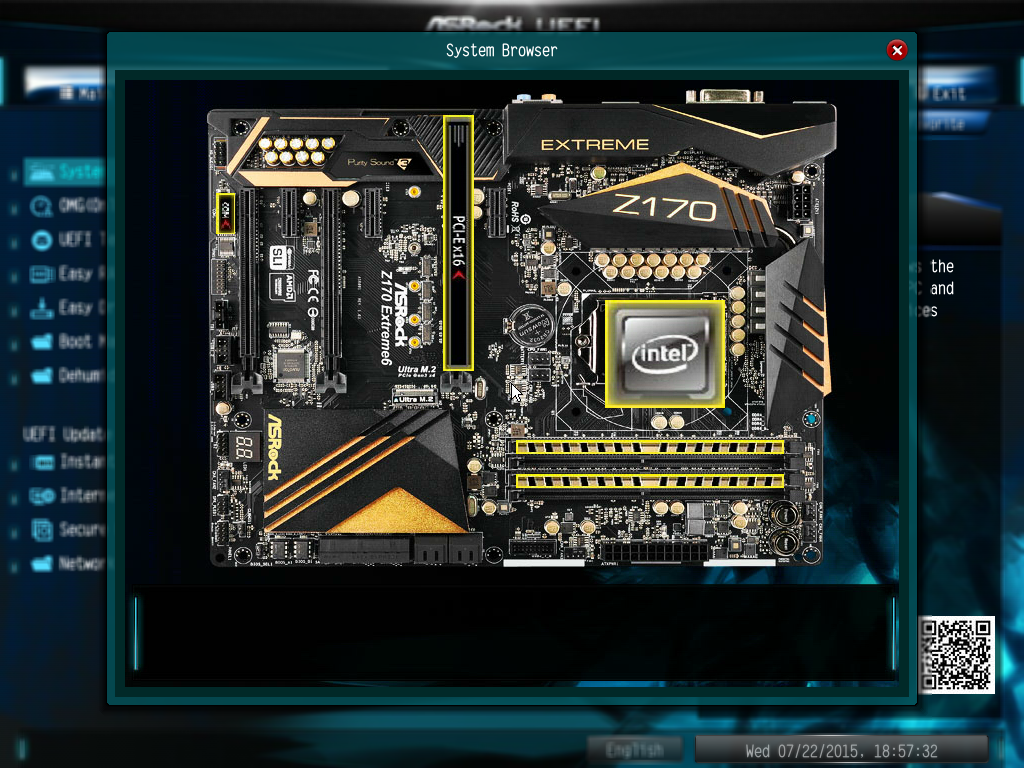
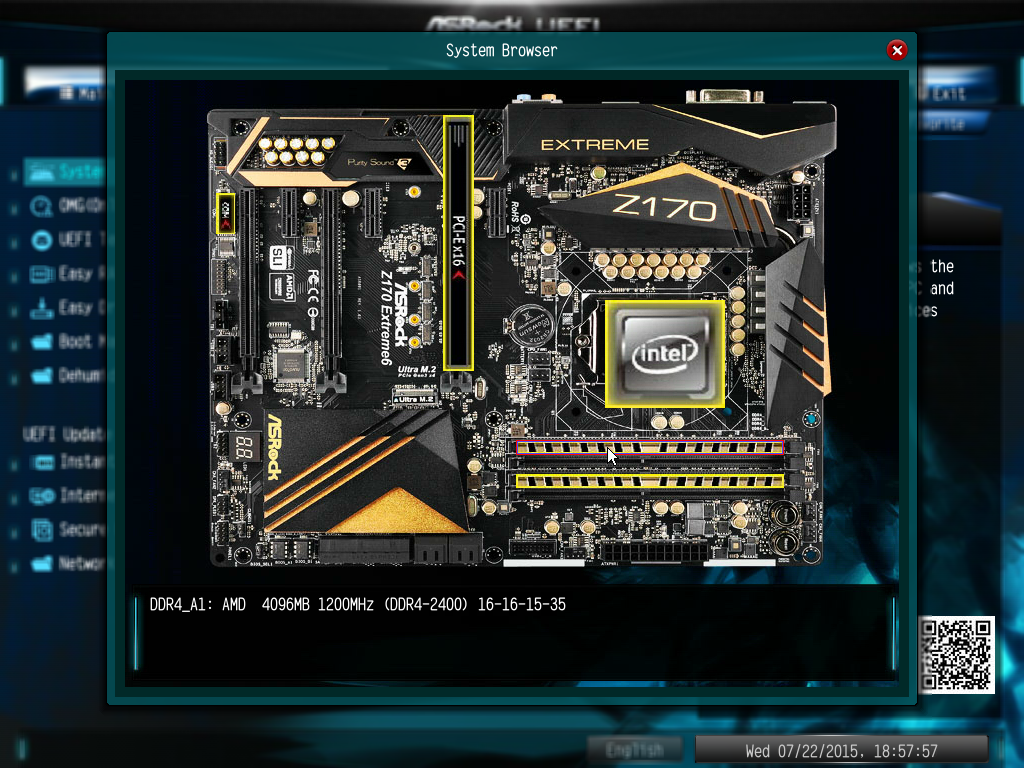
▼系统总览可查看目前所安装的硬体资讯

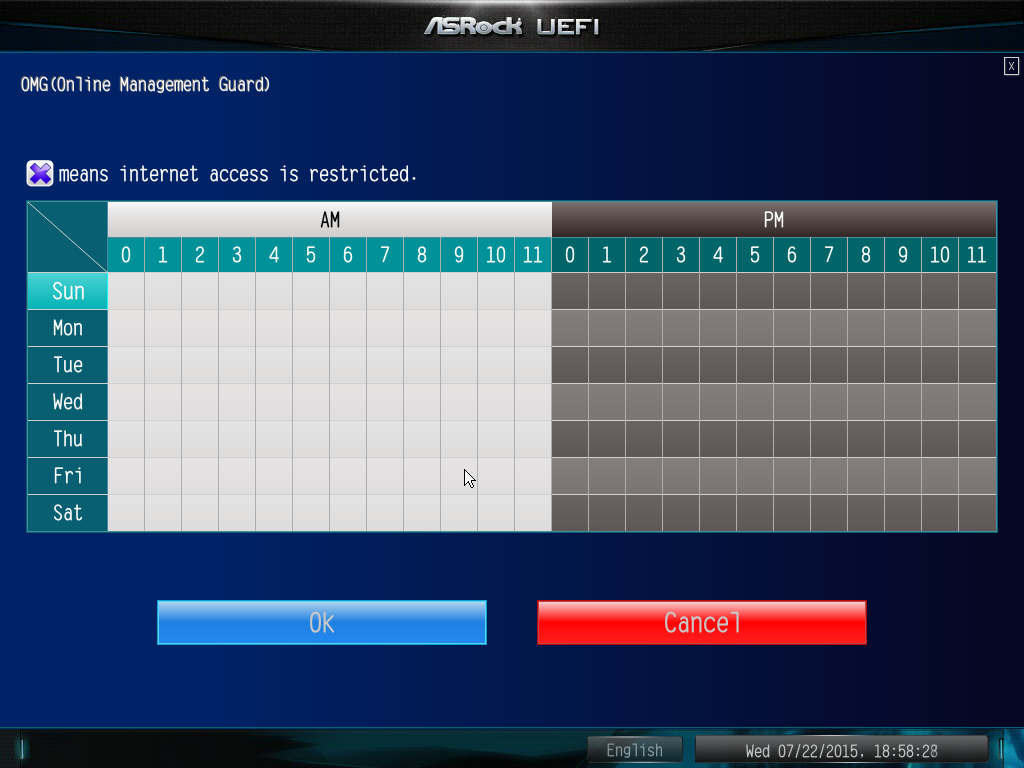
▼OMG功能一览
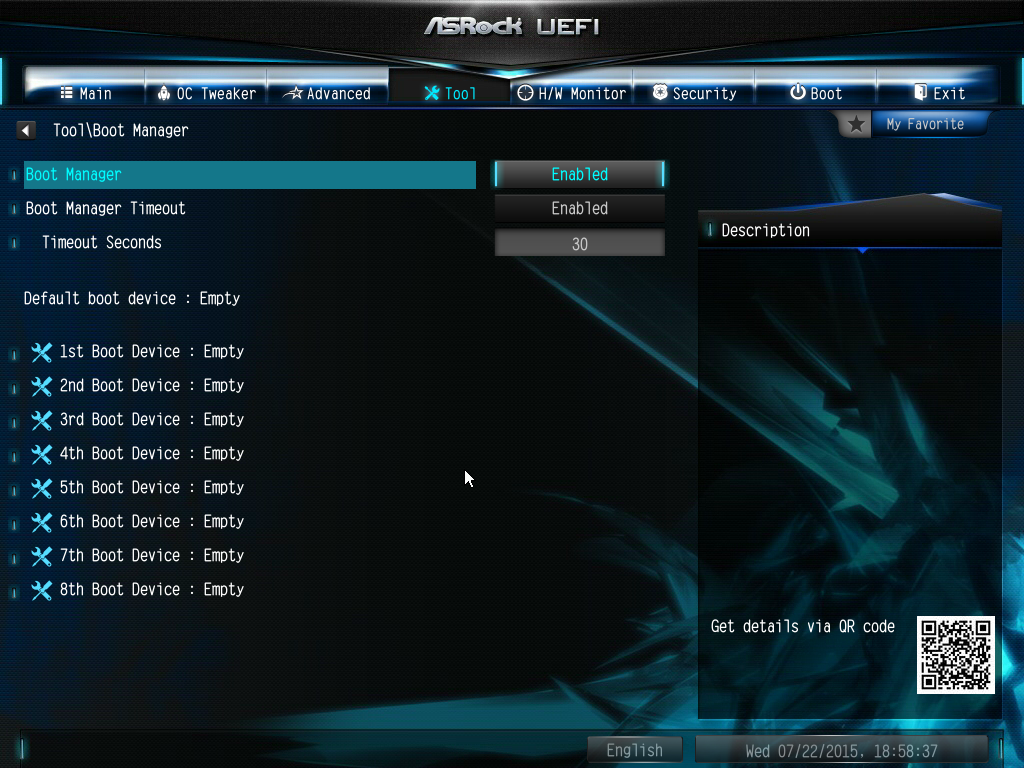
▼开机功能表一览
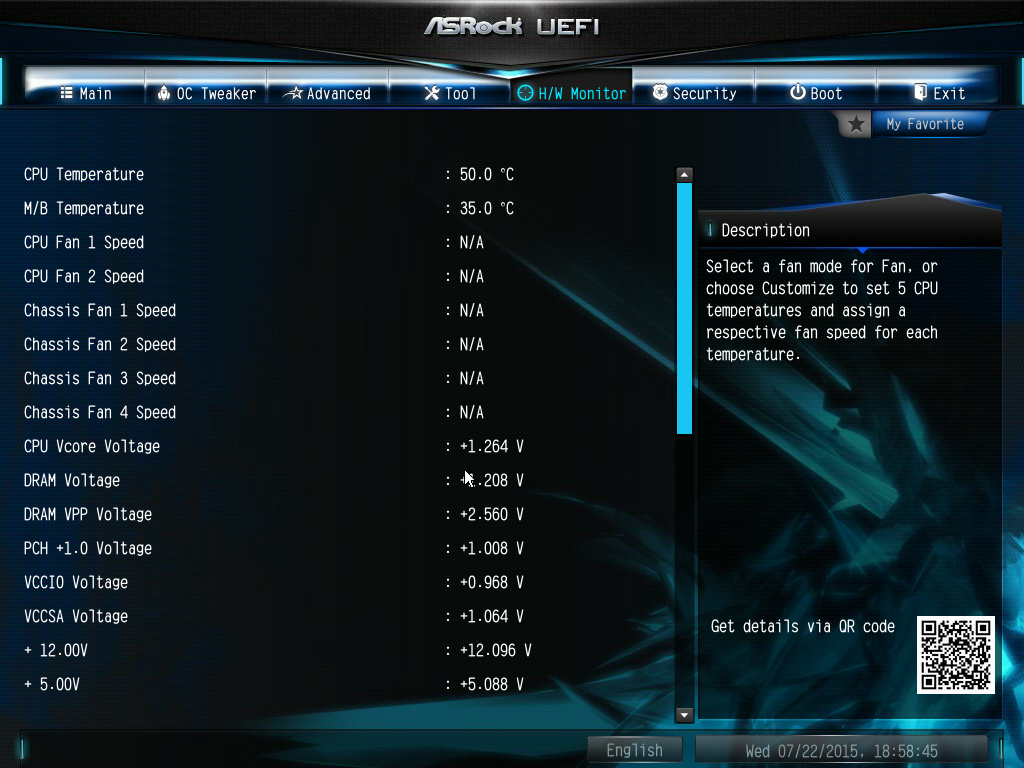
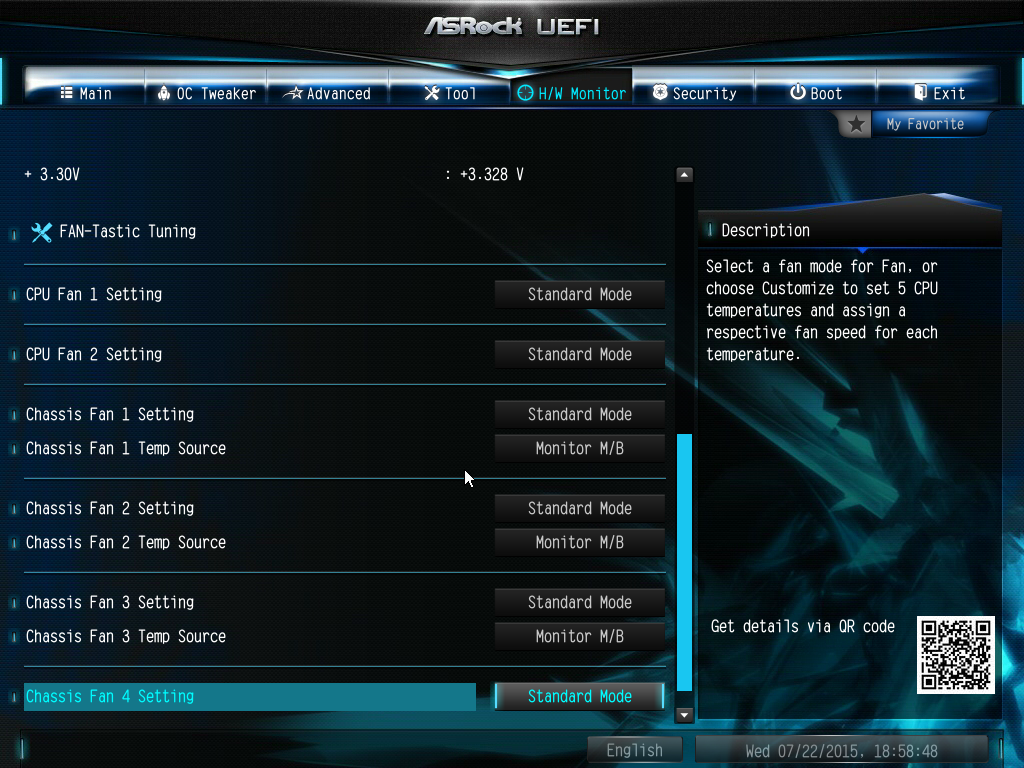
▼硬体监测部分可看到CPU温度、风扇转速与各电源电压状态,并可设定风扇模式
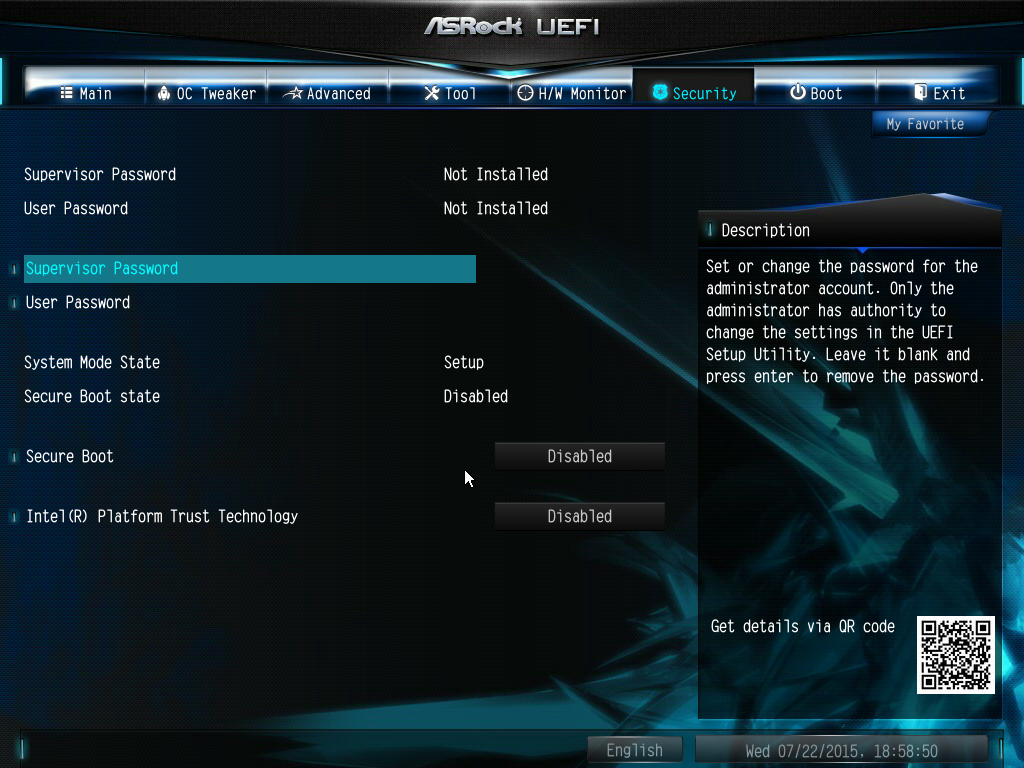
▼安全部分可设定开机密码与其他安全性设定
▼Boot部分可以设定开机顺序与其他开机选项

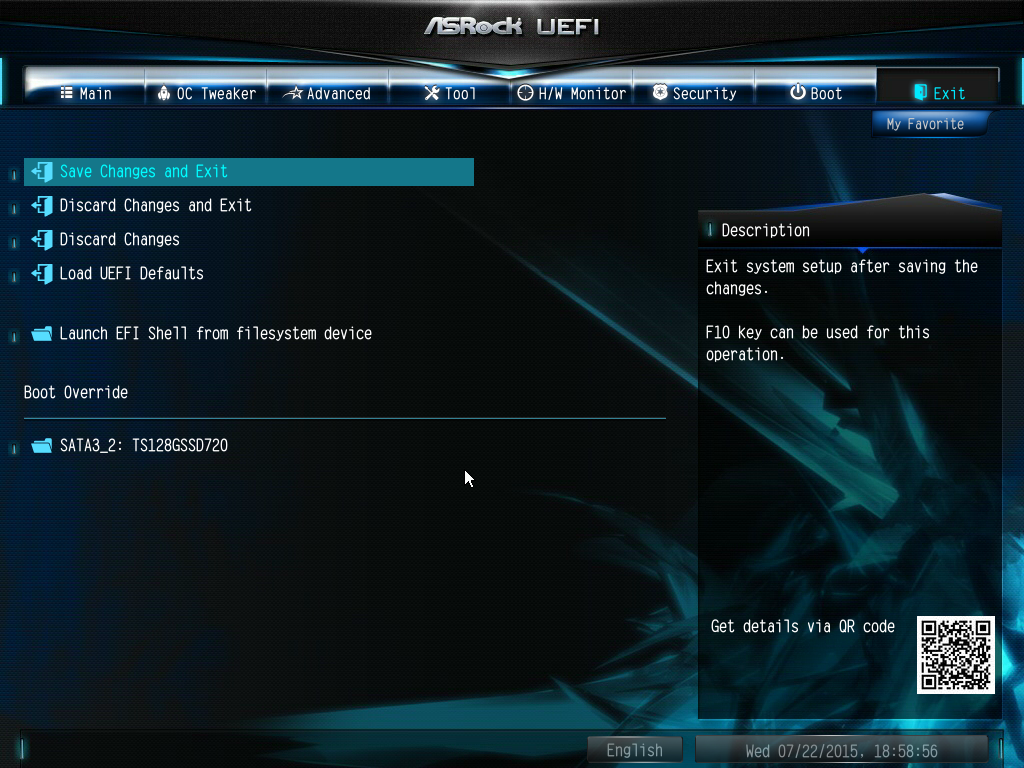
▼最后一部分为设定储存与离开..等选项
 测试平台与环境(预设)
CPU:Intel i7-6700K
Cooler: NZXT. Kraken™ X61
MB: ASRock Z170 Extreme 6
RAM: Panram DDR4-2400 8GB(4GB*2)
VGA: msi GTX960 GAMING 2GB
Storage: Transcend SSD720 128GB
PSU: Steventeam 500W
OS: Windows 7 旗舰版 64 Bit
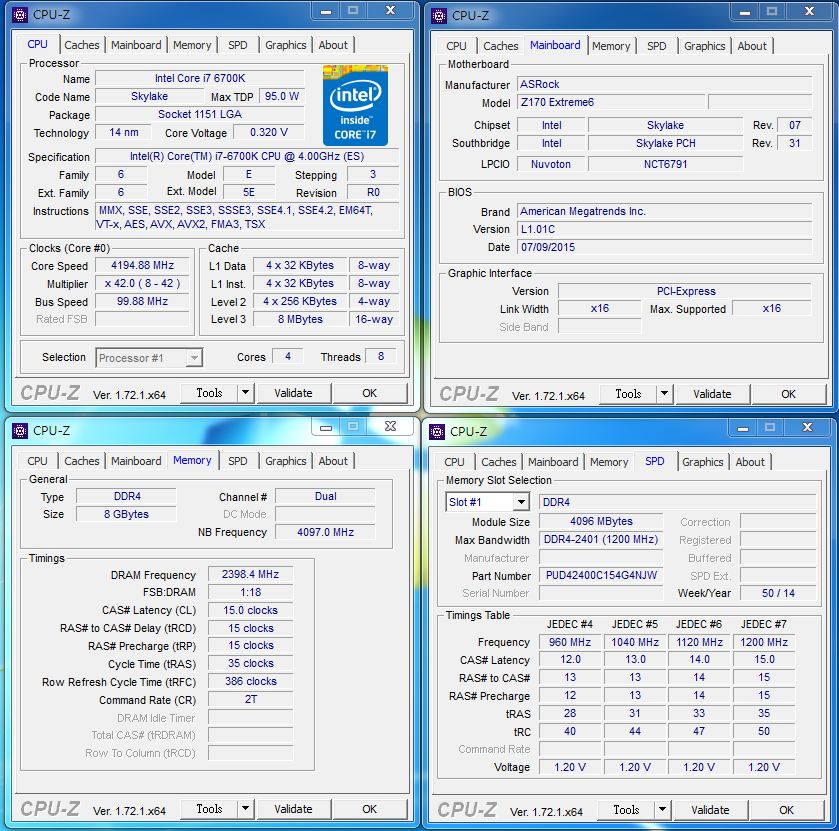
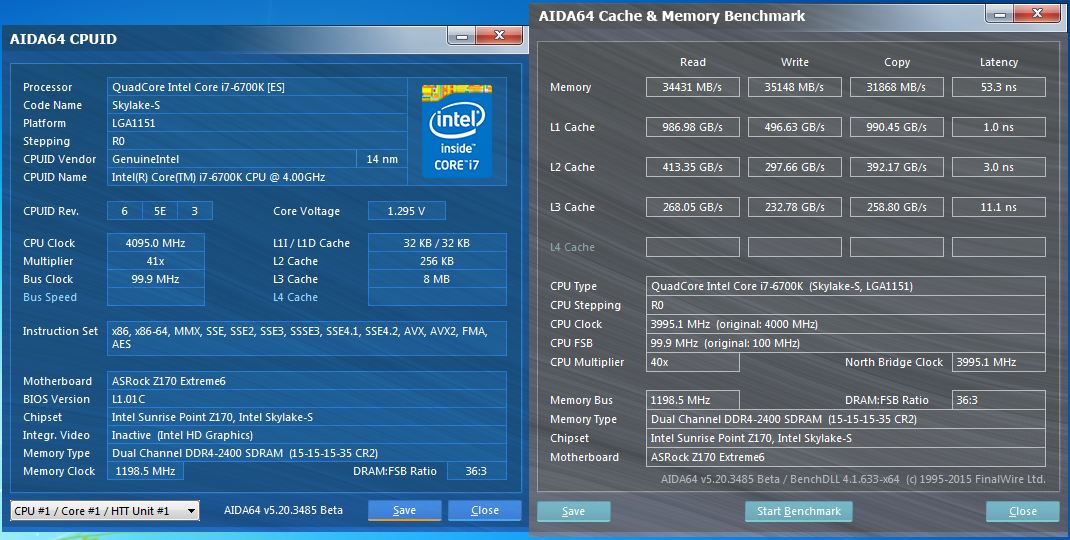
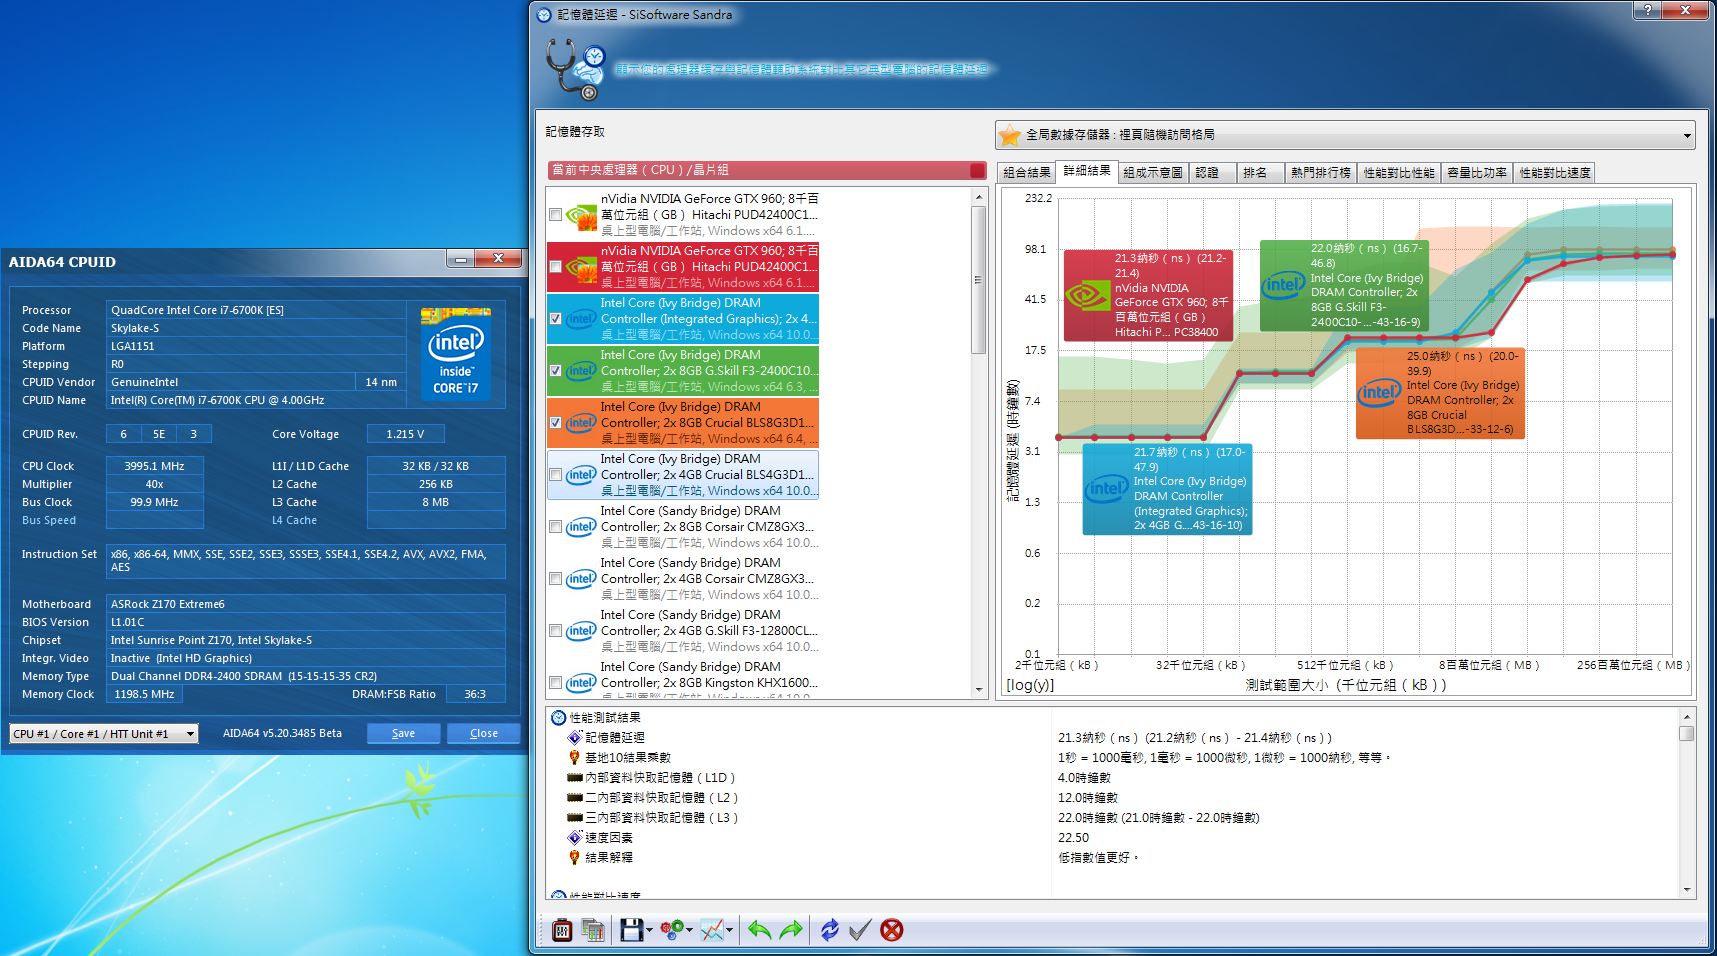
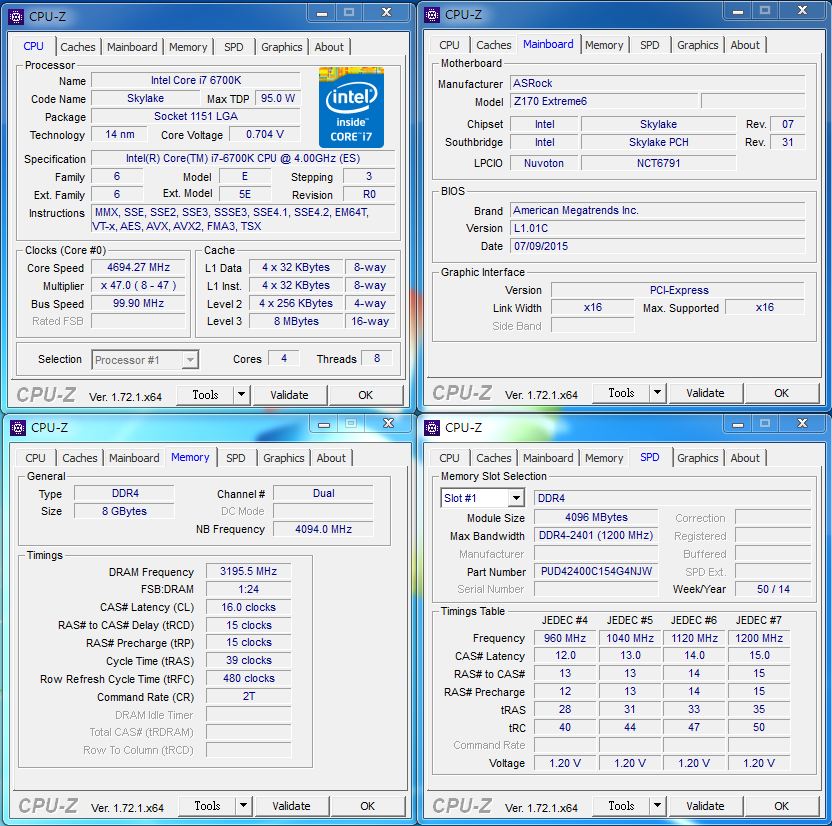
▼验明正身
▼AIDA64 Read:34431MB/s Write:35148MB/s Copy:31868MB/s
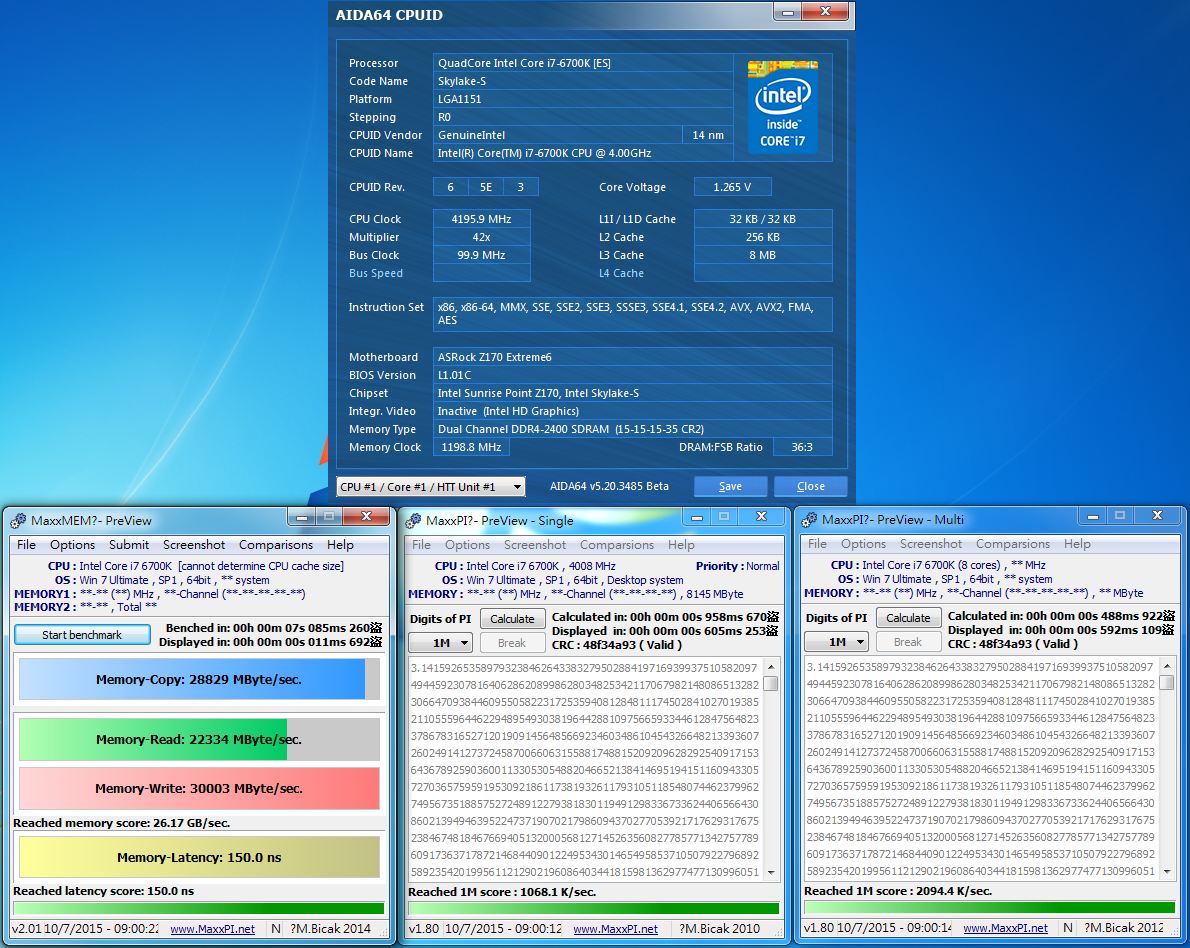
▼Maxx系列测试程式

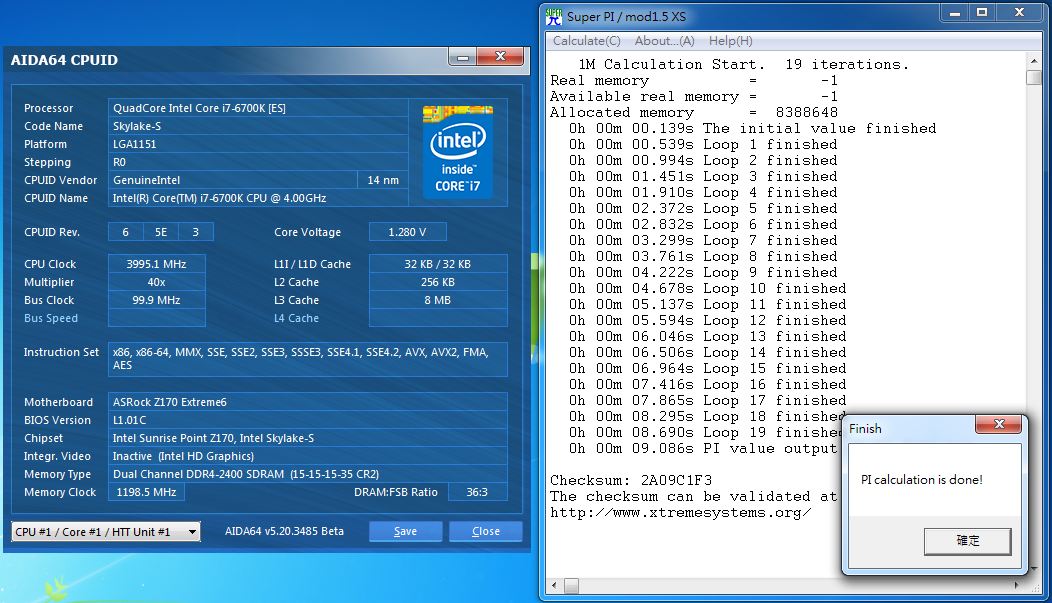
▼Super PI:9.086s
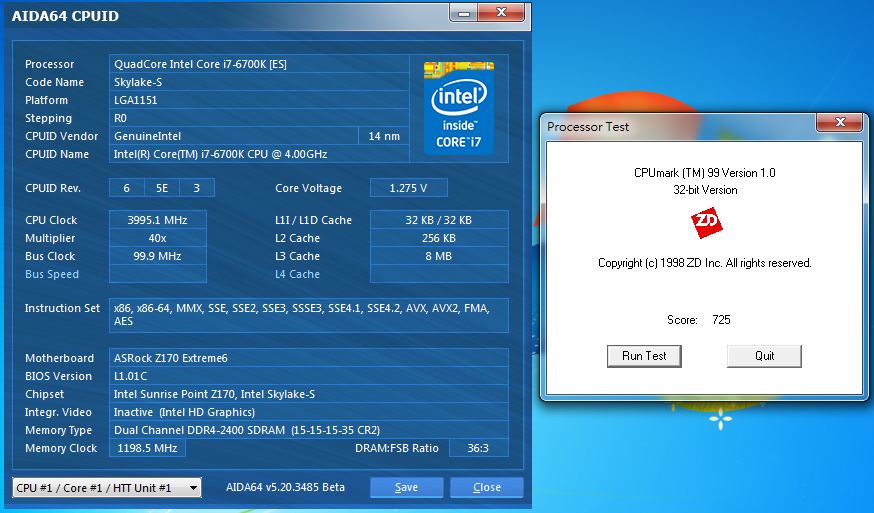
▼CPU Mark:725
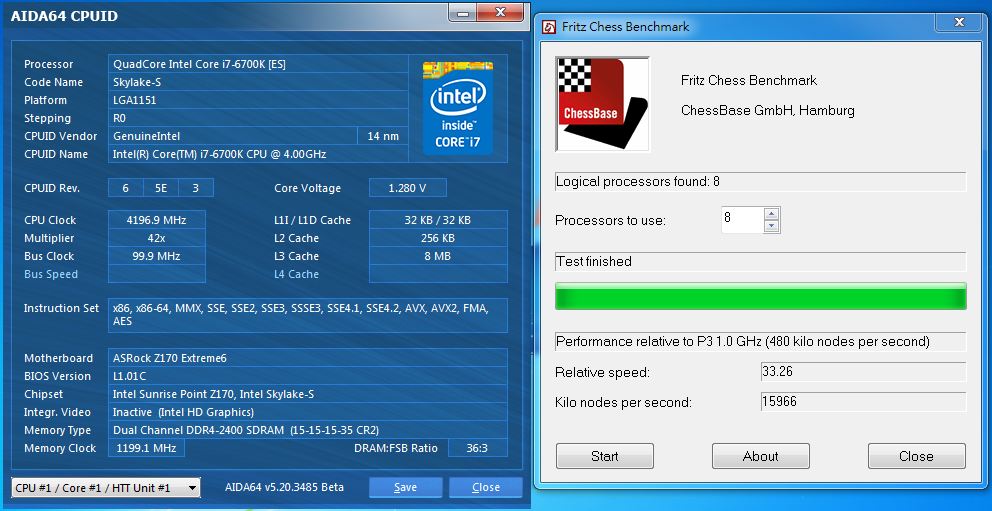
▼Fritz Chess Benchmark
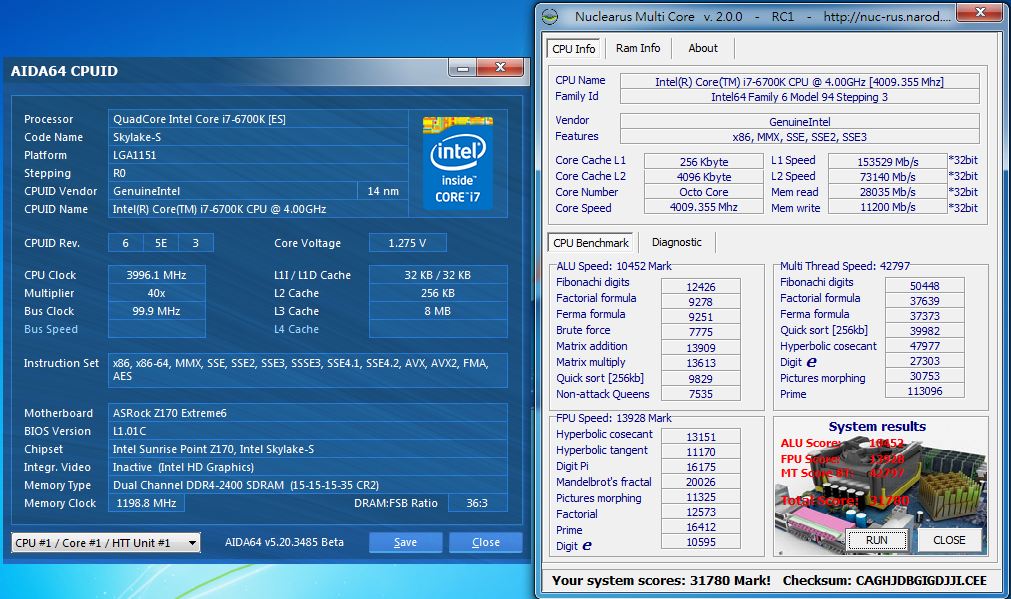
▼NuclearMC
▼wPrime:32M-8.844sec 1024M-280.976sec

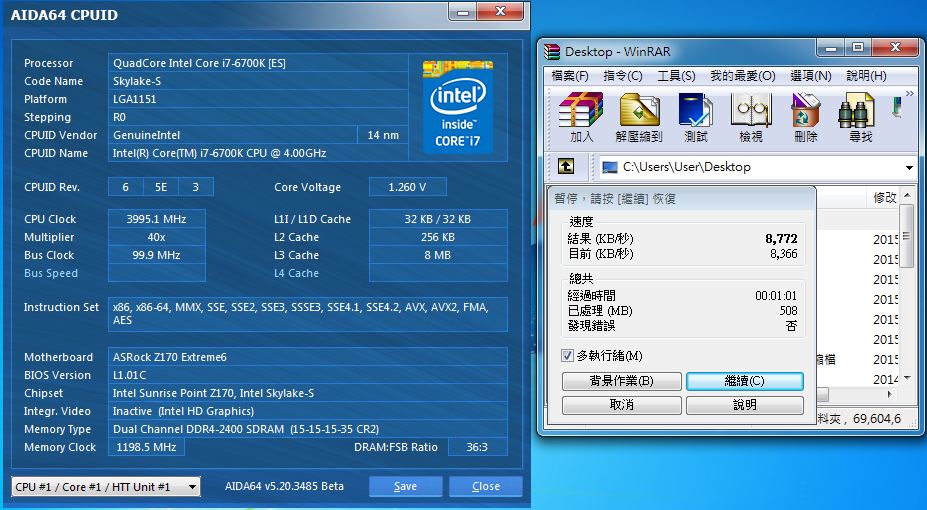
▼WinRAR:8772KB/s
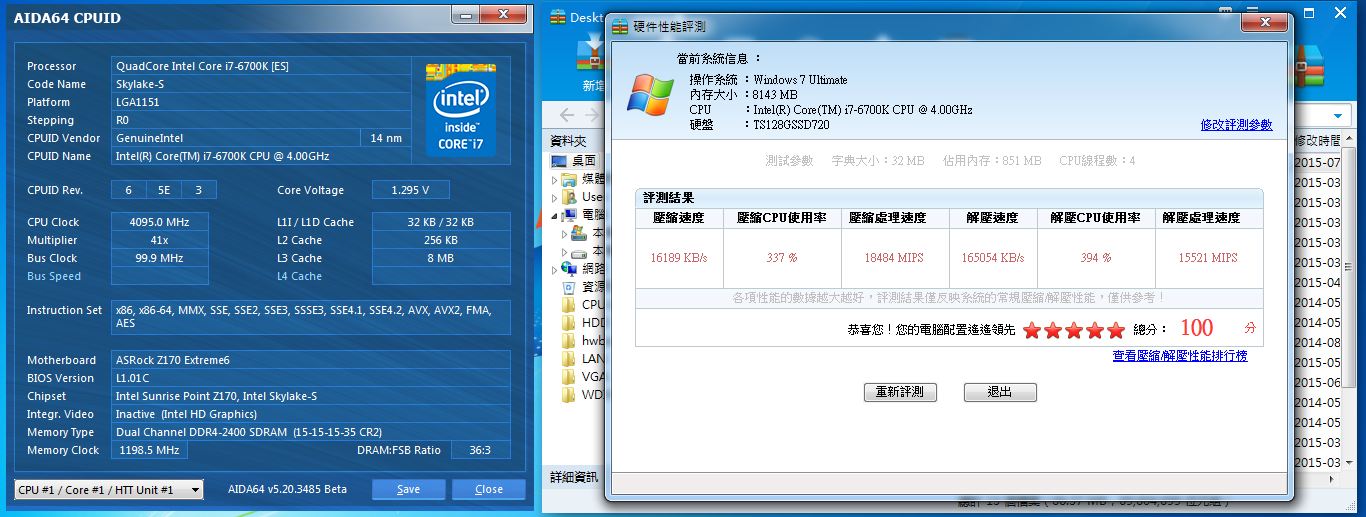
▼2345好压
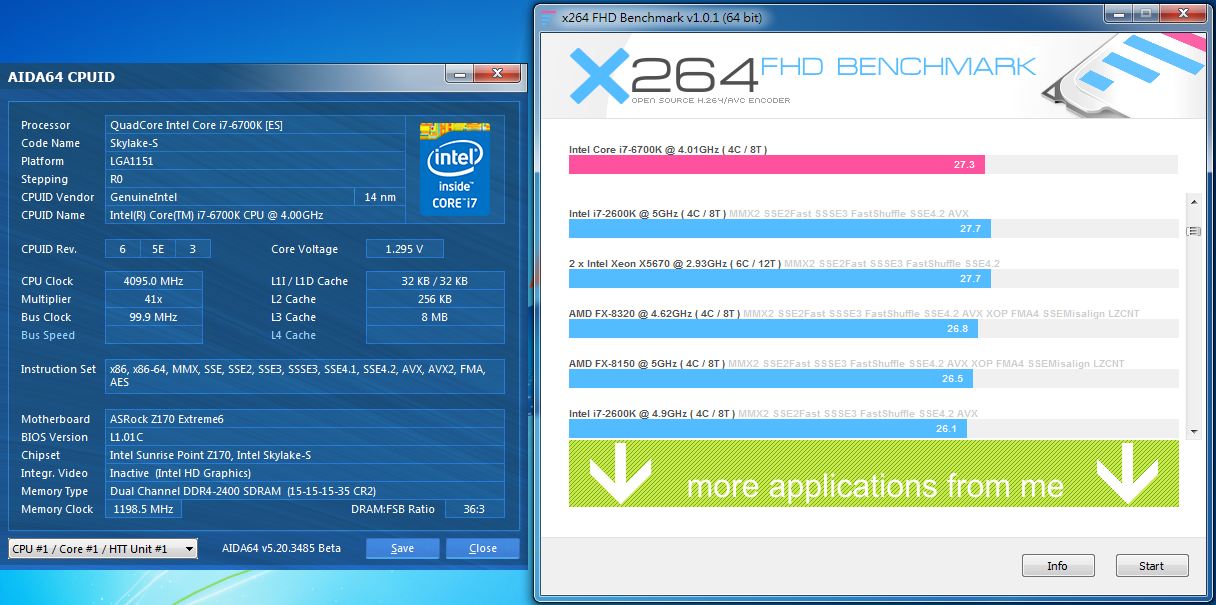
▼x264 FHD Benchmark :27.3
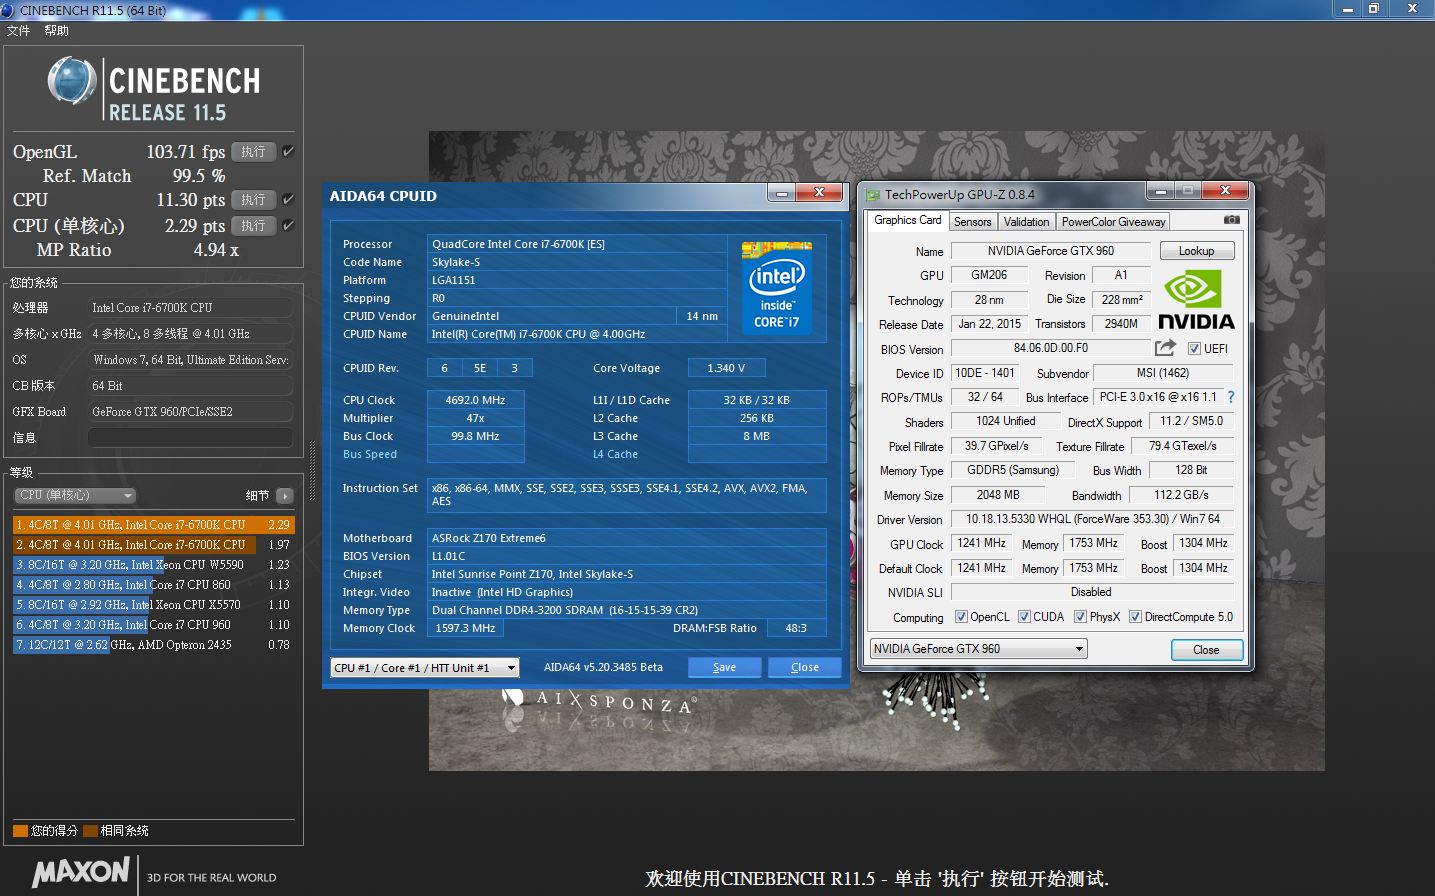
▼CINEBENCH R11.5

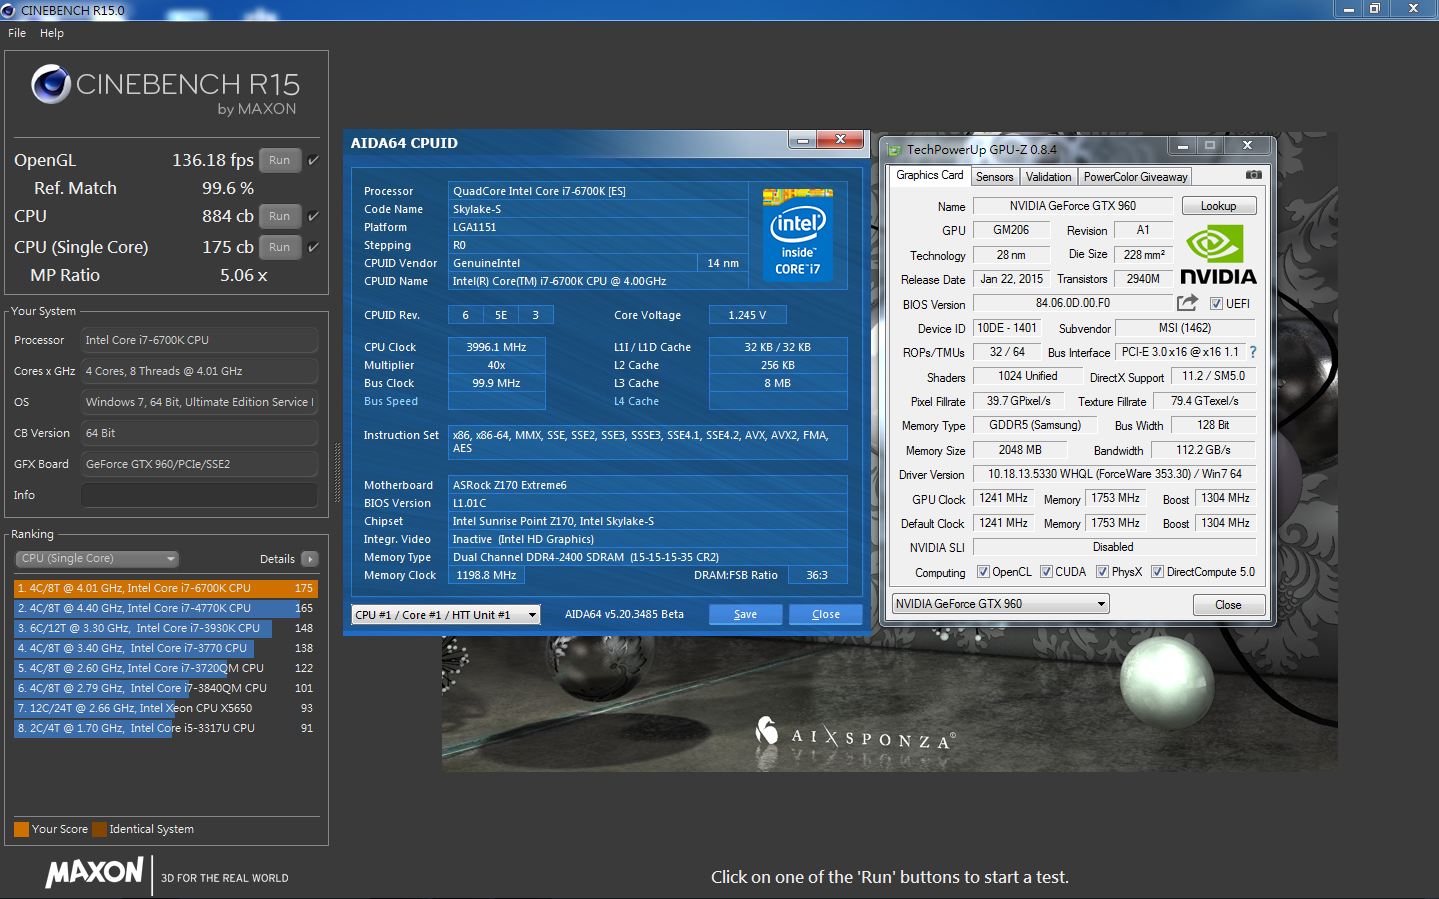
▼CINEBENCH R15
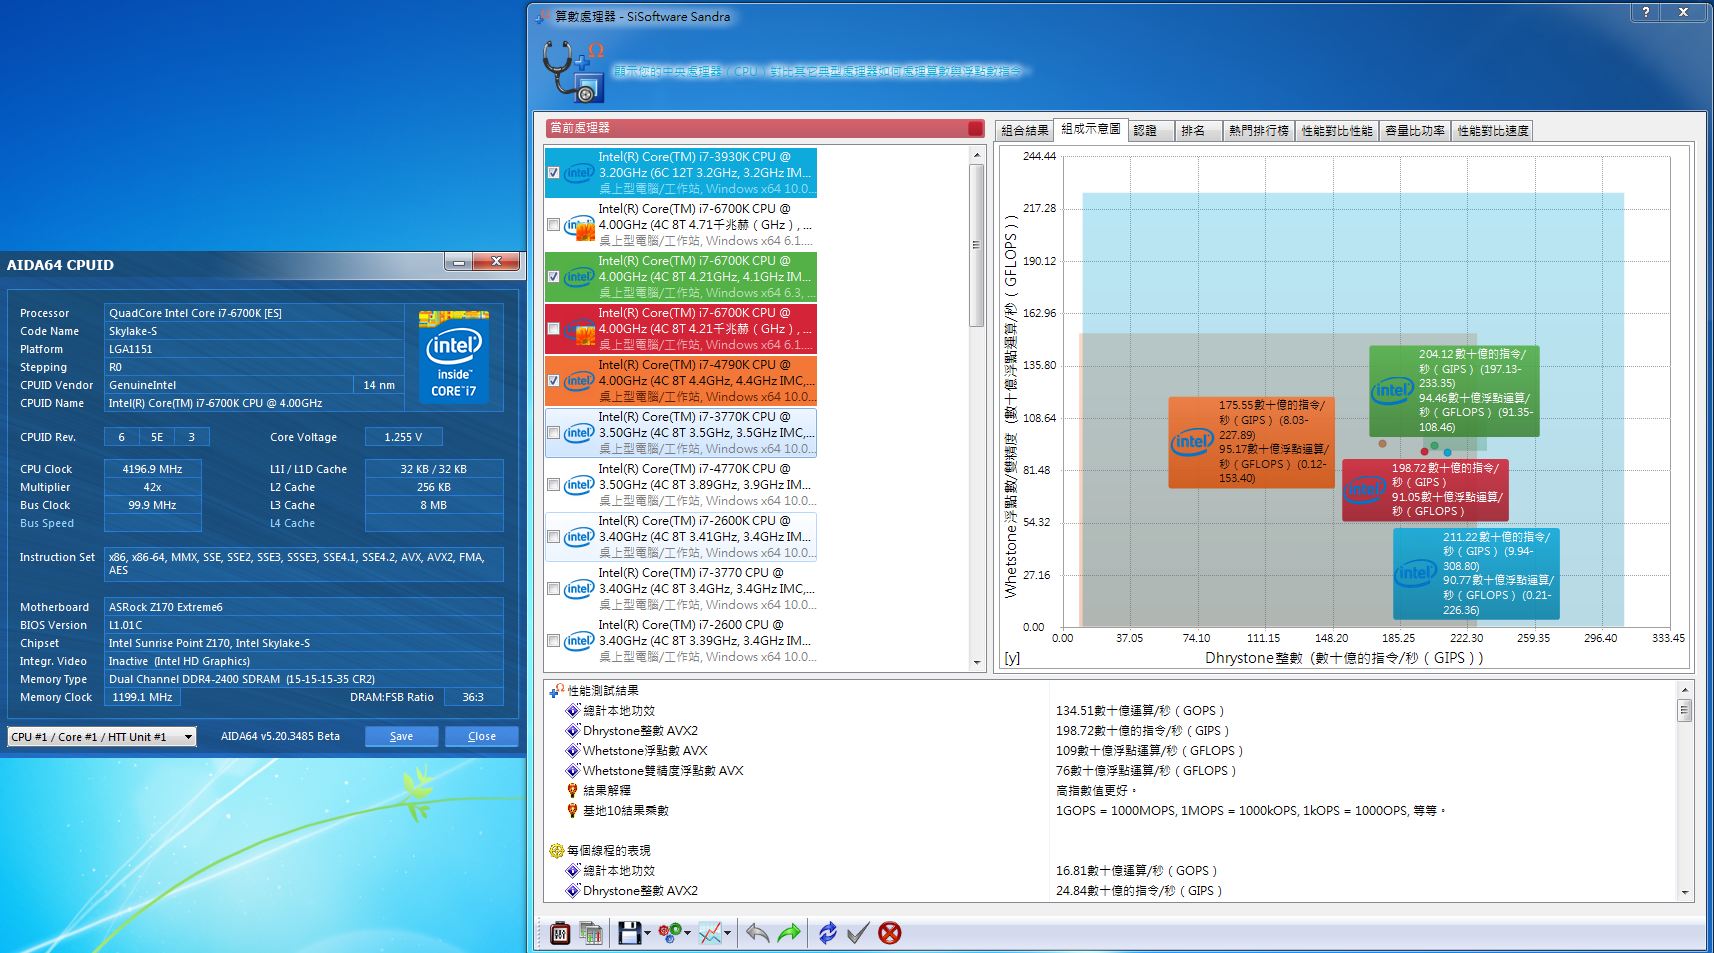
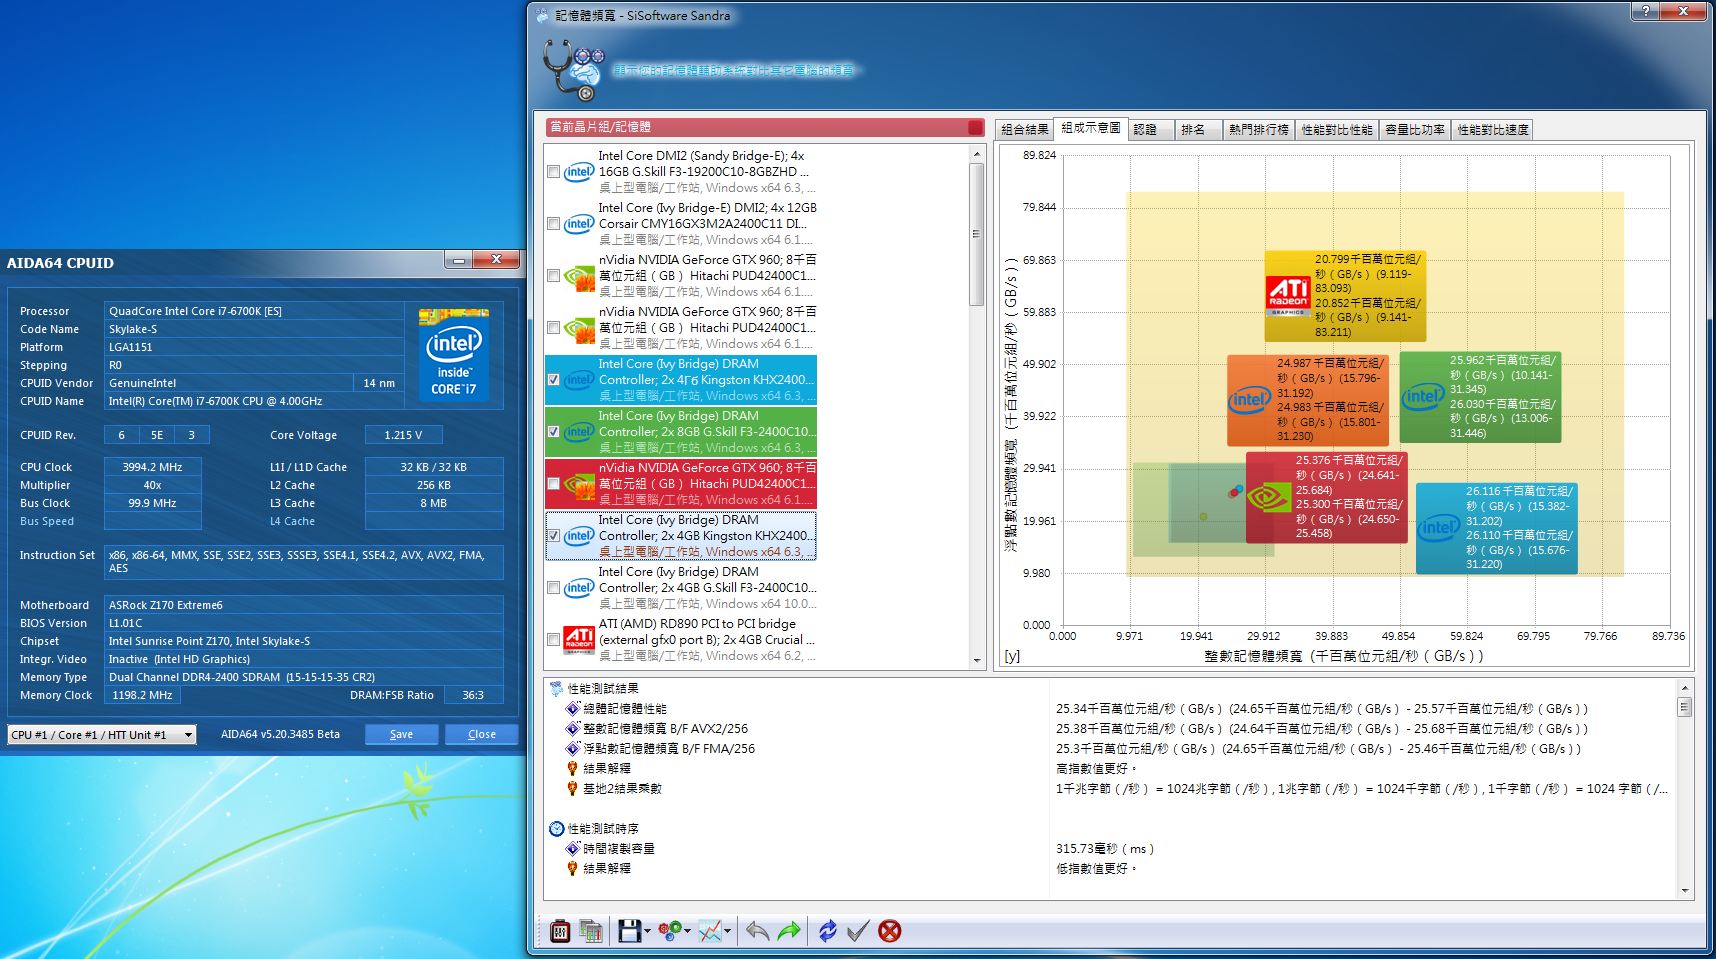
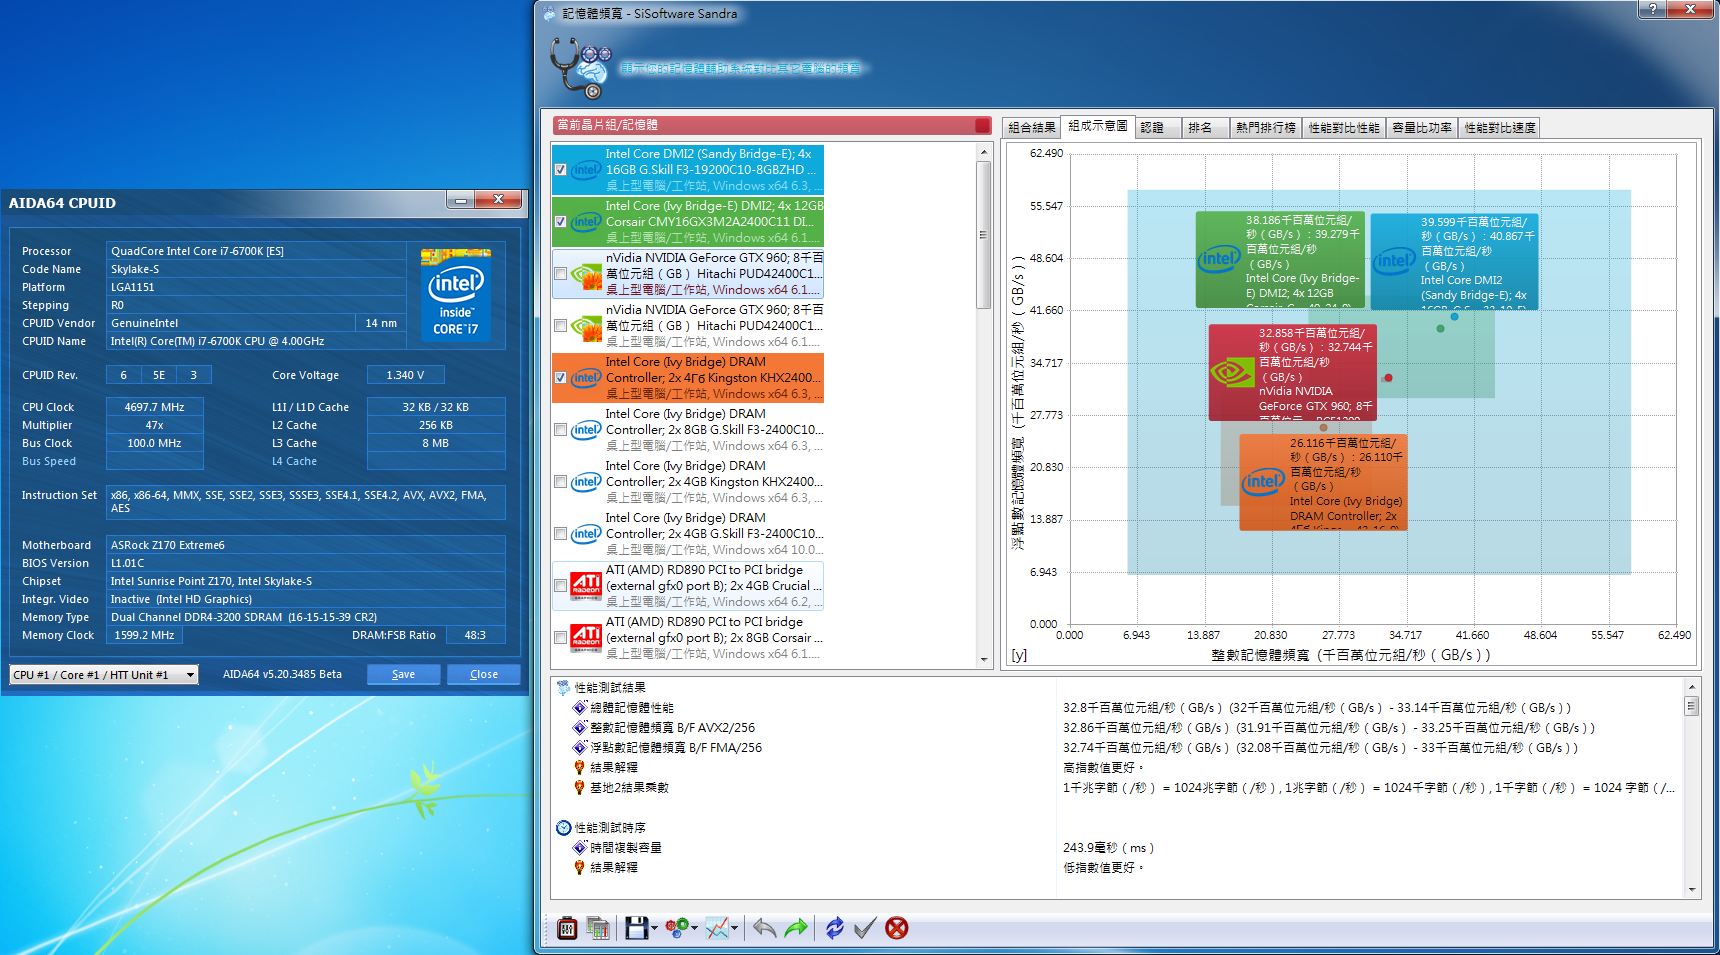
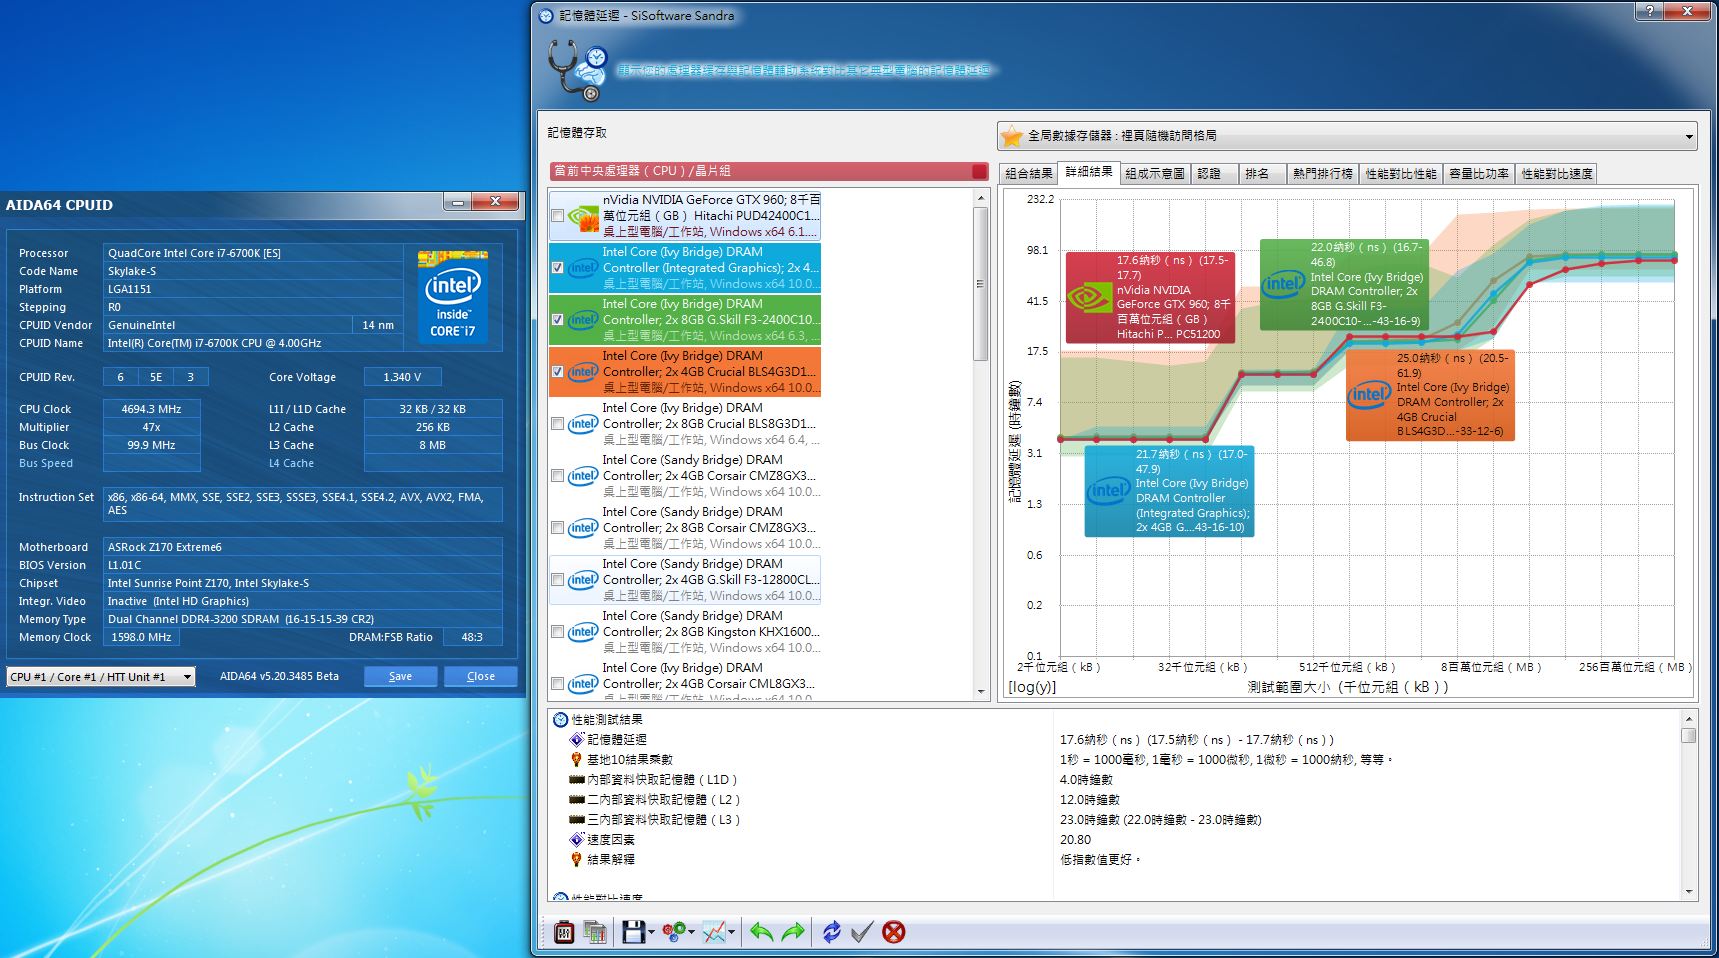
▼Sandra CPU与RAM测试

 测试平台与环境(超频)
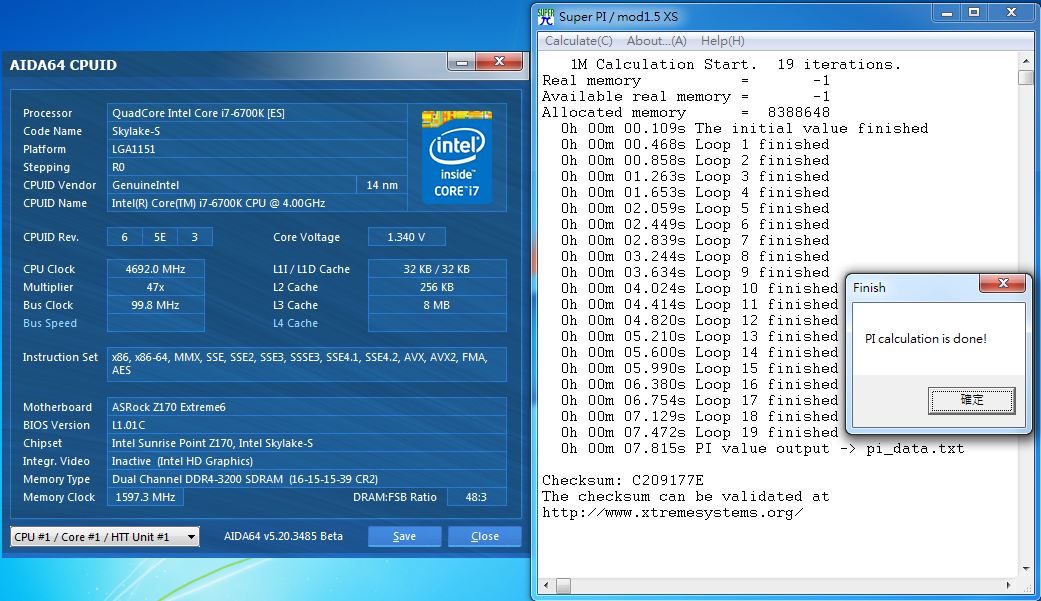
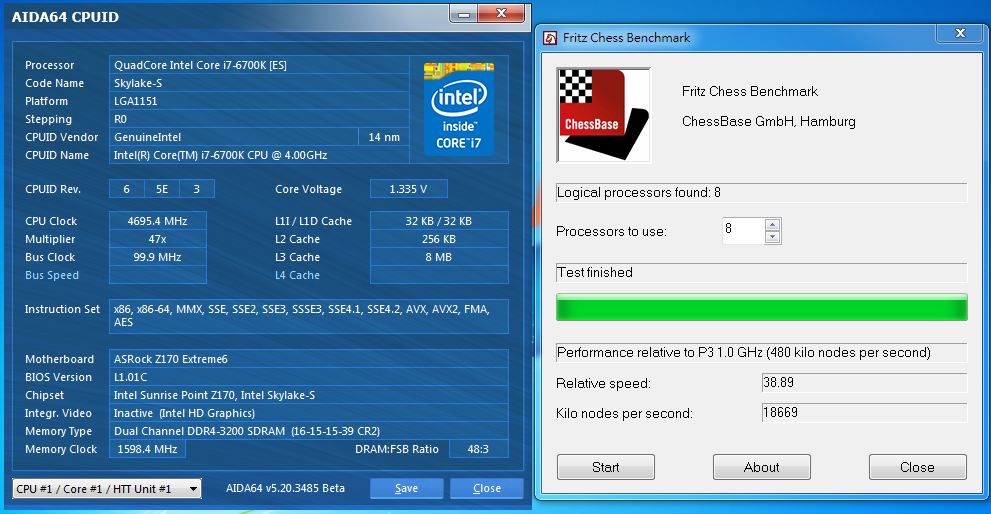
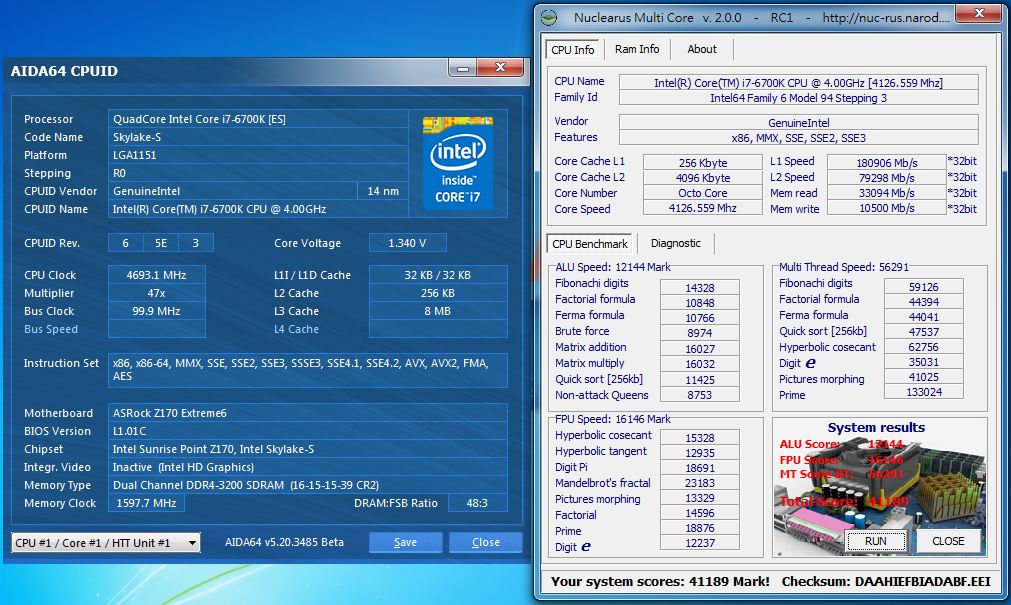
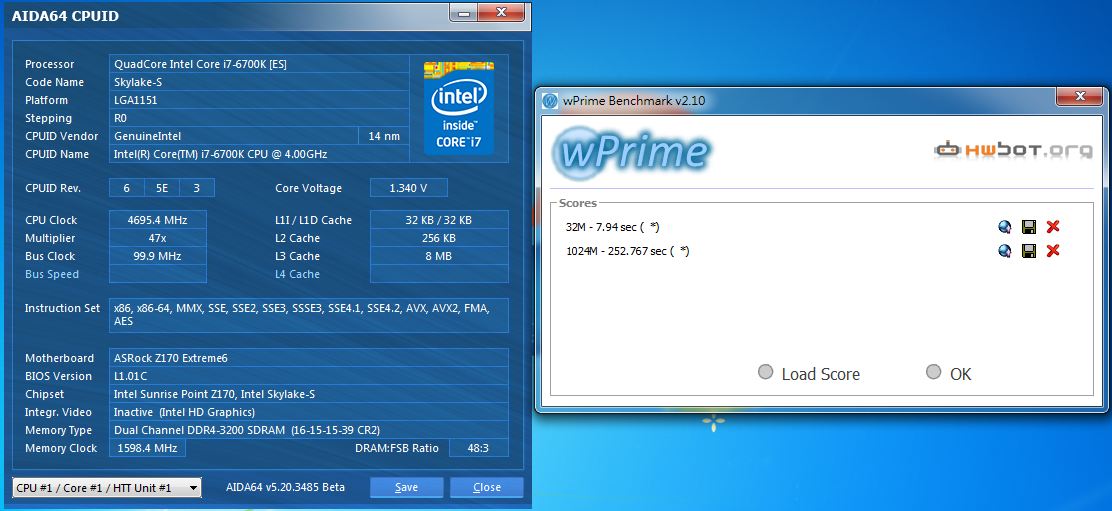
CPU:Intel i7-6700K @ 4.7GHz
Cooler: NZXT. Kraken™ X61
MB: ASRock Z170 Extreme 6
RAM: Panram DDR4-2400 8GB(4GB*2) @ DDR4-3200
VGA: msi GTX960 GAMING 2GB
Storage: Transcend SSD720 128GB
PSU: Steventeam 500W
OS: Windows 7 旗舰版 64 Bit
▼验明正身
▼AIDA64 Read:45201MB/s Write:46519MB/s Copy:41659MB/s

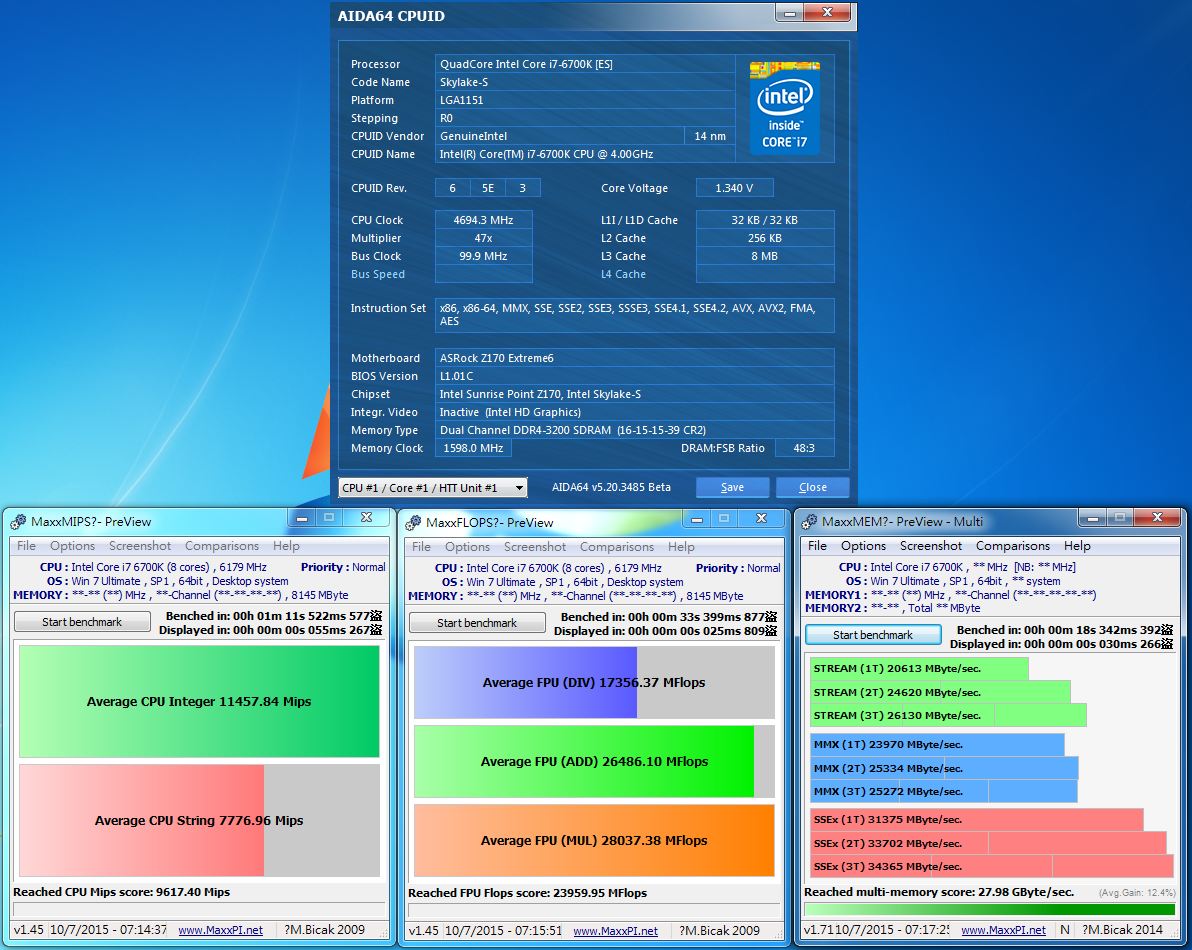
▼Maxx系列测试程式
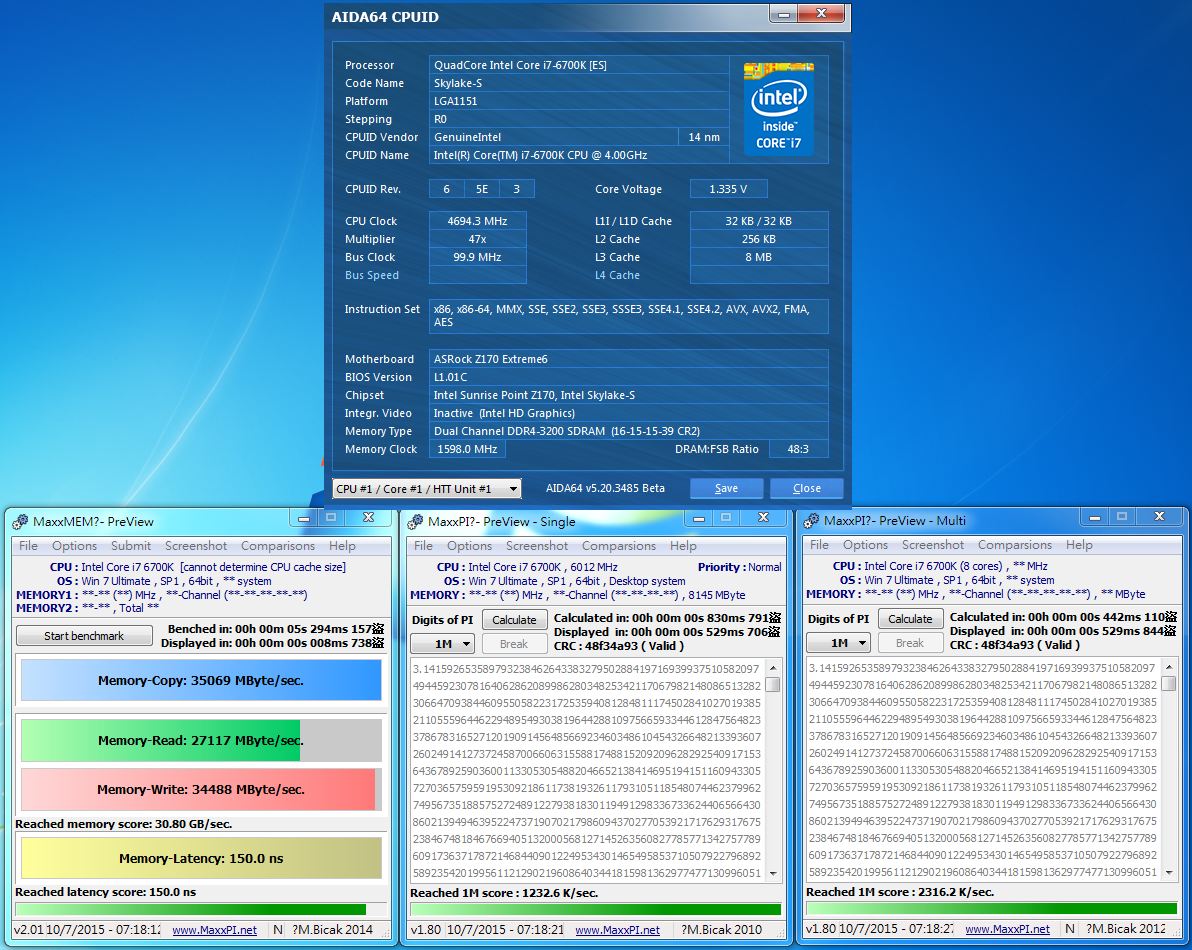
▼Super PI:7.815s
▼CPU Mark:841

▼Fritz Chess Benchmark
▼NuclearMC
▼wPrime:32M-7.94sec 1024M-252.767sec
▼WinRAR:10972KB/s

▼2345好压

▼x264 FHD Benchmark :31.7

▼CINEBENCH R11.5
▼CINEBENCH R15
▼Sandra CPU与RAM测试


 DDR4与DDR3比较与优势
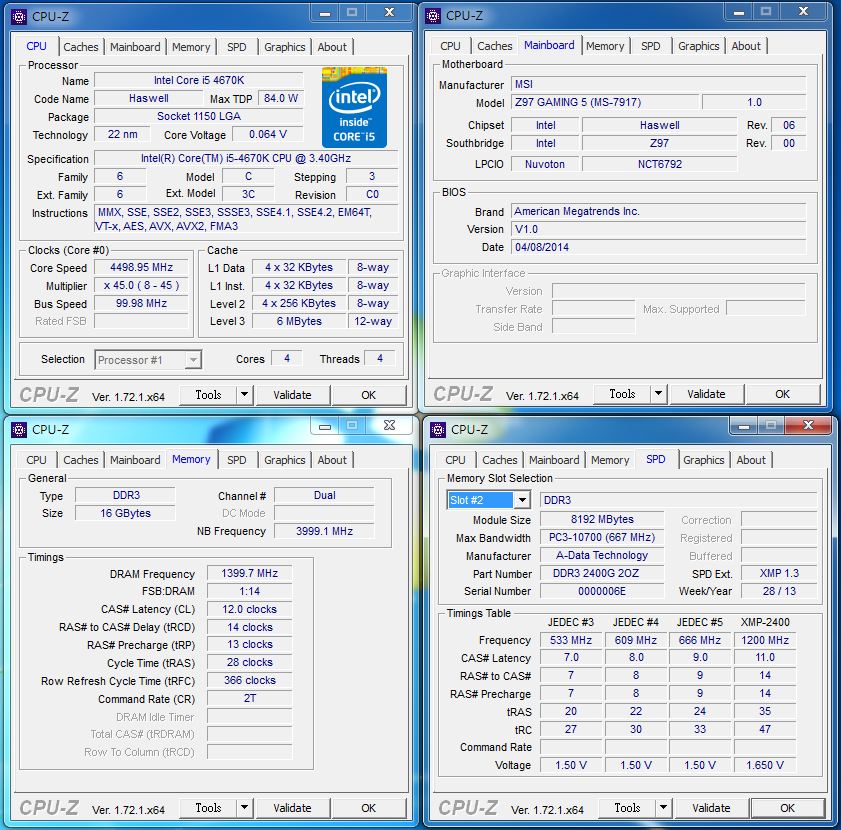
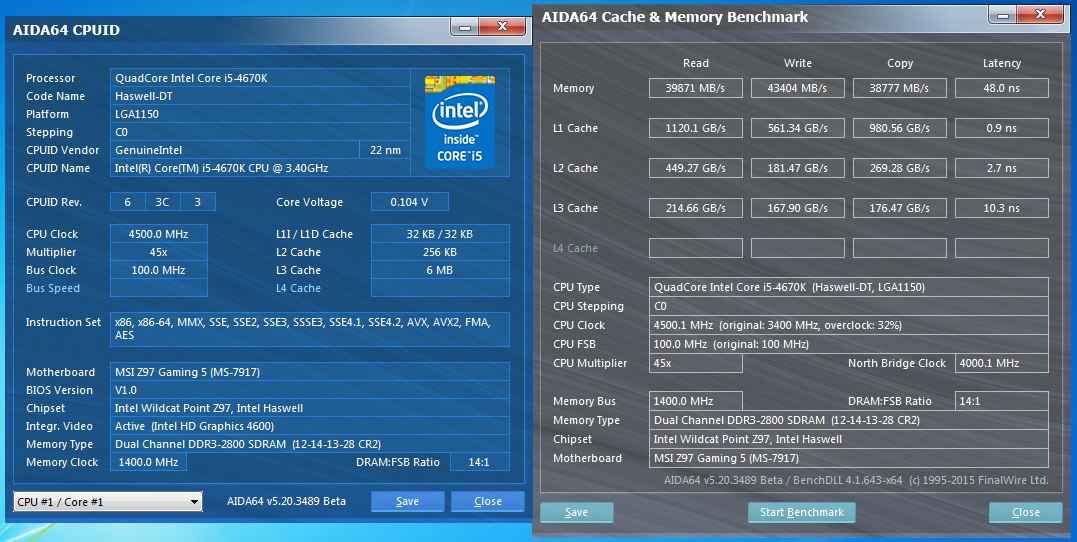
DDR3测试平台
CPU:Intel i5-4670K @ 4.5GHz
Cooler: NZXT. Kraken™ X61
MB: msi Z97 Gaming 5
RAM: A-DATA XPG DDR3-2400 16GB kit(8G*2) @ DDR3-2800
VGA: msi GTX680 2GB
Storage: Samsung MZ-7TD1280 128GB
PSU: Steventeam 500W
OS: Windows 7 旗舰版 64 Bit
DDR4测试平台
CPU:Intel i7-6700K @ 4.7GHz
Cooler: NZXT. Kraken™ X61
MB: ASRock Z170 Extreme 6
RAM: Panram DDR4-2400 8GB(4GB*2) @ DDR4-3200
VGA: msi GTX960 GAMING 2GB
Storage: Transcend SSD720 128GB
PSU: Steventeam 500W
OS: Windows 7 旗舰版 64 Bit
有在玩DDR3超频的玩家就知道,要挑选可以超频上DDR3-3000以上的频率可以说是万忠选一,要特挑才有机会,但是DDR4许多玩家可能还没有玩过,在这边可以告诉玩家们,DDR4要超频上3000MHz的频率可以说是轻轻松松,在频宽部分要破40K大关也是跟吃饭一样容易!!
▼DDR3-2800 AIDA64 Read:39871MB/s Write:43404MB/s Copy:38777MB/s
▼DDR4-3200 AIDA64 Read:45201MB/s Write:46519MB/s Copy:41659MB/s
在DDR3测试部分可是千挑万选才找的到这组可以超频至DDR3-2800而且参数相当漂亮的一组记忆体,而且是加了高电压才冲上去的(1.7V),虽然在写入频宽部分破40K大关,但读取与复制还差了一小步,反观DDR4部分要超频至3000MHz以上的高频率相当轻松,且读取、写入与复制频宽皆超过40K的大关,DDR4的优势在于可以轻松超频上3000MHz,而且在效能表现方面皆相当平均,玩家们可以参考一下,如果是超频玩家对DDR4应该是爱不释手^^
总结:这次尝鲜介绍的ASRock Z170 Extreme 6表现相当不错,不仅用料实在,用料方面采用华擎超合金用料,让整体效能与寿命大大提升,增加了不少CP值,音效部分采用天籁美声三代并搭配Nichicon电容,让声音效果大大提升,降低了许多杂音,让整体音效更加逼真与震撼;最值得一提的还是Ultra M.2提供了高达32Gb/s的频宽,Ultra M.2提供PCIe Gen3 x4与SATA Gen 3讯号,并可以搭配ASRock的U.2 Kit即可支援U.2 SSD与Intel 750系列产品,不过碍于PCIe Gen3的SSD还不是相当普及,所以这次就没有做相关的测试玩家们有参考的数据;在效能方面Z170搭配的是DDR4记忆体,在效能上发挥得相当不错,ASRock Z170 Extreme 6不论在CPU或是记忆体上的超频上也是相当给力,超频后的效能相当不错,记忆体方面的表现再AIDA64部分通通超过了40K大关的优异表现,对超频有兴趣的玩家一定对Skylake这新平台爱不释手,再加上ASRock Z170 Extreme 6的BIOS设定相当容易上手与浅显易懂,如果是超频新手,BIOS选项内有原厂所调整出来的CPU超频设定值,让玩家可以轻松对CPU做超频,一点压力都没有;保固部分原厂提供3年保固,加入了注册升级为4年保固,并且有免费到府收送服务,让玩家有更好与更长时间的保固方案,使用起来也更加安心与放心,值得一提的是除了全省有3间快速服务中心外,还与原价屋合作全省8间快换服务中心(一年换新)。
以上资讯提供给需要的玩家参考^^


